Product Velocity
To keep your warehouse organized in a way that is conducive to efficient picking operations can be a huge challenge. Some products move faster than others and you generally want to store your fastest-moving products in your prime real estate and move your slowest-moving products into your bulk storage or less prime storage areas. As your product catalog grows, users knowing intuitively which products are "hot" and which are "not" becomes virtually impossible, especially to do on a continual basis with rapidly changing seasons, markets and clients. ShipStream's Product Velocity feature aims to help you solve this problem!
Overview
The velocity (the speed of inventory movements) of a product in the context of a warehouse is how fast it leaves the shelves. A product with a high velocity is expected to have a higher volume picked and packed in the near future than one with a low velocity.
The quantitative terms for velocity are usually expressed as the "burn rate", "units/day", "days" or "days of inventory" which are defined as follows:
- The "burn rate" is expressed in "units/day" and is calculated using a trailing N number of days basis such that the "trailing 7 days burn rate" would be the average number of units shipped over the last 7 days. For example, if 700 units were shipped in 7 days, the burn rate would be 100 units per day.
- The "days of inventory" (or just "days" for short) is simply the number of days of inventory on hand for a given burn rate. Following the example of 100 units per day, if you had 250 units in stock you would have 2.5 days of inventory on hand.
Given the context of a warehouse that may easily contain hundreds, thousands, or millions of products, you are often more interested in the relative velocity of a product compared to the other products than you are in the absolute numbers. That is, if a product moves at 100 units per day, is that fast or slow compared to the other 50,000 products?
Rather than leave that up to interpretation, you want to simplify the problem down to a more comprehensible size and also ensure that everyone uses a common dialect that is objective. To this end, ShipStream enables you to automatically assign each product in each warehouse to a predefined Product Tier that your team members can all easily understand and communicate.
Pickable vs Overall
The Pickable metrics are derived only from units picked from pickable locations. The Overall metrics include all picks, whether the locations are pickable or not.
Update Frequency
The product stats and tiers are updated automatically every 6 hours. They are also updated when the time periods or tiers are modified.
Using Tiers
Out of the box, ShipStream comes with a few predefined tiers that should work well for many cases, but you are welcome to customize them to your needs; you can even customize them differently for each warehouse.
We've named them as "tiers" but you can use any naming scheme you like. The default tiers are:
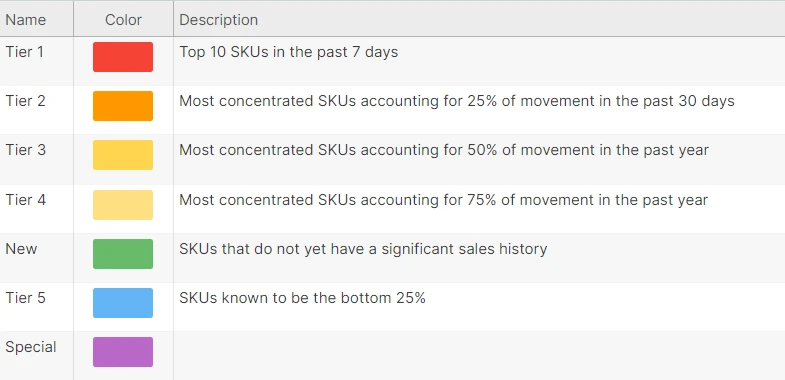
Before we get to managing velocity tiers let's look at how they will be presented to the end users.
Put-Away
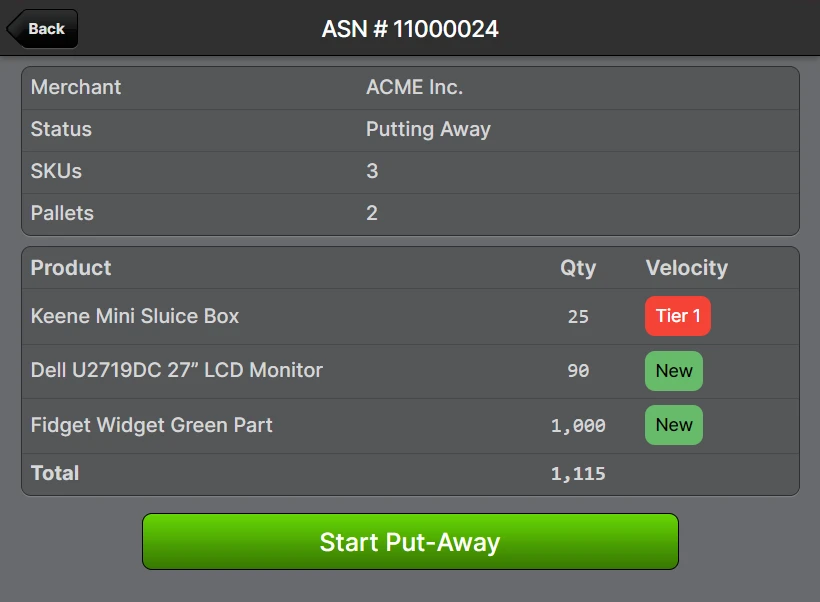
One of the most important uses of tiers is to help inform the put-away process when stocking new inventory. This may be the best time to get it to an optimal location to avoid having to relocate it again later.
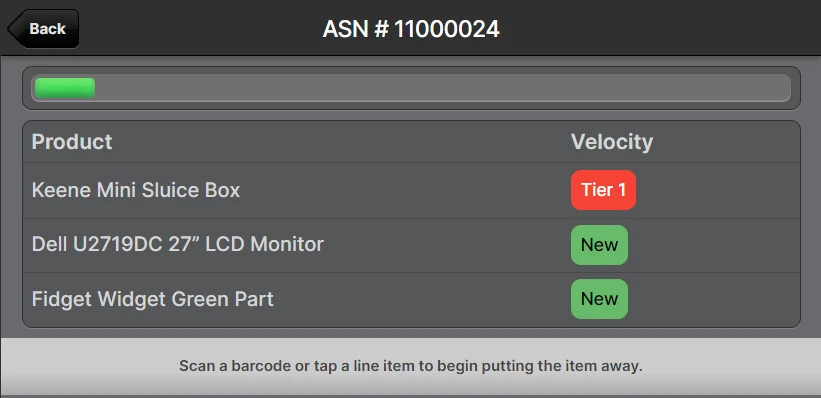
When starting a put-away, the velocities of each product are shown on the right side of the screen to give you an overview of the put-away importance as a whole.
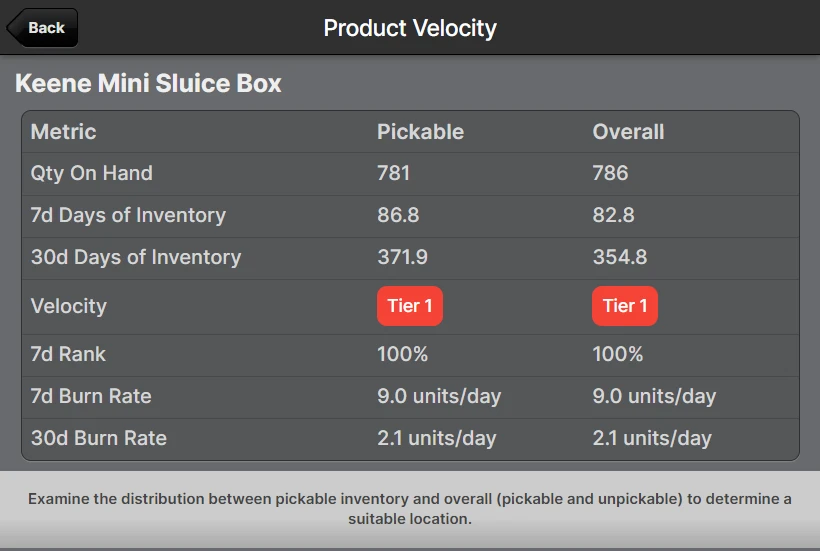
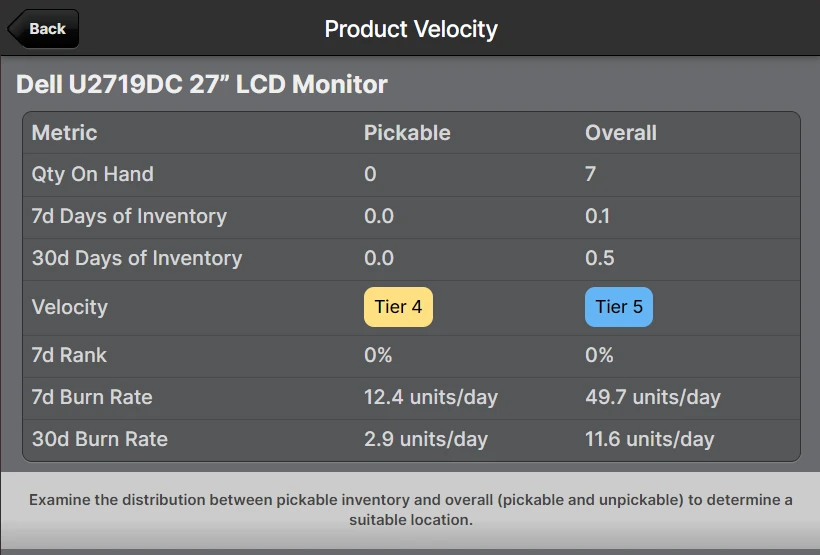
On the individual item page, both the Pickable and Overall velocity is displayed as well as the Days of Inventory:

Tapping the Velocity row displays additional information about the current availability, relative ranking and burn rate.
Relocation
Relocating is also a great time to evaluate where your product should be ideally located, so you can see the Pickable velocity on the Relocation pages.
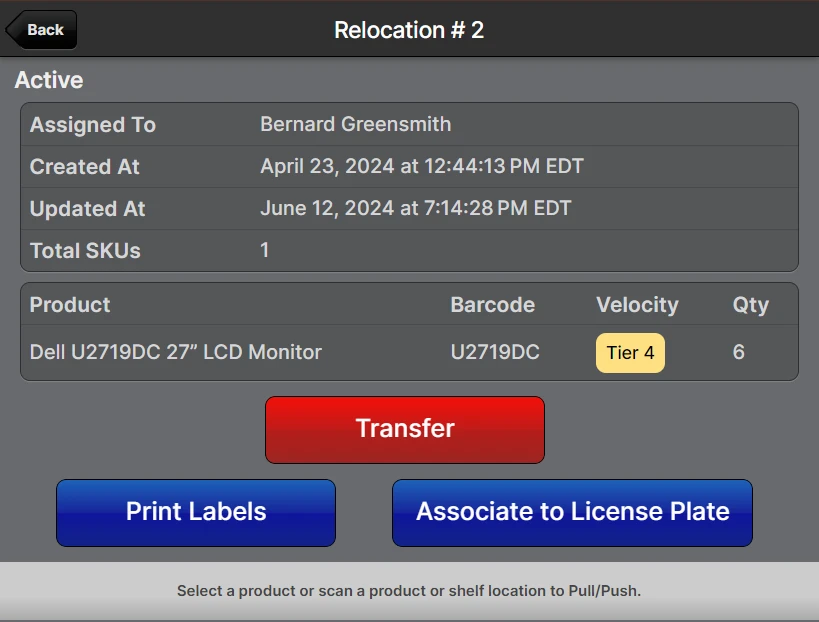
After scanning a product to relocate, you can see the Pickable and Overall velocity:

Finally, tapping the Velocity row will display more information:
Managing Tiers
Out of the box, ShipStream provides some defaults that you may or may not find useful, but you can and probably should customize these to meet your needs. By default, products are assigned to tiers automatically, but you may also assign them manually at any or all warehouses for both Pickable and Overall metrics.
Velocity Time Windows
Before you start customizing your tiers, you will want to check out your "Velocity Time Windows", which are configured at System > Configuration > Warehouse > Stock > Velocity:
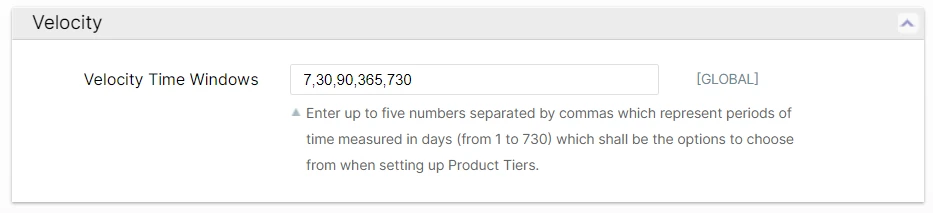
You may customize these according to your seasonality and how quickly you want your tiers to respond to changes. The longer the interval, the more "stable" your velocity rankings will be, and the shorter the interval the more quickly your velocity rankings will respond to changes. However, shorter intervals will also be more susceptible to wild swings from brief and unpredictable events.
Product Tiers
Once your time windows are set you can customize your Product Tiers to suit your needs at System > Catalog > Product Tiers. You can add, remove and modify the existing tiers and customize them independently for each warehouse.
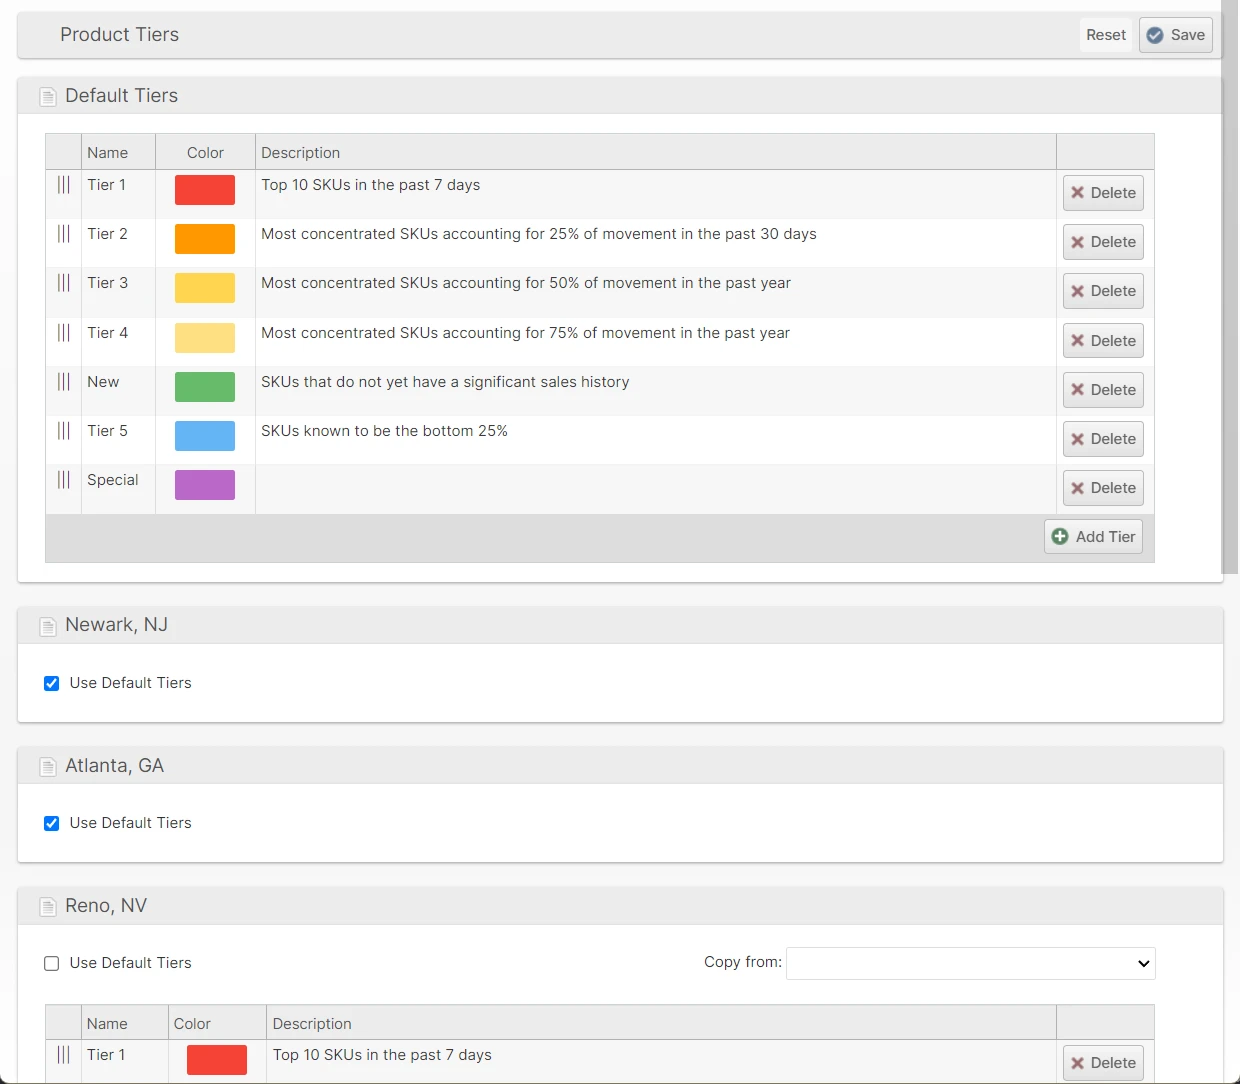
Uncheck Use Default Tiers to override the tiers for a specific warehouse. Choose Copy from and select a source then click Save to copy the tiers from one warehouse to another.

Tier Properties
Click on a row to edit the details of a tier:
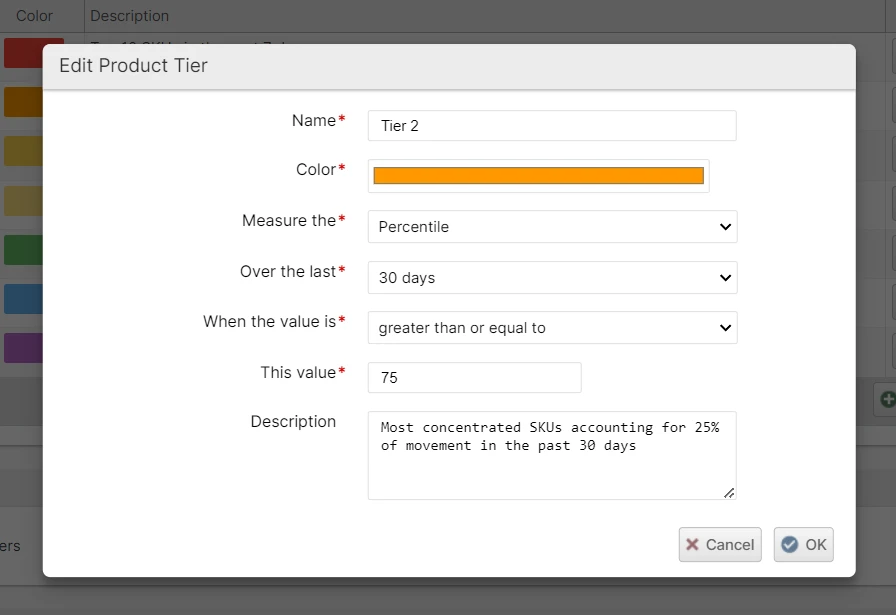
The options for "Measure the" work as follows:
- Rank - relative rank of a product against all other products. E.g. 1 is the product with the highest velocity. Products with equal velocity have the same rank so the "Top 10" for example could have more than 10 products if some were tied.
- Percentile - This is the relative rank normalized to 0 to 100% so 100% is the top product(s) and 0% are the bottom products.
- Quantity Shipped - This is an absolute value of the number of units shipped.
- Remainder - This will match all products so place this at the bottom of the list as a catch-all.
- Manually Assigned - This will never match products automatically but you may manually assign products to this tier.
Tier Ordering
Drag the tiers up and down to modify the order.

Click Save to save your changes.
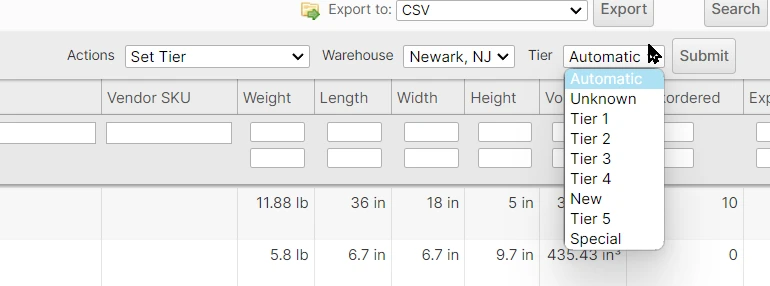
Product Assignment
Products will be automatically assigned to the tiers, updated every 6 hours. However, you can also manually assign products using the Set Tier mass action on the Catalog > Products grid, or from the Velocity tab on the Product page.
Velocity Tab
From the Product page, click the Velocity tab in the left sidebar to see the current tier assignments and velocity stats.
Switch views between the Overall and Pickable tiers by clicking the buttons indicated in the green box.
Click Reset All Automatic to assign all tiers to the "Automatic" value, wiping out any manual assignments.
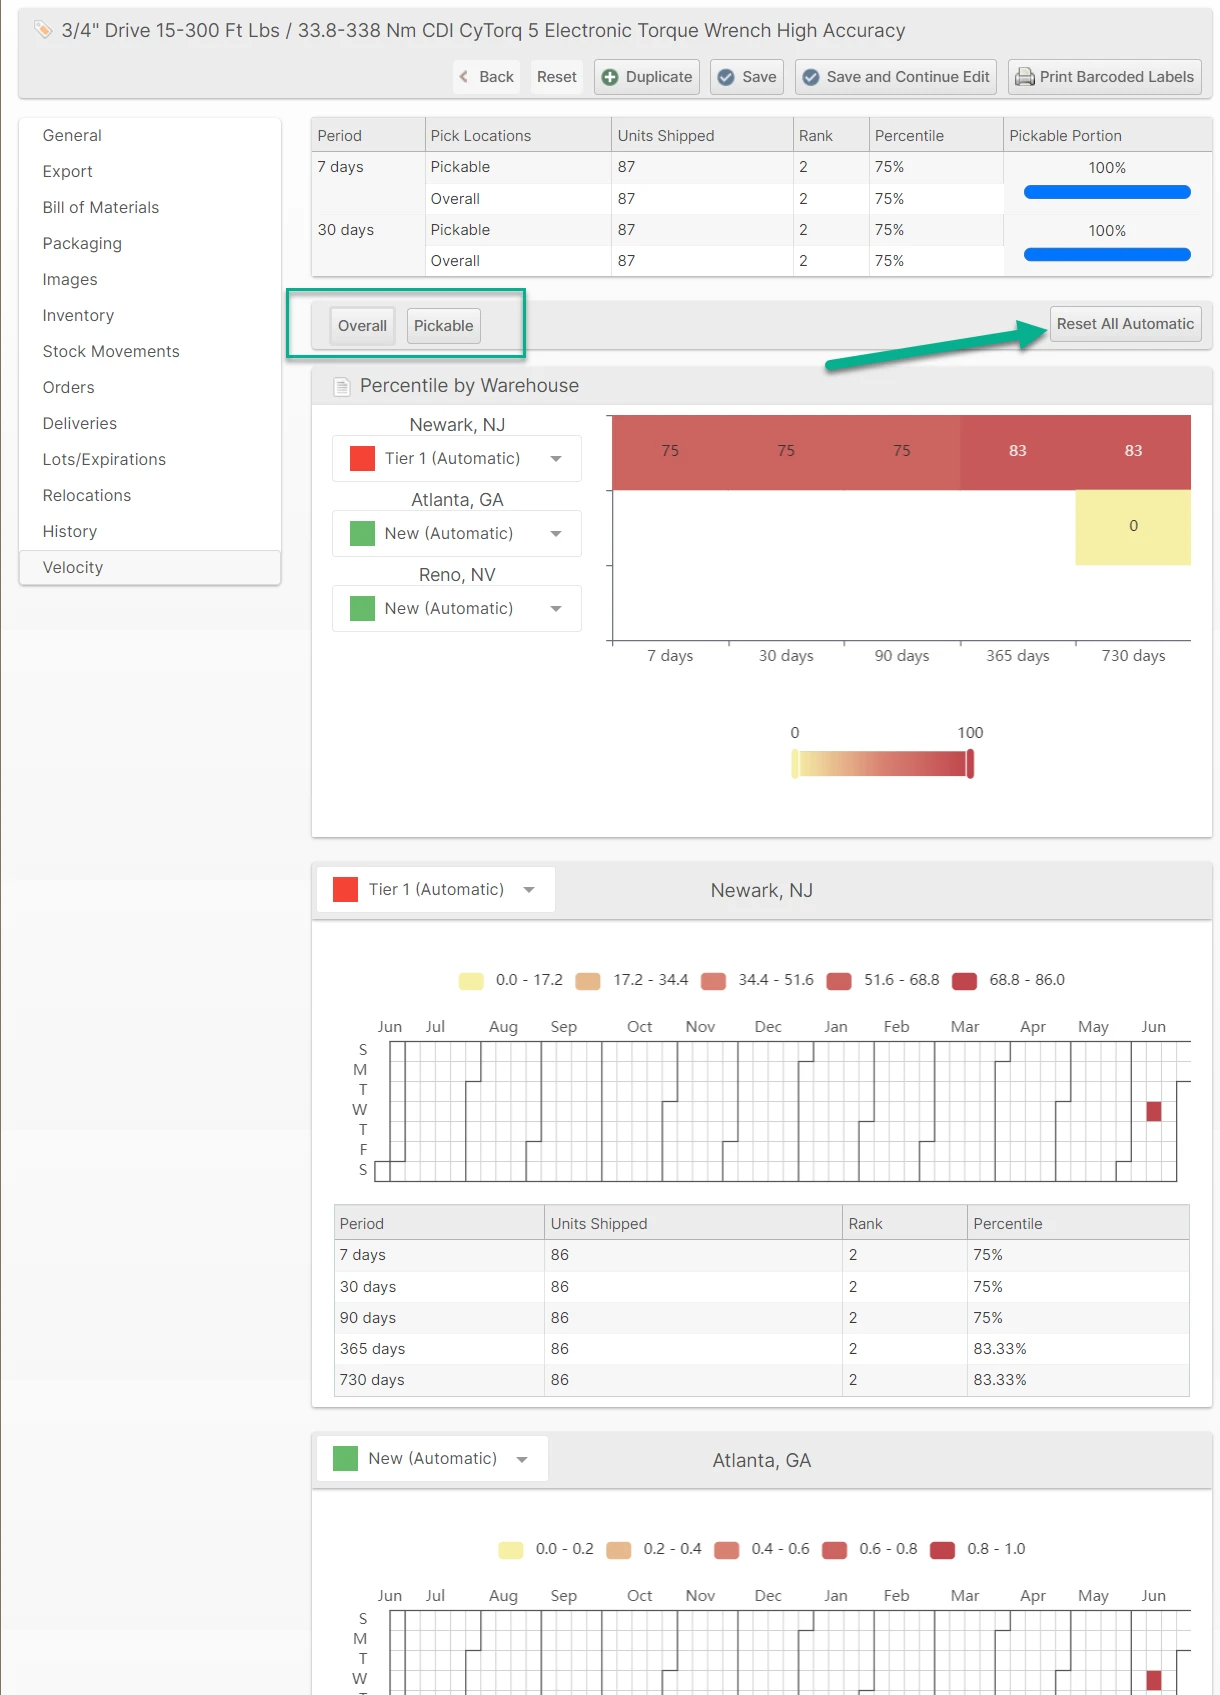
Click Save after making any changes.