Table of Contents
- Create a Packaging Feature
- Using Packaging Features
Packaging Features
Packaging Features in ShipStream are items that can be added to a shipment during packing to help ensure that packages are packed in a specific way. This could mean using specific supplies, collectin…
- Create a Packaging Feature
- Using Packaging Features
Packaging Features in ShipStream are items that can be added to a shipment during packing to help ensure that packages are packed in a specific way. This could mean using specific supplies, collecting data such as serial numbers, net weight of the contents and more. This system provides you with unprecedented flexibility for controlling the packing workflow just by configuring them to your needs. There are five types of Packaging Features which are:
- Containers
- Infill
- Supplies
- Instructions
- Data Collection
Create a Packaging Feature
- Navigate to Shipping -> Packaging Features.
- Click Add Packaging Feature at the top right.
- Choose which Merchant will "own" this Packaging Feature.
- Select a Packaging Type according to your needs.
- Containers - These are items that can contain your products for shipping or some special purpose designations like nylon straps.
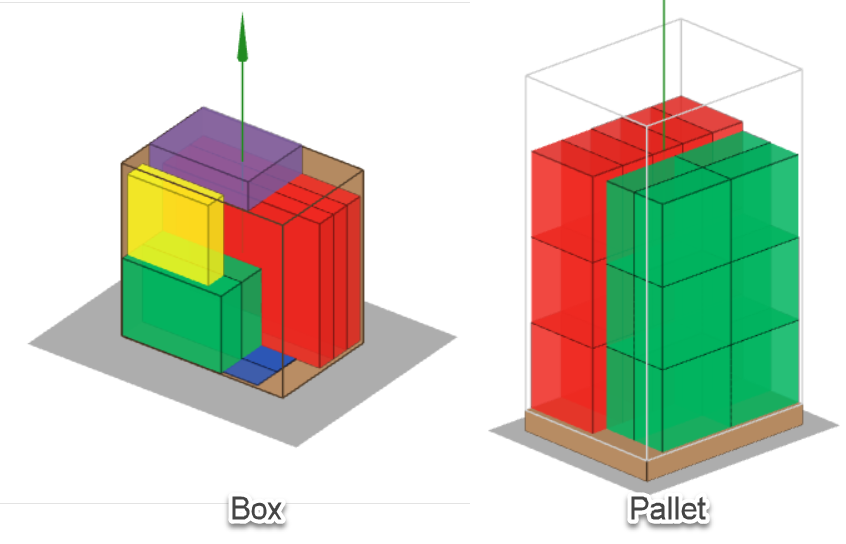
- Infill - This packaging type is used not only to indicate to the packer which type of infill to use and how much, but it also makes sure that space is reserved in the container by the Packing Solutions.
- Supplies - These are used in situations that require special tape, packing material, stickers, etc. The packer will be notified of which supplies to use and how much.
- Instructions - Prompt the packer with special instructions for packing. You can specify when and how often these instructions appear to the packer.
- Data Collection - Use this type to collect data from the packer about the items being packed such as serial numbers, net weight, etc.
- Fill in the remaining form fields and click Save. The form fields are described in more detail in the sections below.
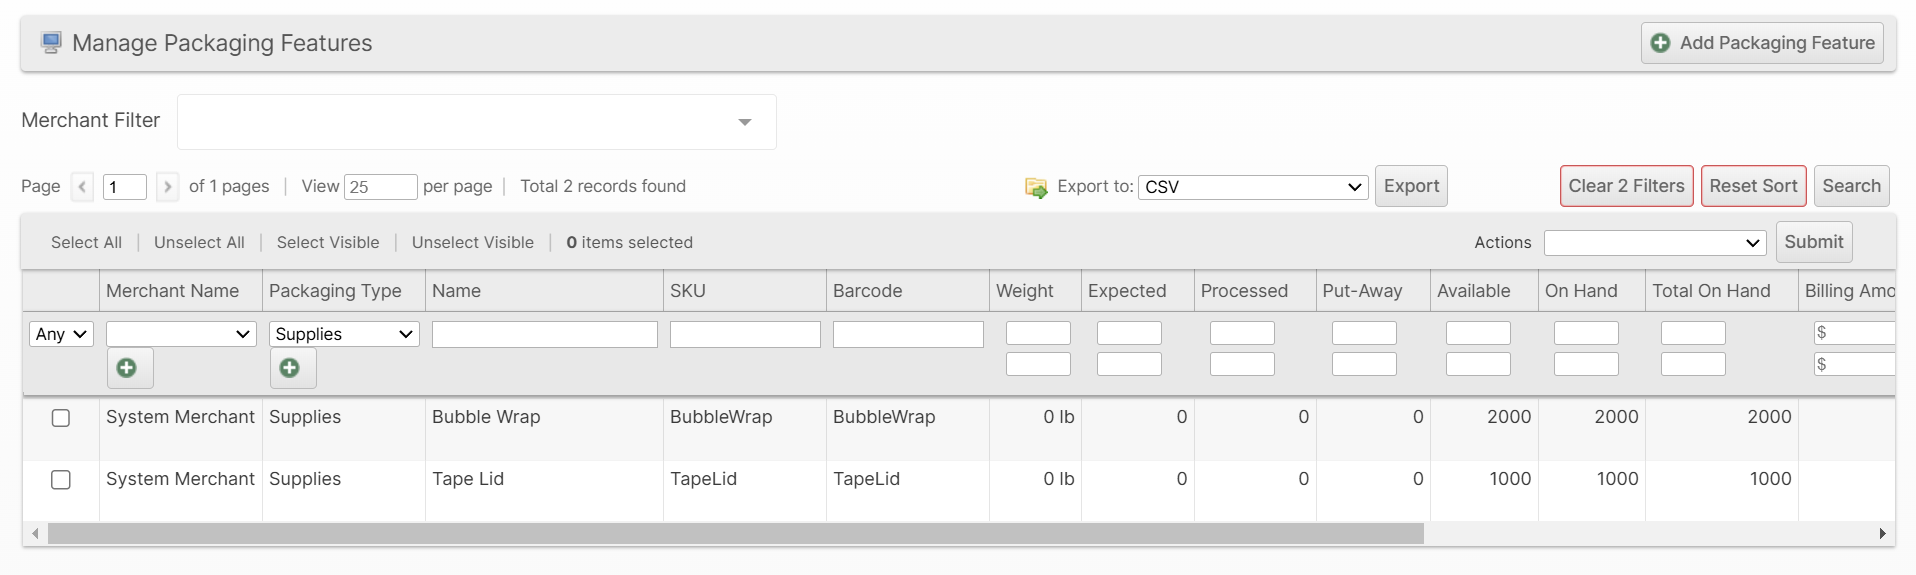
Once a Packaging Feature has been created successfully, it can be viewed in the Packaging Features grid.
Using Packaging Features
Although you can place orders for some Packaging Features (if Manage Inventory is enabled), they are not meant to be added to an order along with the other order items. Instead, they are applied to shipments at the time of packing. They can be applied to an order in one of the following ways:
- Containers and Infill are applied automatically using Packing Solutions
- Supplies and Instructions can be applied:
- To all orders based on the Goods Type or Container:
- Always/Never Apply to Goods Type
- Apply Unless Container Meets HazMat Specs
- To shipments containing products based on the Product attributes:
- Special Supplies or Other Special Features
- Using Other Shipping Options to apply them on a per-order basis
- Manually added at packing time
- To all orders based on the Goods Type or Container:
- Data Collection can be applied to specific products based on the Product attribute Other Special Features
Common Attributes
Each Packaging Feature type has some special attributes in the Packaging tab. The following attributes apply to all types:
Allow for Merchants/Brands
If specified, this packaging feature will only be applicable to the selected merchants/brands. If empty, it will be applicable to all merchants/brands.
This is commonly used for things like branded boxes, tape or infill.
Disallow For Merchants/Brands
If specified, this packaging feature will not be applicable to the selected merchants/brands.
Allow for Shipping Methods
If specified, this packaging feature will only be applicable to the selected carriers/shipping methods.
This can be useful for things like carrier-supplied packaging such as FedEx OneRate.
Billing Amount
The amount that will be billable for the consumption of one unit of this packaging feature.
Containers
Containers are applied to shipments by the Packing Solutions system, or on-the-fly by the packer during packing by scanning the container's barcode.
On the Packaging tab while creating or editing a Container, you will find the following attributes:
Container Style
This tells the system which type of algorithms and special cases to apply to a container.
Satisfies Overbox
If No, this container will not be considered valid for products that have Requires Overbox: Yes.
For example, this should be No for psuedo-containers that represent things like manufacturer's packaging, nylon straps, etc. It is recommended to create a barcode sheet or affix barcodes near a packing station so the user can scan the barcodes for these special-purpose "containers".
Use for Bin Packing
Choose Yes to allow this container to be considered as an option when resolving Packing Solutions or No to disallow its usage.
Choose Fallback Only if the container should only be considered an option if none of the containers that are a Yes can fit the item. This option is often most appropriate in cases where the container is only useful for edge-case items.
For example, a very long, skinny box may be useful for long, skinny products like poles, but should not be used for short items even if it has the least amount of void space. Fallback Only allows you to avoid misuses of such containers while still allowing automatic application when appropriate.
Allow for Warehouses
If specified, this packaging feature will only be applicable to the selected warehouses. If empty, it will be applicable in all warehouses.
Use this if you keep different subsets of your containers in stock in different warehouses.
Weight Capacity
Specify the maximum allowed weight of the container, including tare weight. This will ensure that it is not overloaded with heavy items and potentially damaged during transit. This attribute directly impacts the outcome of Packing Solutions.
Flexible Container Dimensions
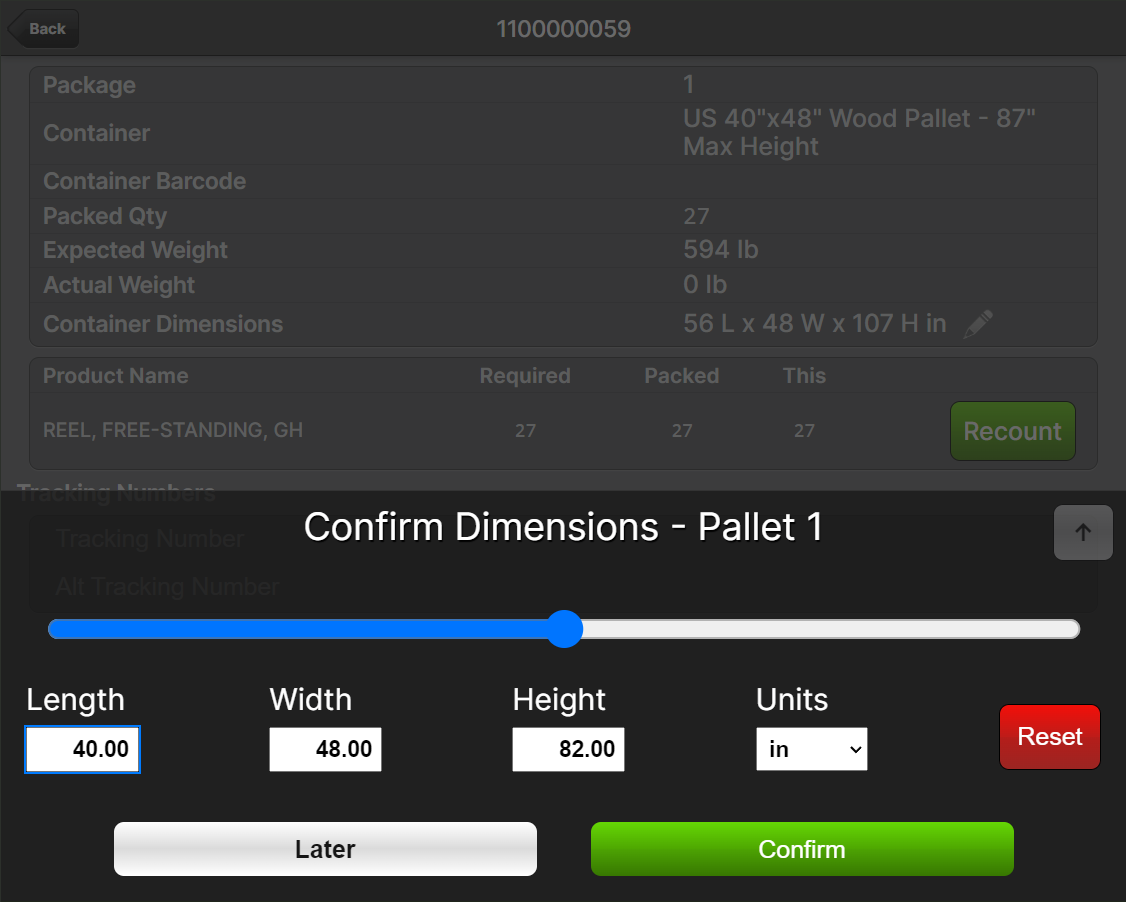
This feature is useful to accommodate the need to submit custom dimensions for a container at the time of packing in cases where the exact dimensions are not known beforehand but are still important to capture. Examples include pallet heights for LTL or telescoping boxes.
The dialog in the screenshot below will appear after tapping Full in the Packing UI. If the user chooses to Confirm Later, the dialog will appear again the next time the Full button is pressed and the user will not be allowed to tap Finished Packing until they have confirmed the dimensions.
Additional Handling Surcharge
This indicates if the Packaging Surcharge (see Rate Shopping) is applicable for this container. Typically this is a non-standard container such as one that is a cylinder, made of non-fiberboard material, has protrusions, is non-conveyable, etc.
Infill
Please see Infill as this Packaging Feature applies exclusively to the Packing Solutions system. If you have infill items that you would like to apply without using Packing Solutions, you can specify them as Supplies, but space for them will not be reserved automatically by the Packing Solution algorithms.
Require Confirmation
If Yes, the user will be prompted to confirm the infill used for the shipment. Otherwise, the infill is assumed from the Packing Solution and no interatction is needed.
Disable Confirm Button
If both Require Confirmation and this option are Yes, the user must scan a barcode, otherwise the barcode will be optional, and a Confirm button will be presented. If enabled, the user can confirm using either the scanner (if a barcode is assigned to the Packaging Feature) or the button.
Minimum Thickness
The amount of space to reserve on each side and top and bottom of the package for infill.
Infill Priority
If multiple infill types are prescribed for a mix of items, the infill with the lowest Infill Priority number will prevail.
Supplies and Instructions
Supplies and Instructions are very similar with the two main distinctions being:
- You can choose to Manage Inventory for Supplies, but Instructions do not have an Inventory tab
- Supplies can be assigned to products via the Special Supplies attribute, but Instructions are assigned using the Other Special Features attribute
However, these two types have many features in common as it relates to how they are applied to shipments during packing. As such, they both have these additional attributes in the Packaging tab compared to the other types.
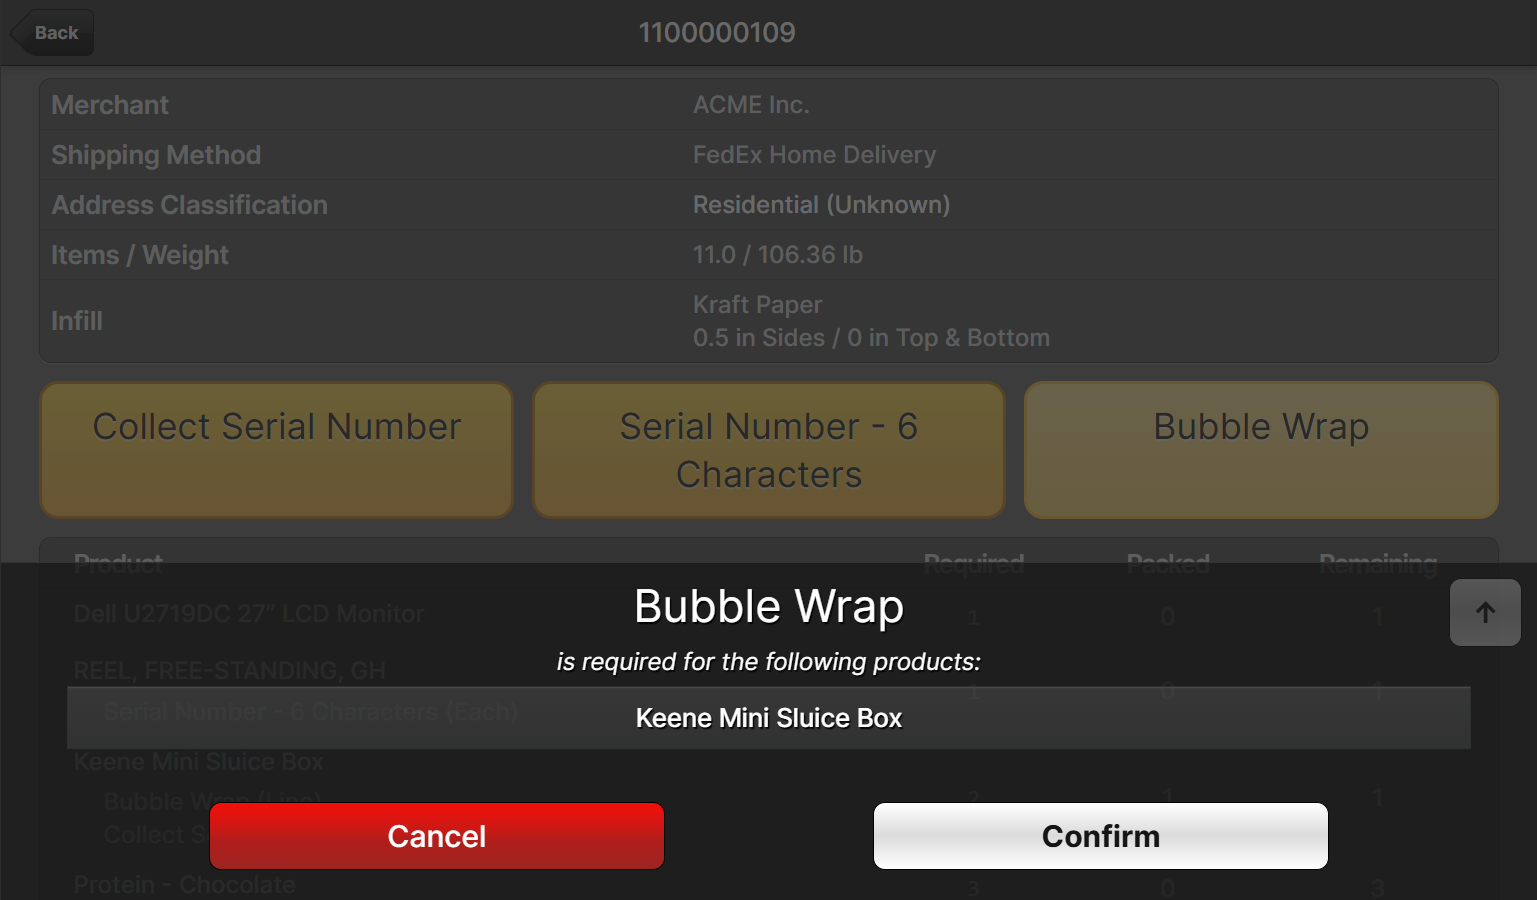
An "auto-prompt" is a modal window that appears above the UI to grab the user's attention and require interaction. They may require a barcode scan, tapping a button, or entering a quantity or string of text depending on the situation.
Auto-Prompt Frequency
This indicates how often a packer should be required to confirm the Packaging Feature - either scan the item's barcode or tap confirm (if allowed by the Disable Confirm Button attribute) while packing. The options are:
- One Per Order -> Require this only once (on the first shipment of the order)
- One Per Shipment -> Require this once for every shipment
- One Per Package -> Require this once for every package
- One Per Line -> Require one confirmation for each line item that is assigned to this Packaging Feature
- One Per Each -> Require a confirmation for each unit of inventory for all line items that are assigned to this Packaging Feature
Auto-Prompt Timing
This lets you determine when the packer is prompted to confirm the Packaging Feature.
- After Product Scan -> Scanning an item will trigger the confirmation prompt immediately
- On Start -> This happens as soon as the packing screen is loaded
- On Full -> This occurs when the user taps Full to complete a package
- On Finished -> Similar to On Full but would only occur after all packages are marked as full and there are no items remaining to pack
- None -> A prompt will not be displayed, and the Applicable Quantity will be calculated automatically.
Applicable Quantity
This attribute determines how many units should be recorded with the final package data. For example, you could scan to confirm once using Auto-Prompt Frequency: One Per Shipment, but then record an amount equal to the total number of items assigned to the Packaging Feature by choosing Applicable Quantity: Line Quantity Sum.
- One Per Shipment
- One Per Package
- One Per Line -> Record one unit for each line that is assigned regardless of the quantity of the item. If items are packaged in separate packages, there will be one per line for each package that the line item was packed into.
- Line Quantity Sum -> Effectively the number of individual units packed for all items that are assigned to the Packaging Feature.
- Line Quantity Sum x Unit Quantity -> This refers to the Unit Quantity product attribute so the recorded quantity is the same as above multiplied by the Unit Quantity of the product.
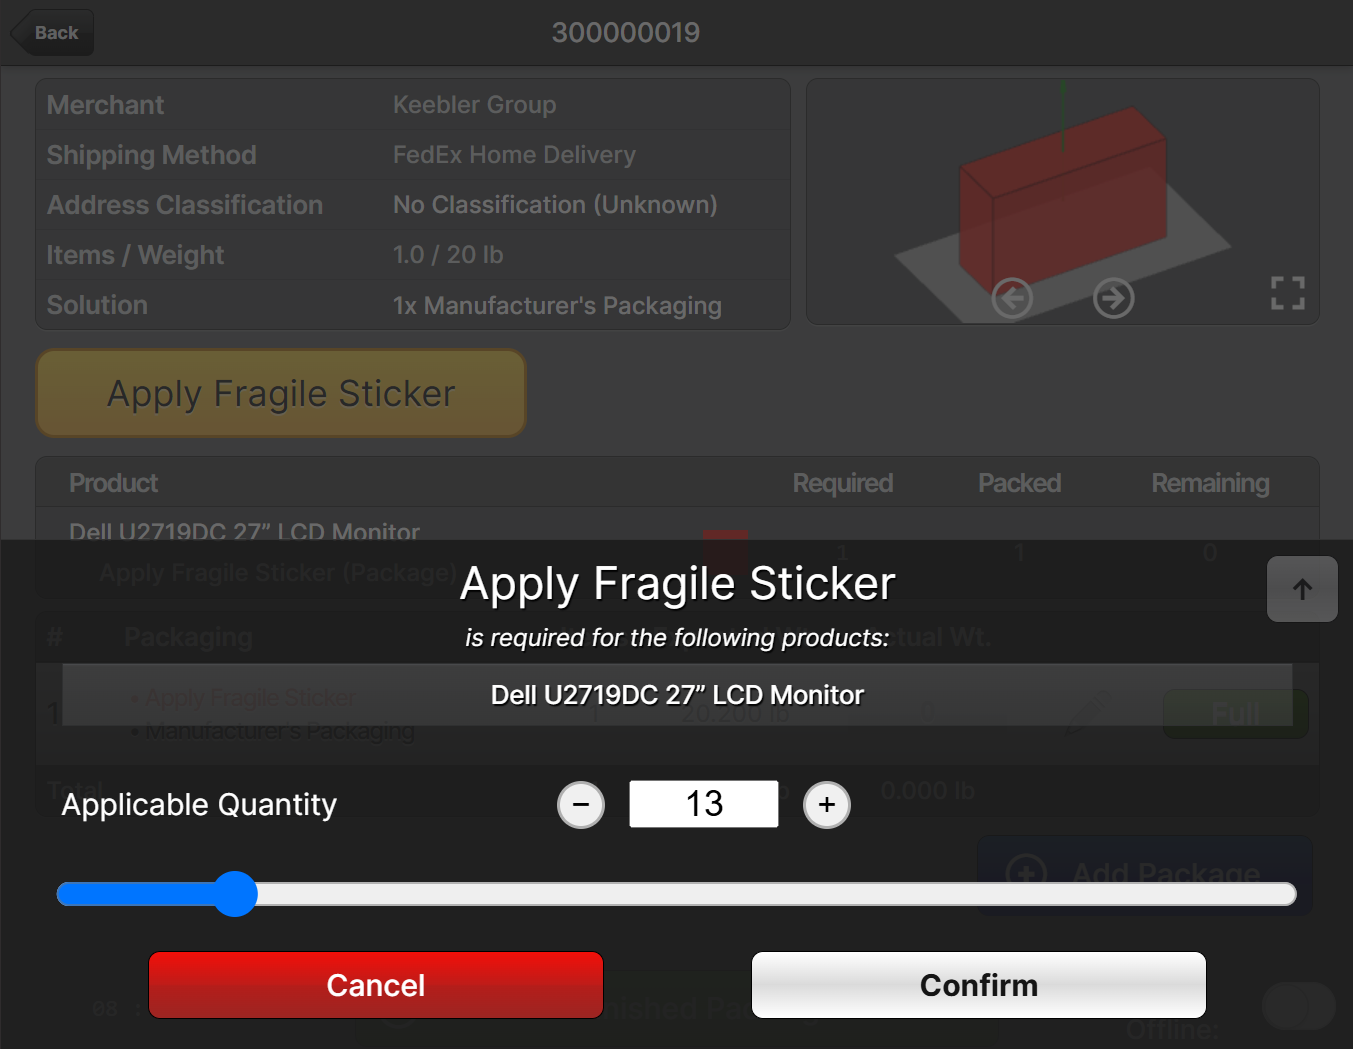
- User-Specified -> The user will be prompted to provide a value during packing.
Example of Applicable Quantity: User-Specified:
Applicable Quantity Override
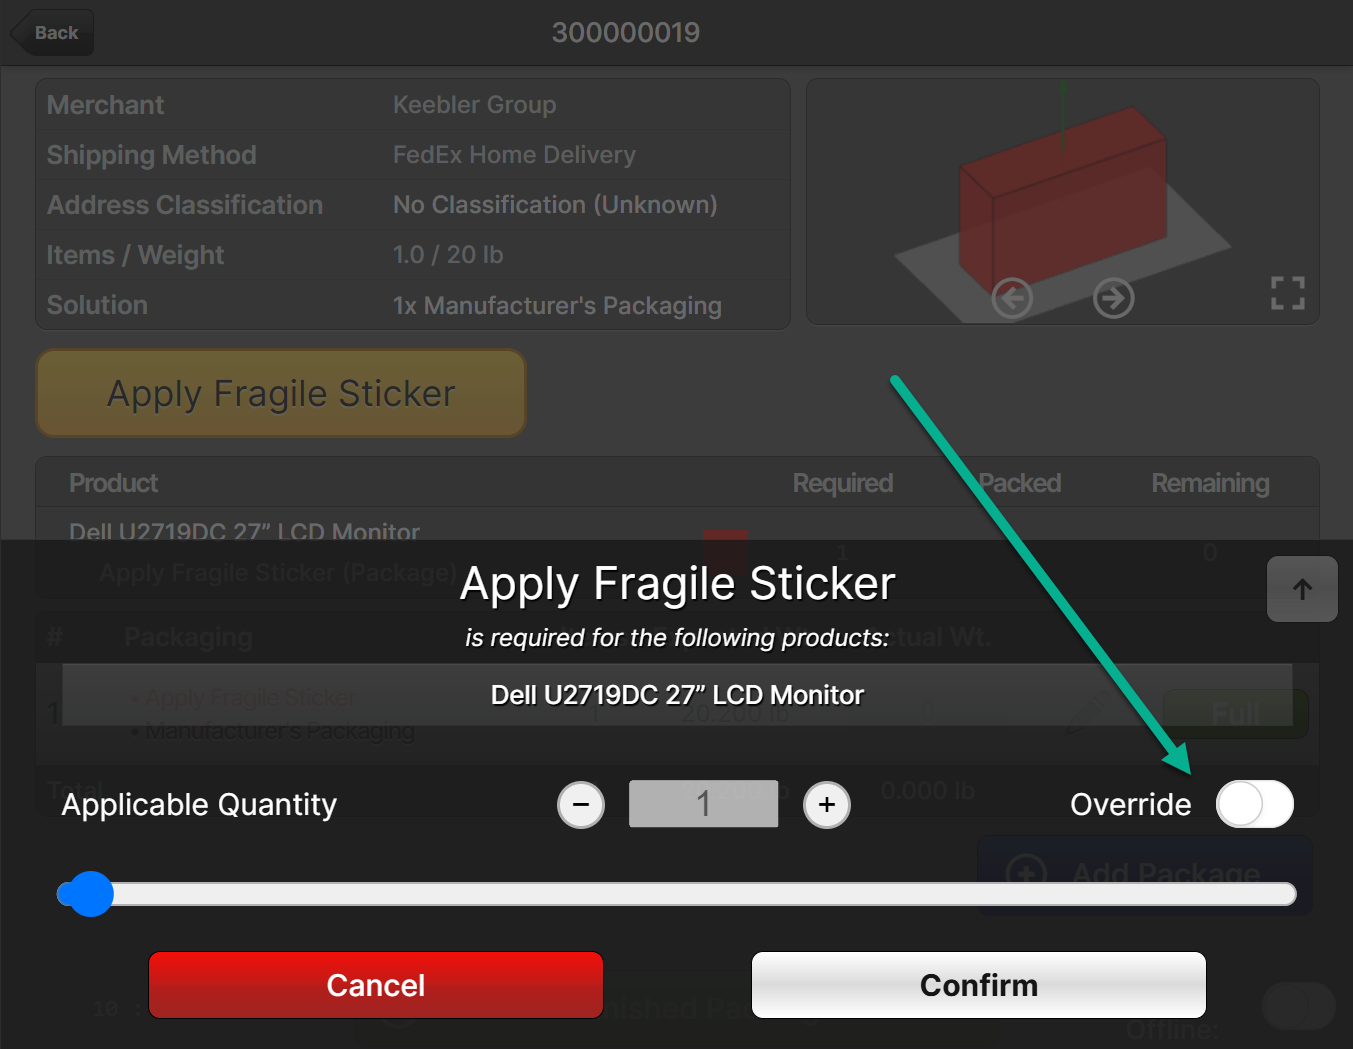
If Yes, this option allows the system to calculate the amount according to the Applicable Quantity option chosen, but the user may override it during packing.
If the Packaging Feature involves a prompt, the quantity may be overridden by tapping Override on the prompt popup:
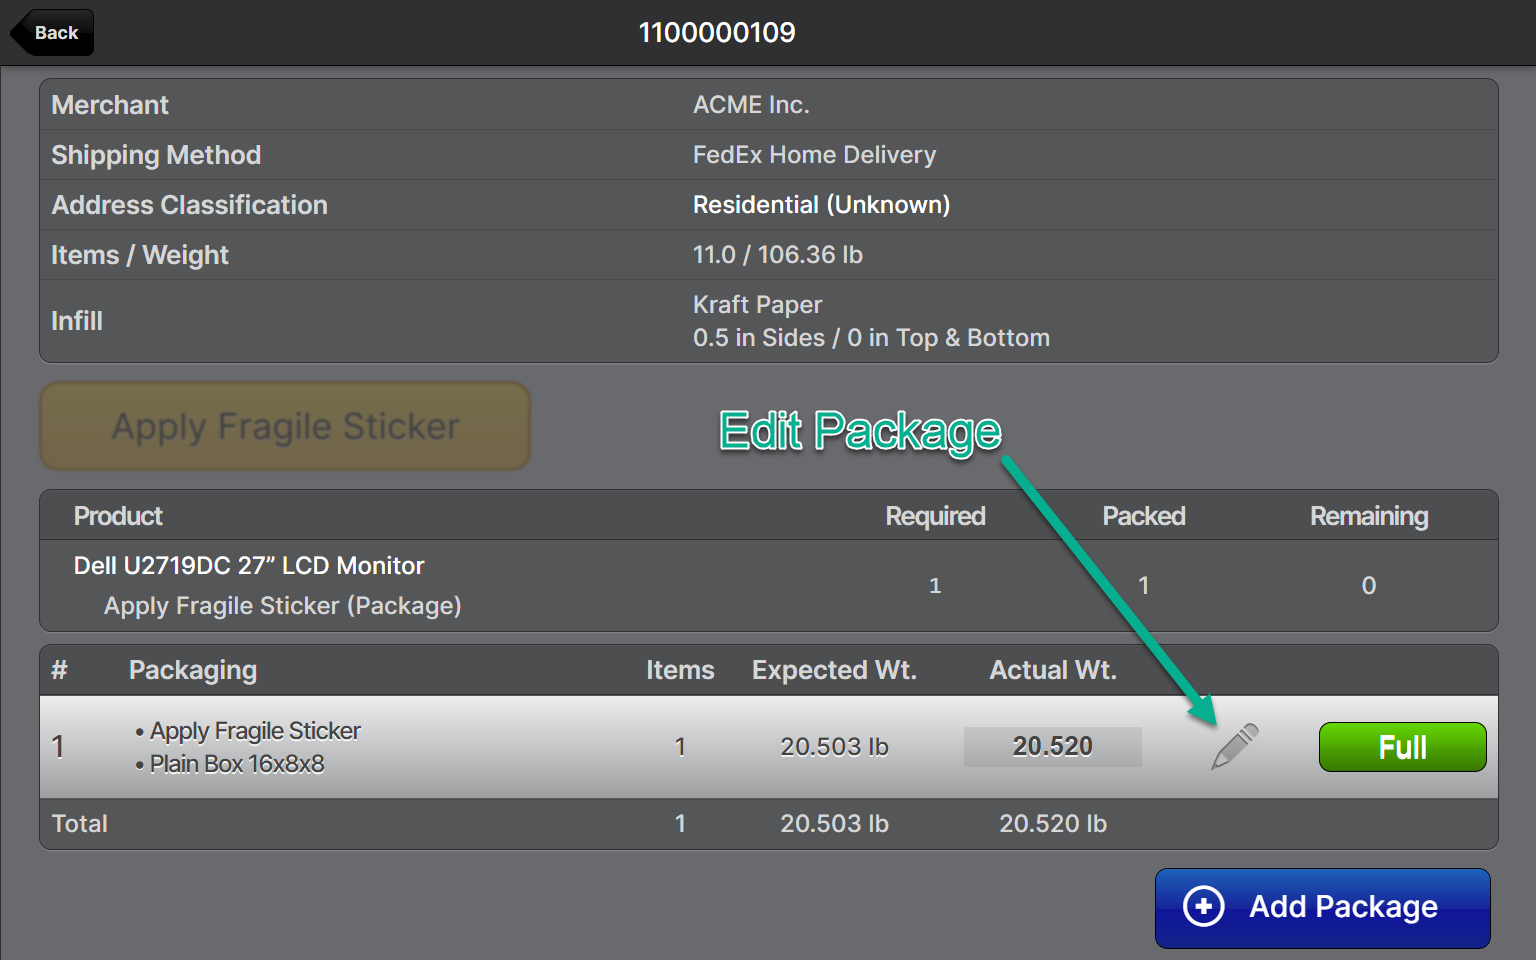
Otherwise, to perform an override, the packer must click the pencil icon on the package:
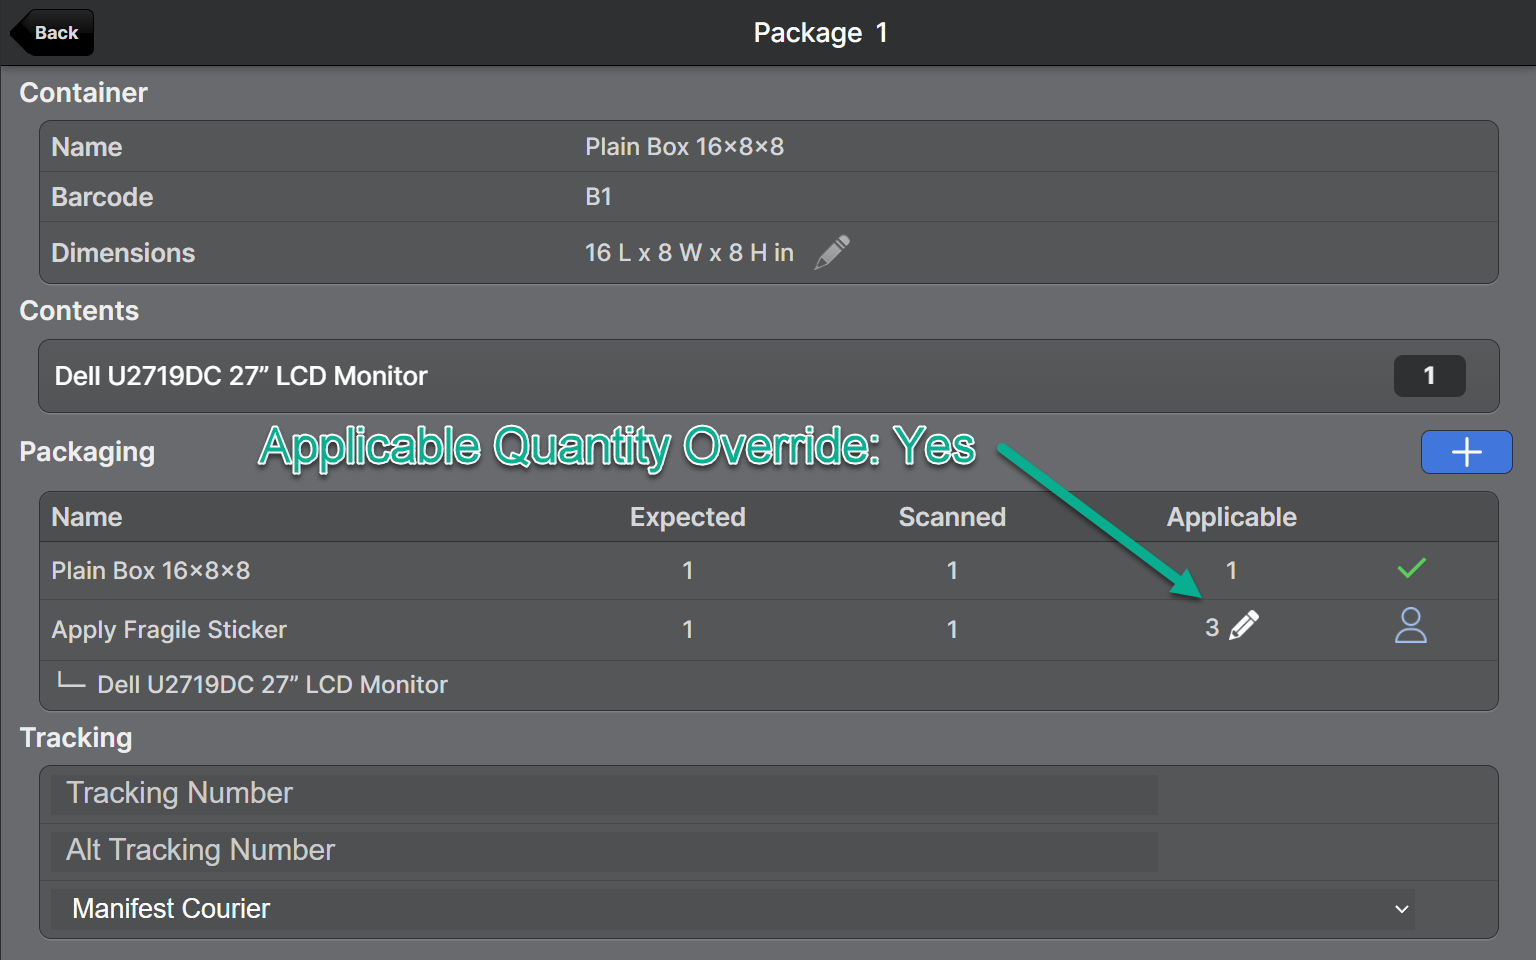
... and then the pencil icon on the quantity:
Disable Confirm Button
If Yes, the user must scan a barcode, otherwise the barcode will be optional, and a Confirm button will be presented. If enabled, the user can confirm using either the scanner (if a barcode is assigned to the Packaging Feature) or the button.
Example with Disable Confirm Button: Yes:

Always/Never Apply to Goods Type
If an option is chosen for Always, the Packaging Feature will apply to all packages containing the selected Goods Type, even if none of the products in the shipment are assigned to it with the Special Supplies or Other Special Features attributes.
Similar to Always, if an option is chosen for Never, the Packaging Feature will apply to all packages that do not contain the selected Goods Type.
Apply Only to Shipping Region
This Packaging Feature will not be applied to shipments destined for any regions besides the one selected. This can be useful for when you want to apply Packaging Features to certain states such as California, which often has regulations that do not apply to other states.
Data Collection
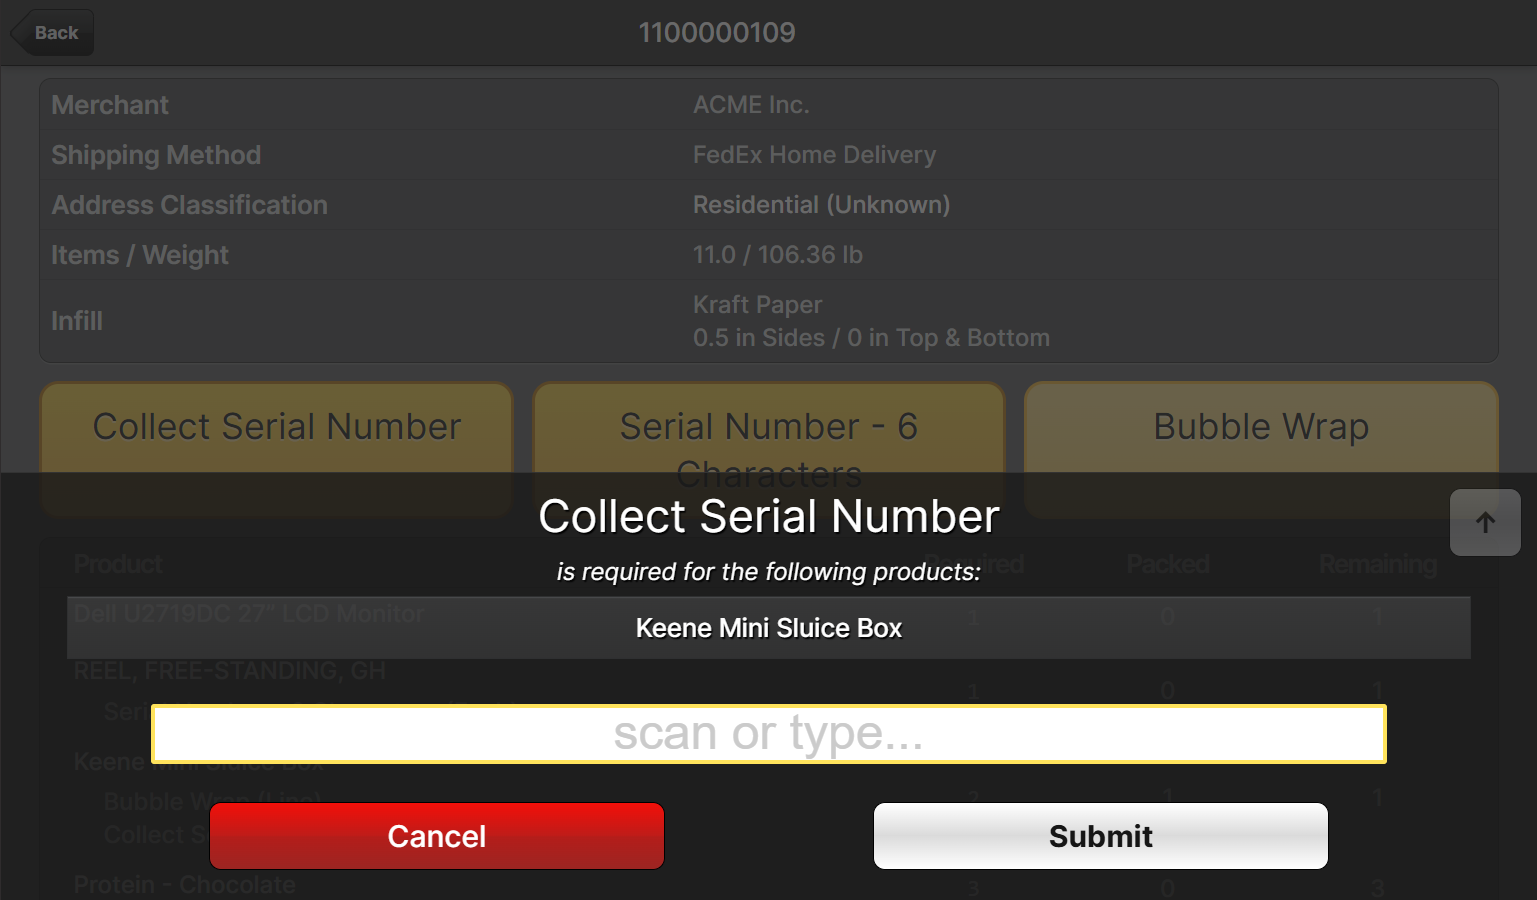
When this Packaging Feature type is applied to a shipment item, the user will be prompted to enter some text input. This is most commonly used to collect serial numbers on outbound but could be used to capture any other text as well.
The data is collected via the Packing UI immediately after the product being packed is scanned. It should ideally be collected with a barcode scan, but keyboard input is supported as well if the Disable Confirm Button option is No.
Collect Data Pattern
This is required to validate the user's input. Specify a regular expression pattern which matches the correct input and rejects incorrect input.
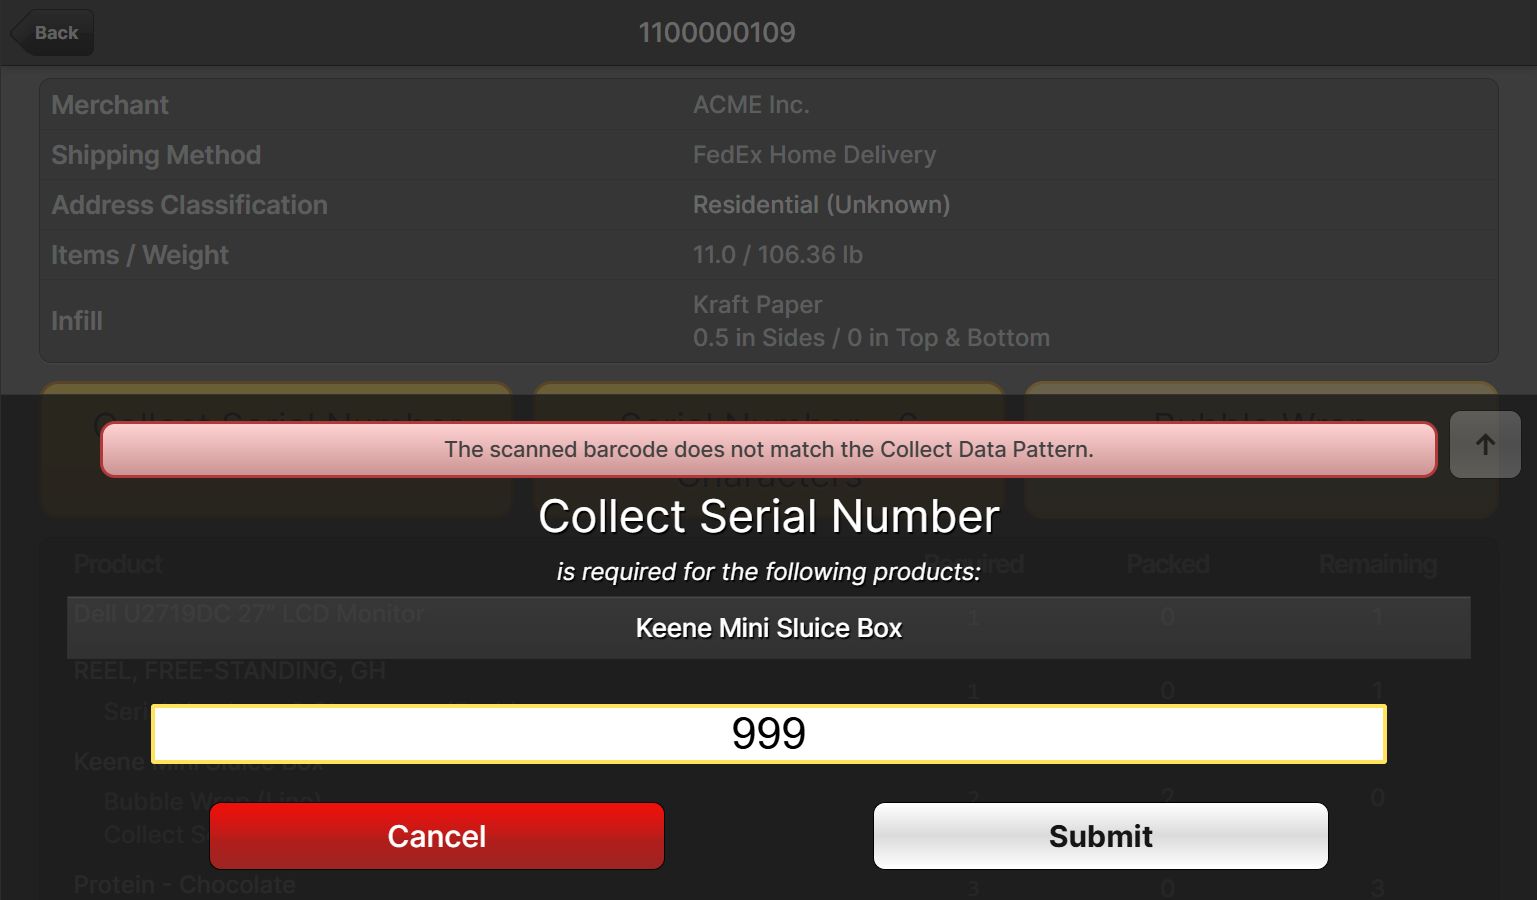
^\d{15,16}$ you can prevent the 12-digit UPC codes or other barcodes containing letters from being inadvertently accepted as valid input. You can be more specific if you know immutable facts about your serial numbers such as unique prefixes or patterns.Collected Data Unique
Specifying Yes will tell the system to prevent the same data collection value from being collected more than once on the same shipment to prevent accidentally scanning the same unique value twice. This should always be enabled for serial numbers but can be disabled for things like lot numbers, weights, names, etc. that may not be unique.

Adding Unexpected Packaging Features
Supplies and Instructions can be added arbitrarily to a package at packing time by the user.
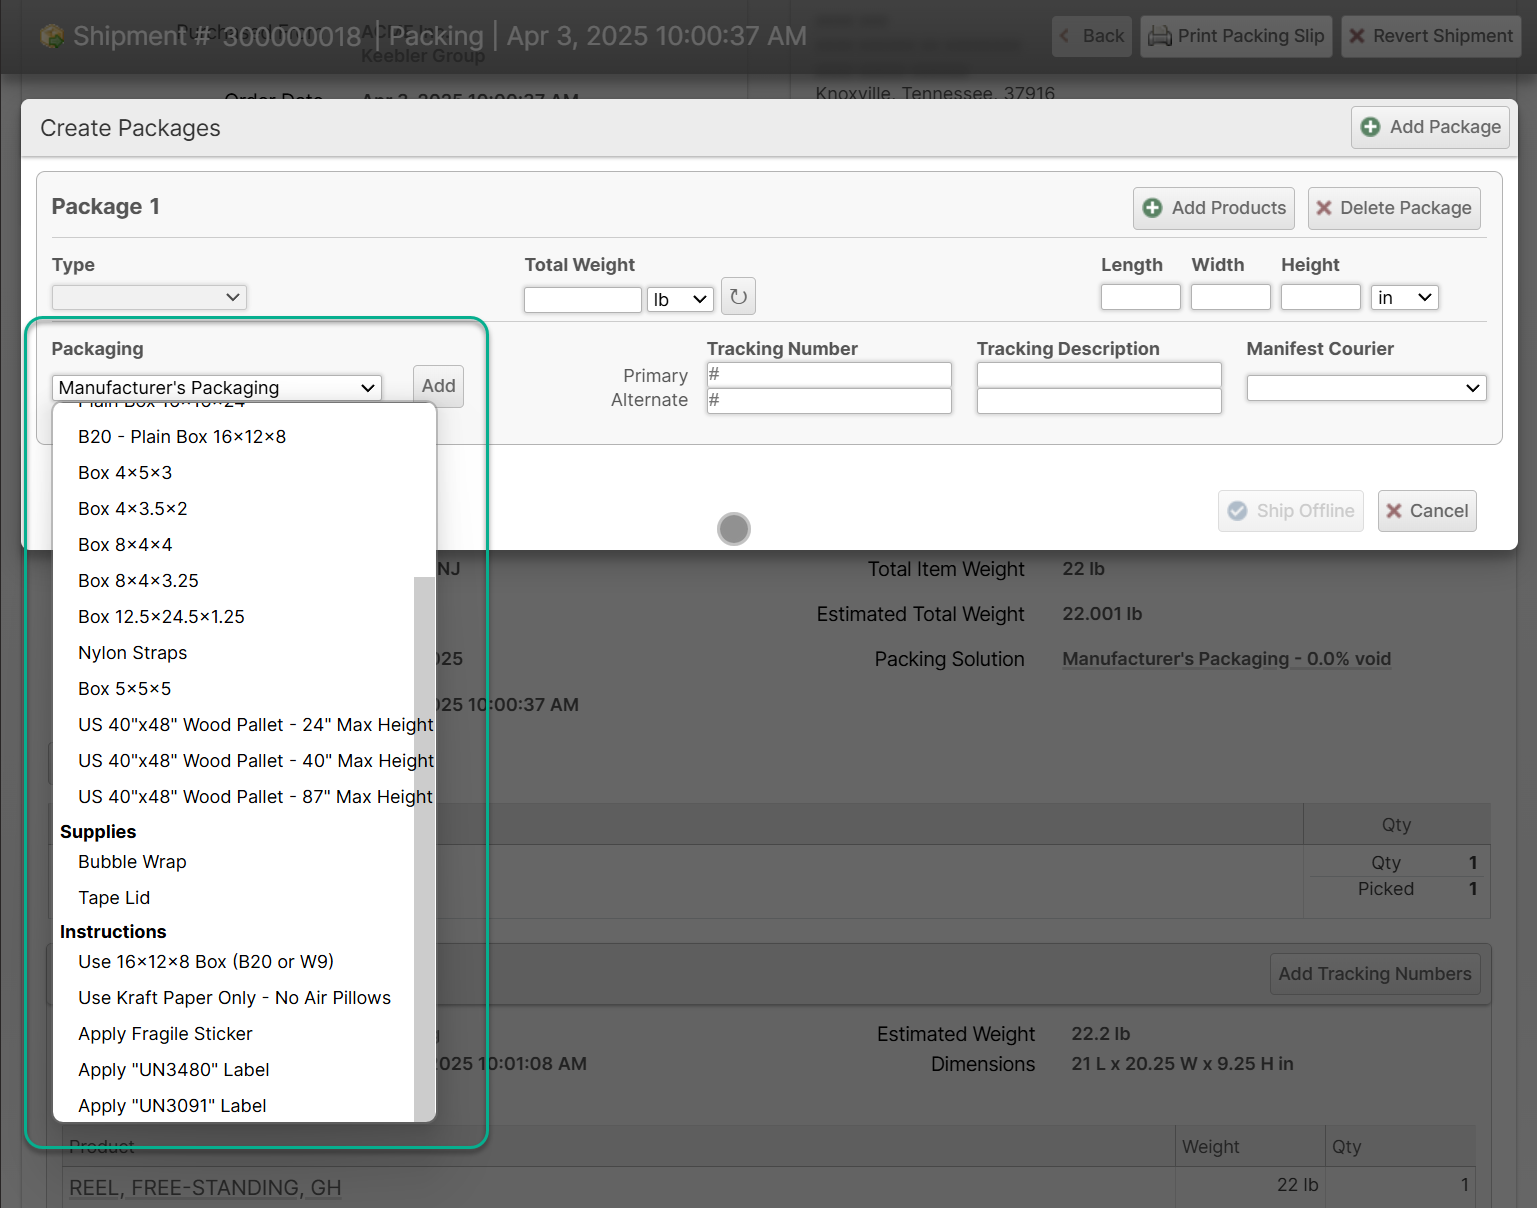
Admin UI
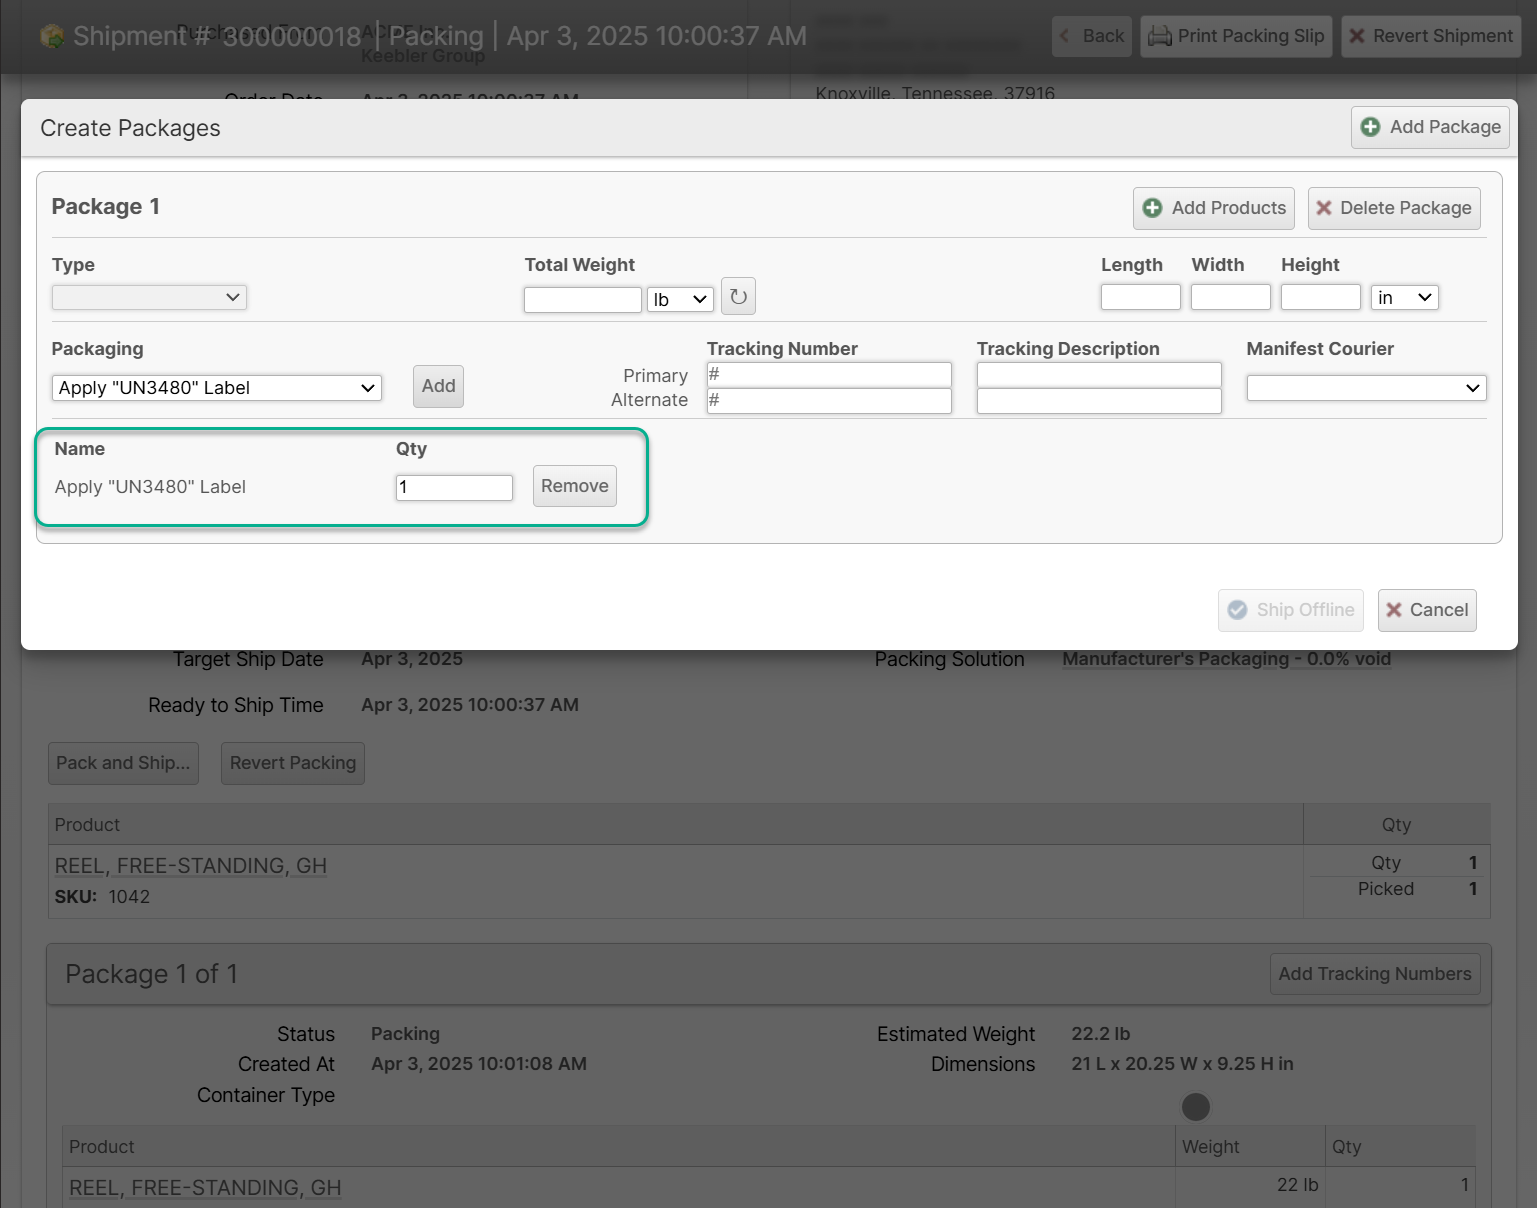
In the "Pack and Ship..." dialog, select the item to add from the dropdown list below Packaging and tap Add.
You can then edit the quantity or click Remove to remove it.
Scanner UI
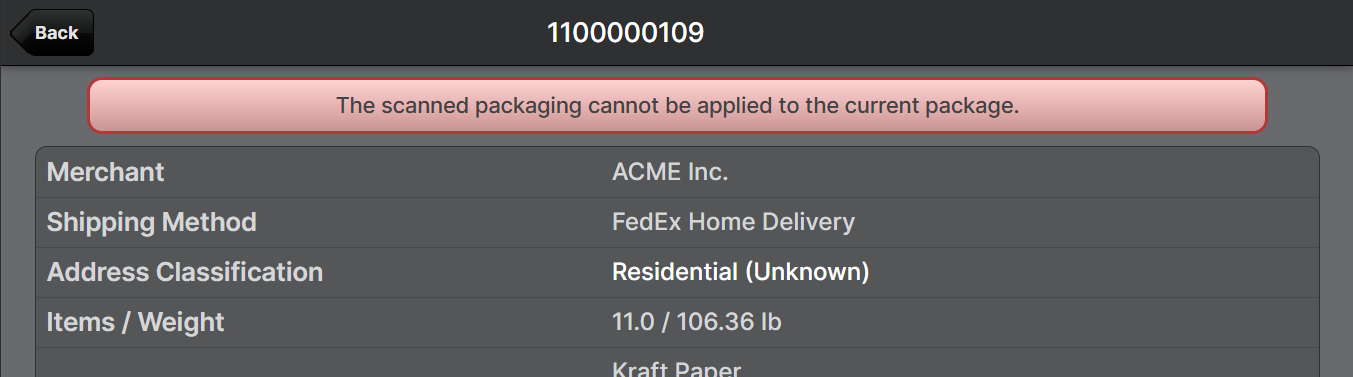
The packaging validation will prevent unexpected items from being added to the shipment by default, but you can add arbitrary packaging by following the steps below.
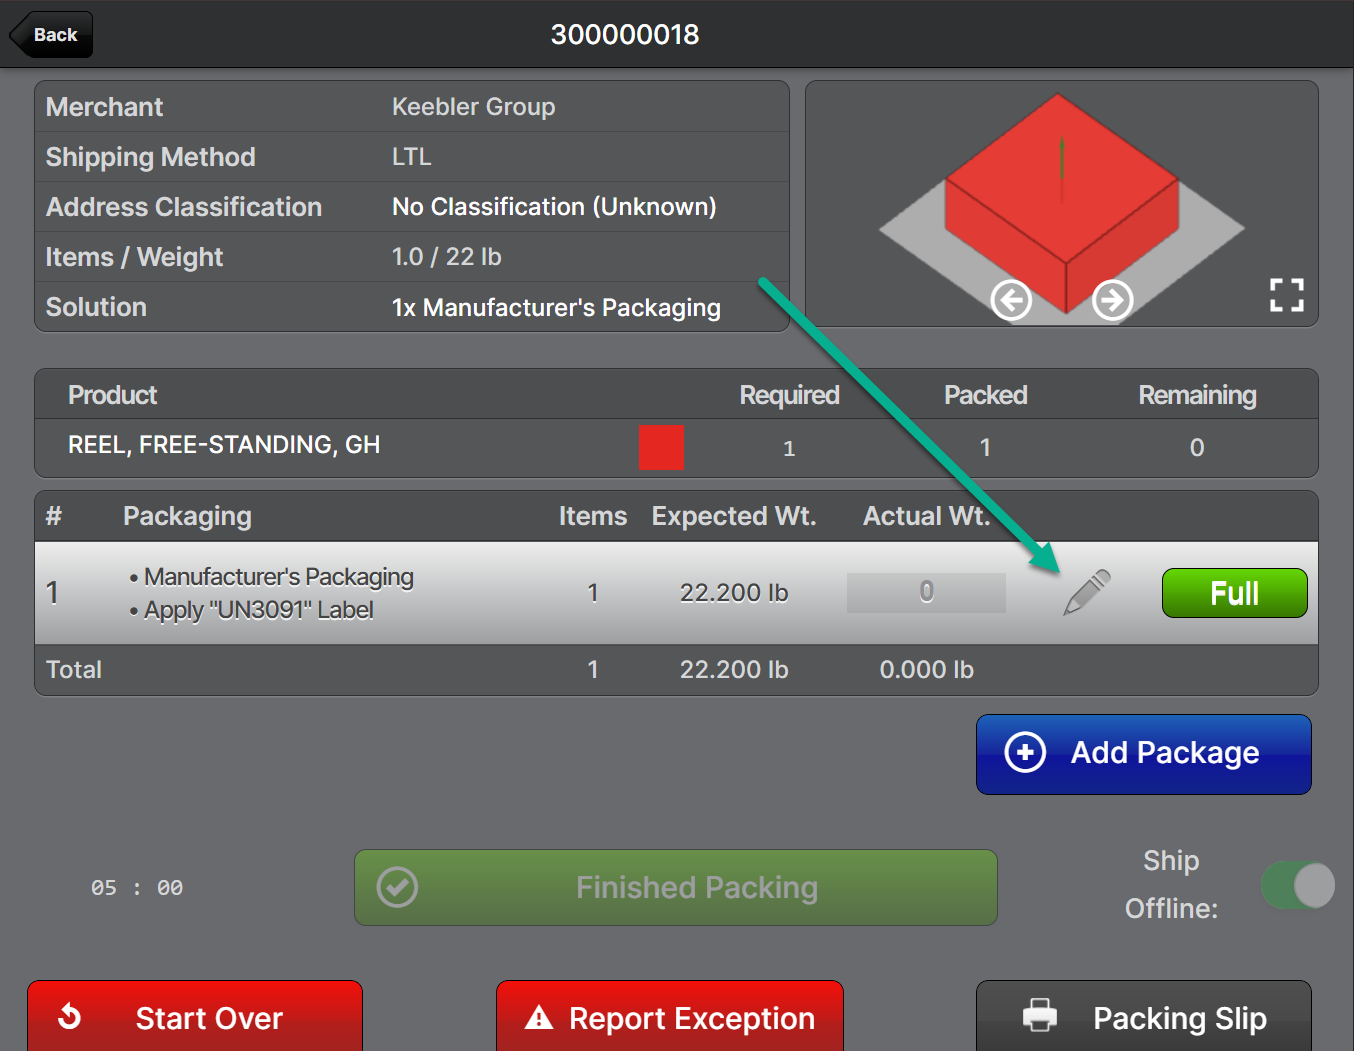
- Tap the ✏️ icon on the package you wish to add the supplies or instructions to.
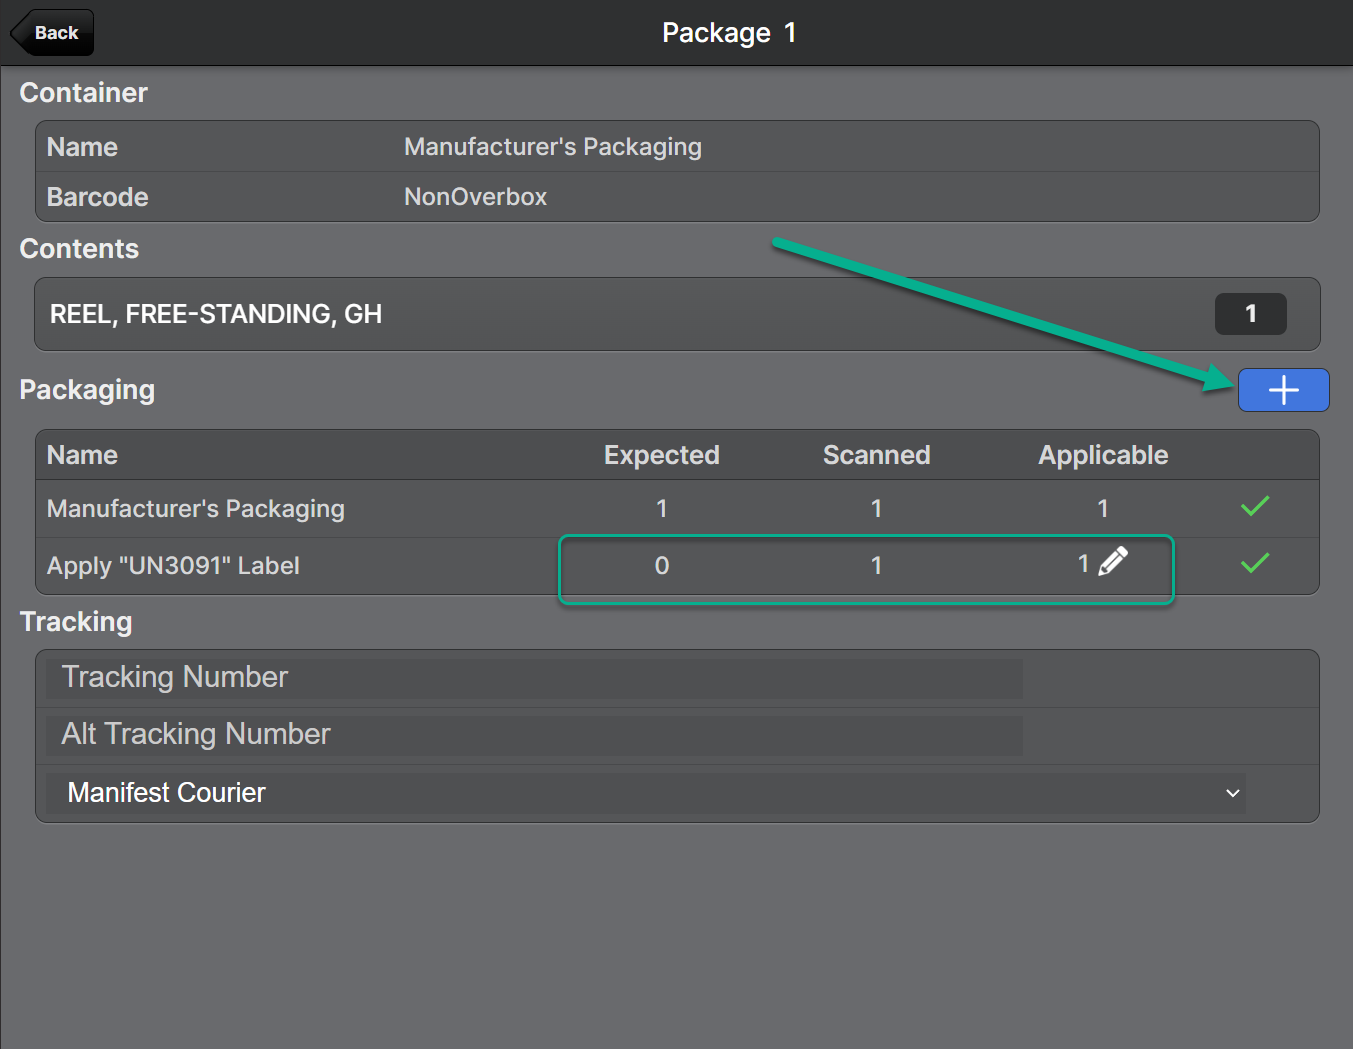
- Tap the blue "+" button
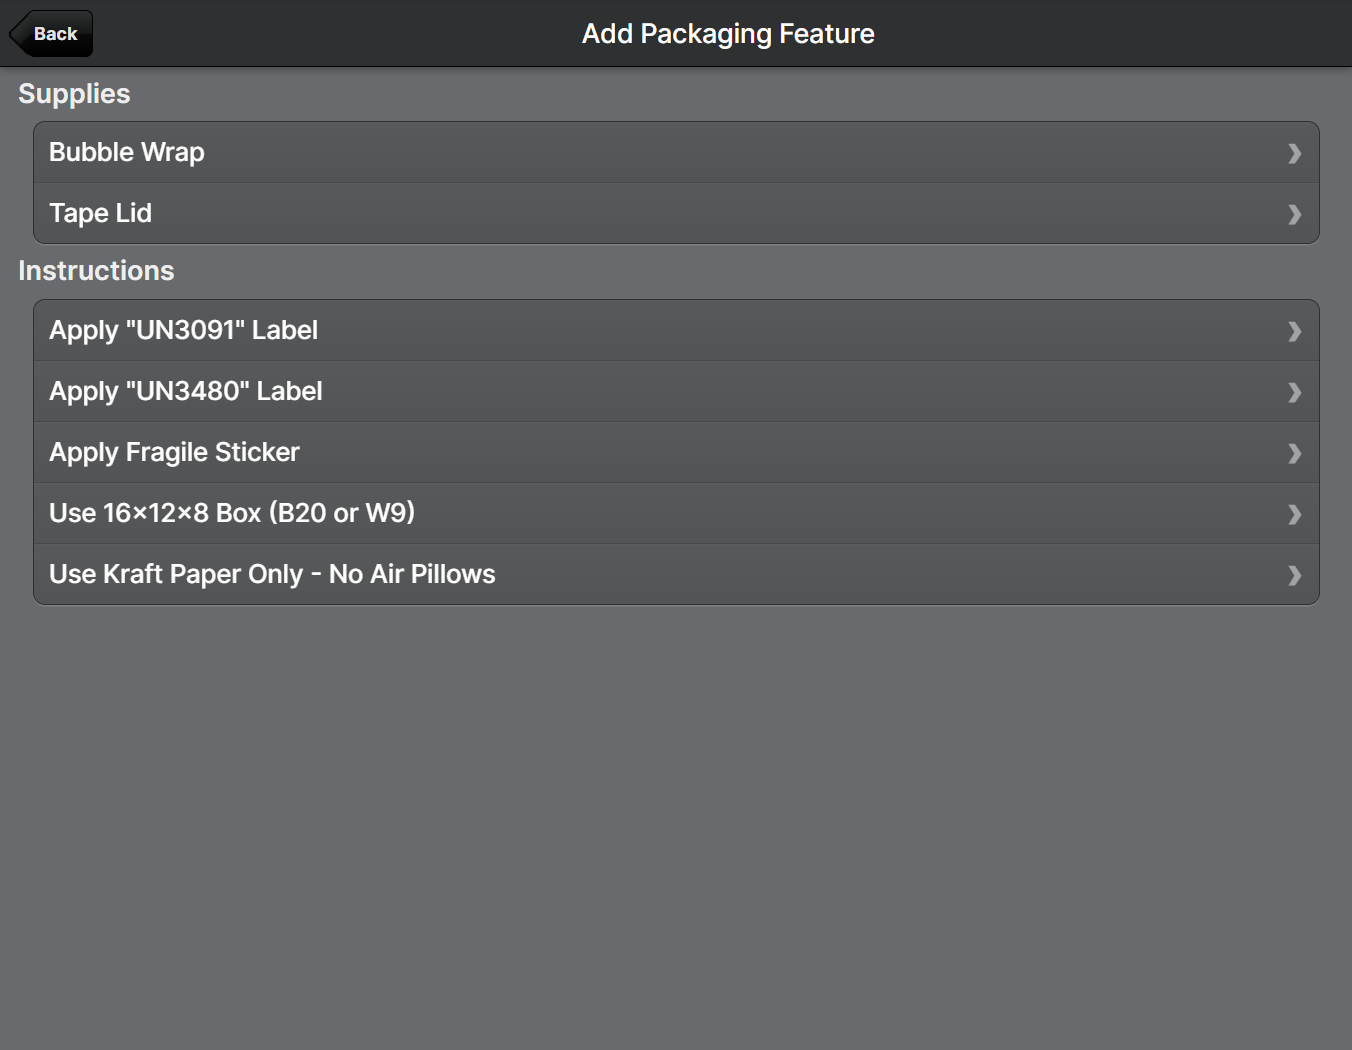
- Tap the item you wish to add in the list
How did we do?
Attach Packaging Features to Orders