Table of Contents
Relocations
Relocations are used to safely move product from one shelf location to another, as well as convert inventory to other SKUs and transfer inventory to other warehouses.
Relocations offer a user-friendly, yet tightly controlled, way to safely relocate inventory from one location to another location in the same warehouse without affecting overall inventory availability and without interrupting other operations. Relocations can also be used to transfer inventory from one warehouse to another warehouse.
Why use Relocations
Relocations are superior to simply making manual adjustments to inventory locations for the following reasons:
- Due to the fact that ShipStream maintains order allocations in real-time, making negative adjustments can cause orders to become backordered or reallocated to another warehouse. Similarly, making positive adjustments may cause orders to be un-backordered or unintentionally reallocated from other warehouses. Such adjustments can also cause unwanted event notifications to be sent to integrations and have other side-effects. Thus, using Relocations within the same warehouse will not affect order allocation since the total inventory counts never increase or decrease as a result.
- The total amount pushed must match the total amount pulled before the Relocations will be closed so there is always a record of the inventory and it never becomes "invisible" to the system.
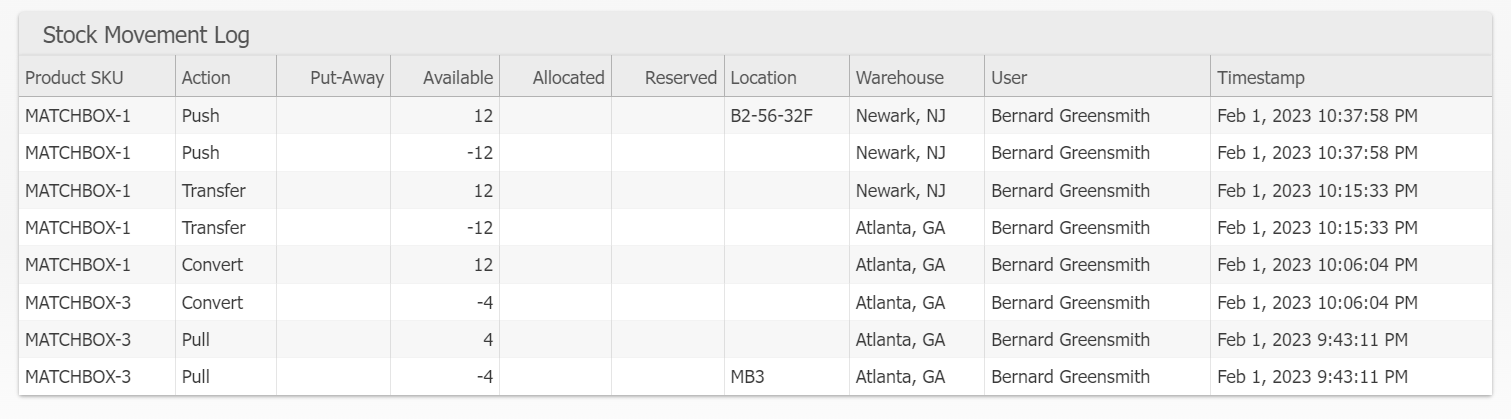
- The relocation push and pull actions will be recorded in the stock movement log so it is easy to distinguish relocations from adjustments.
- Inventory that is put-away or reserved cannot be adjusted down, but can be relocated.
- Moving many products from any number of locations to any other number of locations would be very tedious and prone to human error.
- Time required to complete the relocation is recorded for full visibility on operational efficiency.
Relocations are created on-the-fly by "pulling" inventory from one or more shelf locations. This inventory is then kept in "temporary" locations until a user "pushes" it to a new shelf location. A user can perform any number of these pull or push operations in any order, and as long as they count each step correctly, the system will always know how much inventory remains to be relocated. Inventory can also be converted to another SKU or transfered to another warehouse using Relocations.
Pushing the last of the remaining inventory to a shelf location will cause the relocation to be closed as "Complete" such that any further pull operations will require starting a new relocation.
Performing Relocations
Create a Relocation by performing a Pull via the Scanner UI. When a Pull is performed in the context of an existing Relocation the pulled inventory will be added to the same Relocation, but when performed from the main menu a new Relocation will be created on the fly.
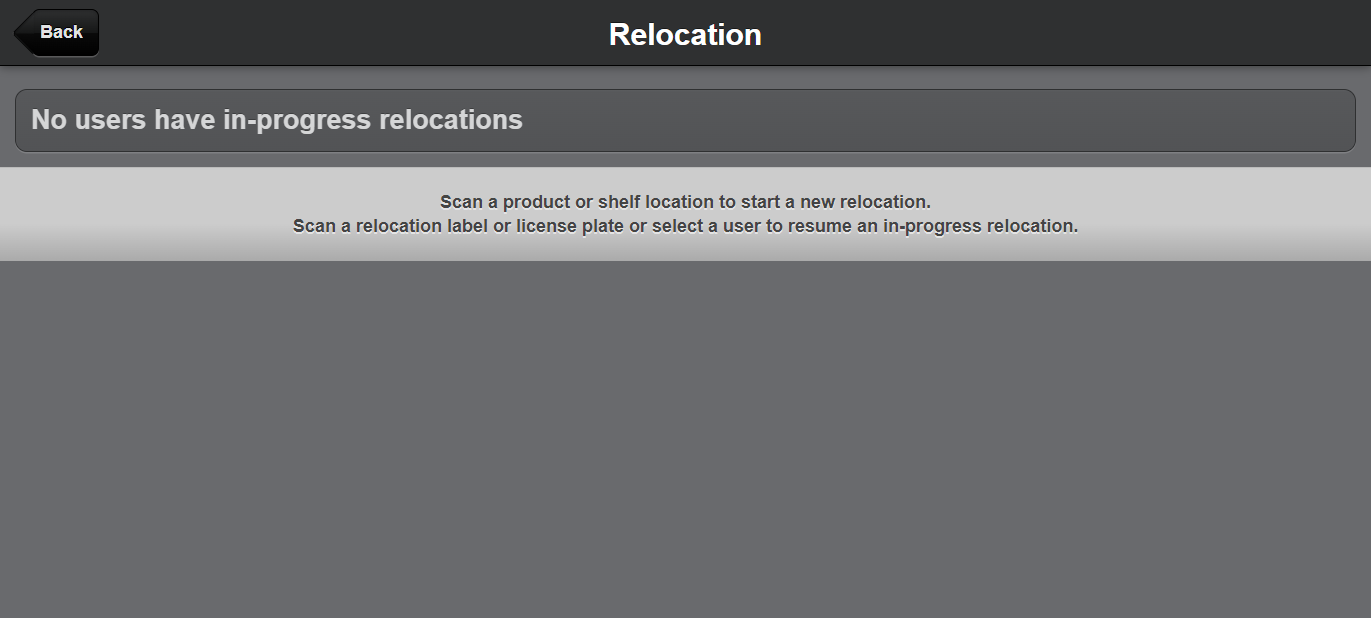
Upon first use of the Relocation feature or when there are not Active Relocations you may only create a new Relocation by scanning a product or shelf location.
How to "Pull" Inventory
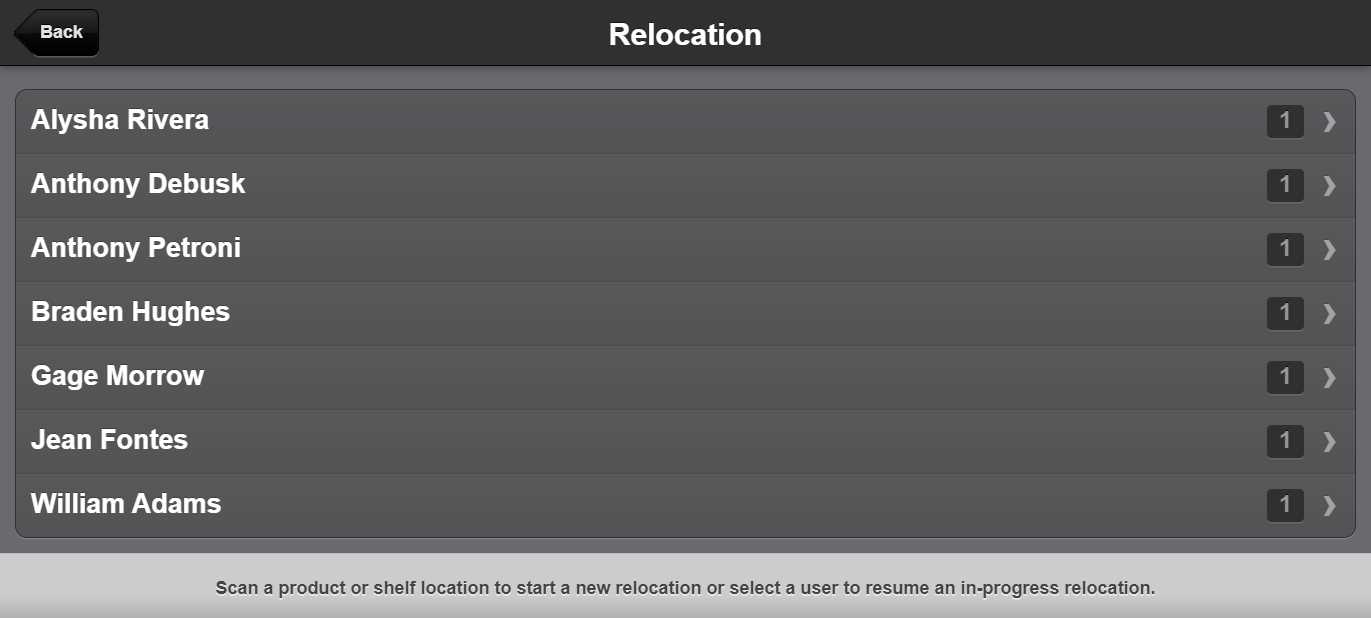
Relocations are always assigned to the last user to activate them so users assigned to existing relocations are listed on this page.
- From the Scanner menu, tap the Relocation button.
- Scan the product barcode that you wish to relocate OR scan a location containing inventory.
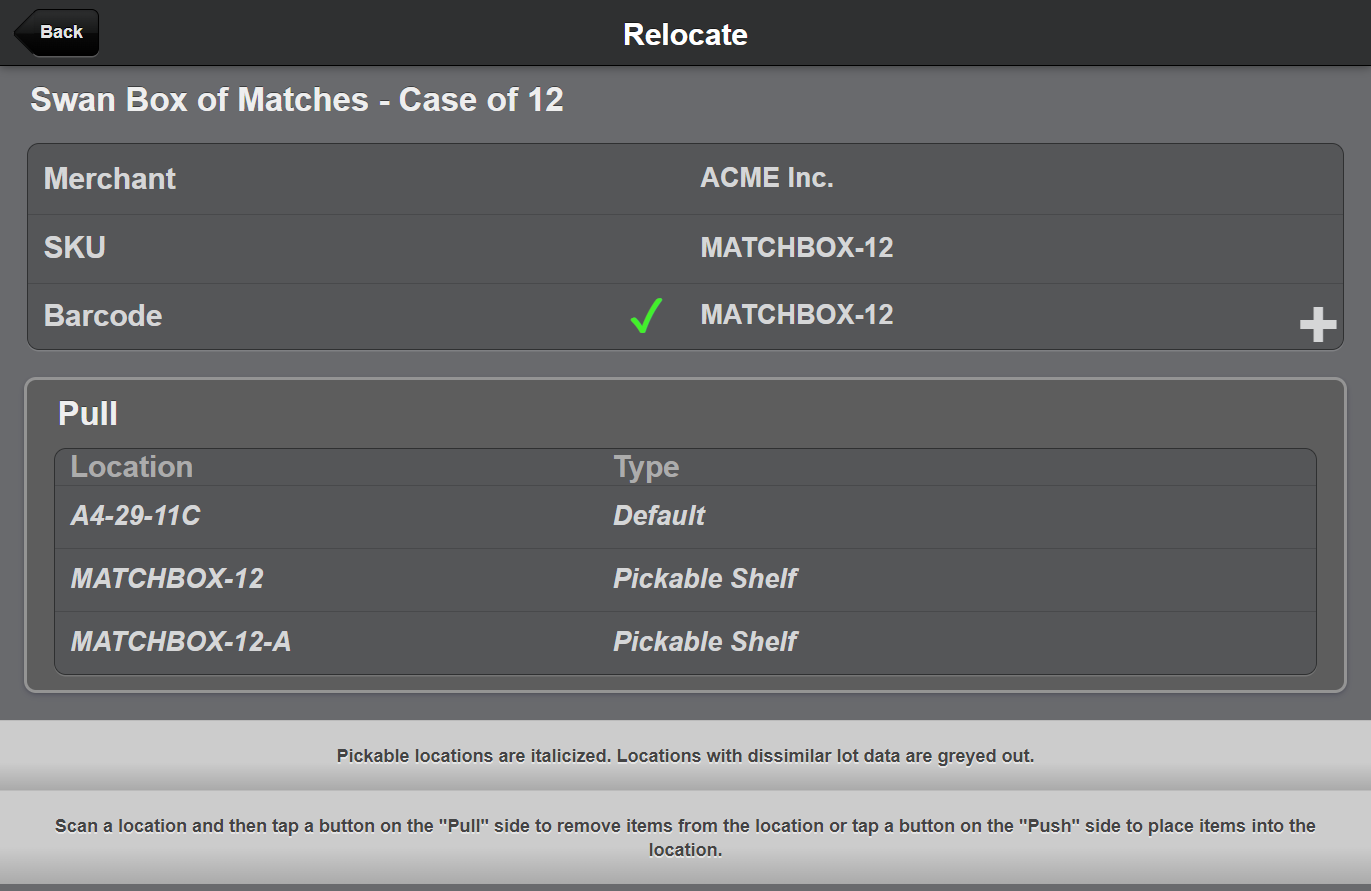
- If you scanned a location, scan the product barcode to confirm they match and you will see a green checkmark for confirmation. You will see information on the Product's Merchant, SKU, and Barcode and locations to which it is currently assigned.
- Either tap or scan the location you wish to pull from and the "Pull Count" and "Pull All" buttons will appear. The "Pull All" button skips the count and pulls the full on-hand amount from the location.
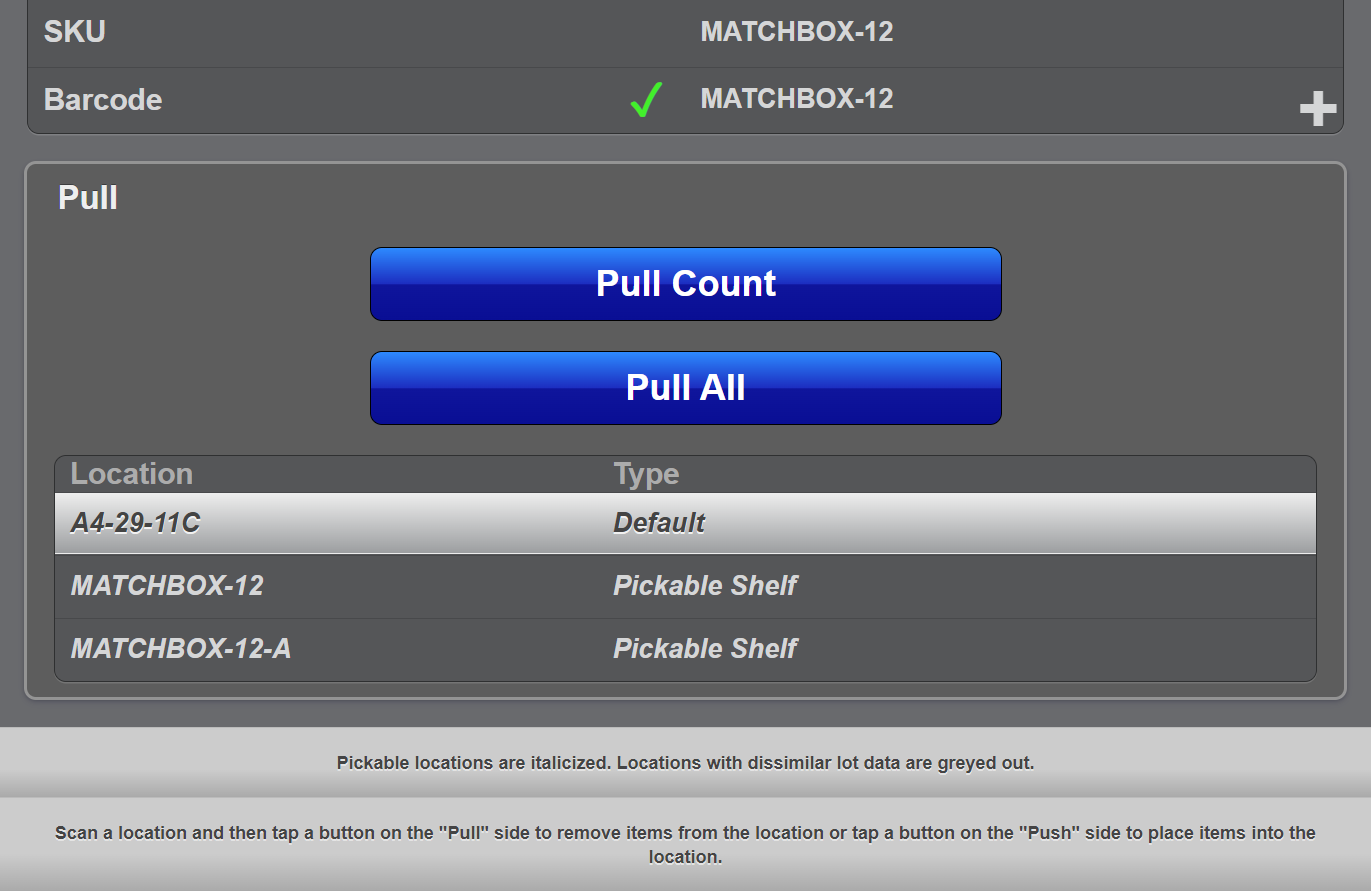
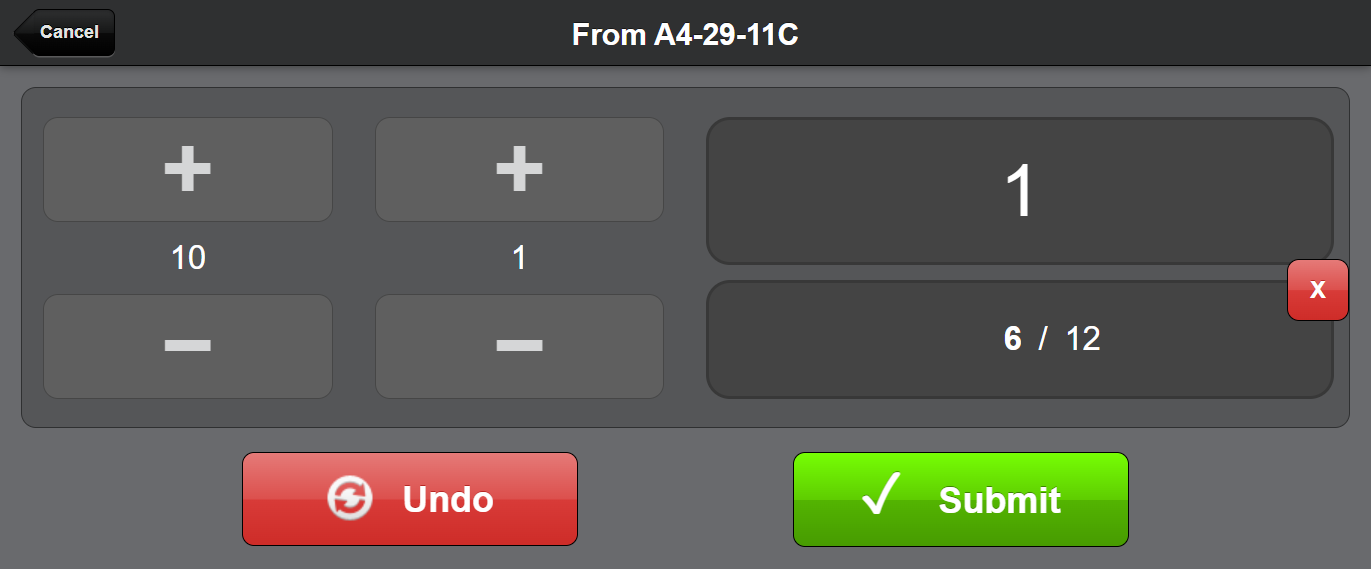
- Tap Pull All to skip counting and pull the full amount present or tap Pull Count to use the counter to specify the amount to be pulled. The amount will be verified so you cannot pull more than is present but you may pull less. You may also pull fractions of a product if it is part of a Bill of Materials which is convertable to another SKU, in this example we will pull 1 full case and 6 units.
After the first pull, the Relocation is created and you are returned to the Relocation page which shows the products and the quantities you have pulled.

How to "Push" Inventory
After you have "pulled" some inventory using the steps above you are ready to "push" the inventory back into a properly labeled location.
- Navigate to the Relocation you wish to push from and do one of the following:
- Scan a product barcode and then the location you wish to push to.
- Tap a product and then the location you wish to push to. You will need to scan the barcode to confirm it before you can proceed (confirmation indicated by the green checkmark).
- Scan the location barcode you wish to push to or tap a location in the "Pull" section. You will need to scan the product barcode to confirm it before you can proceed (confirmation indicated by the green checkmark).
- You will now see in the Push section buttons for "Push Count" and "Push All" and the quantity that remains to be pushed and the location you have selected, and a green checkmark beside the Barcode if you have confirmed the product barcode with a scan.
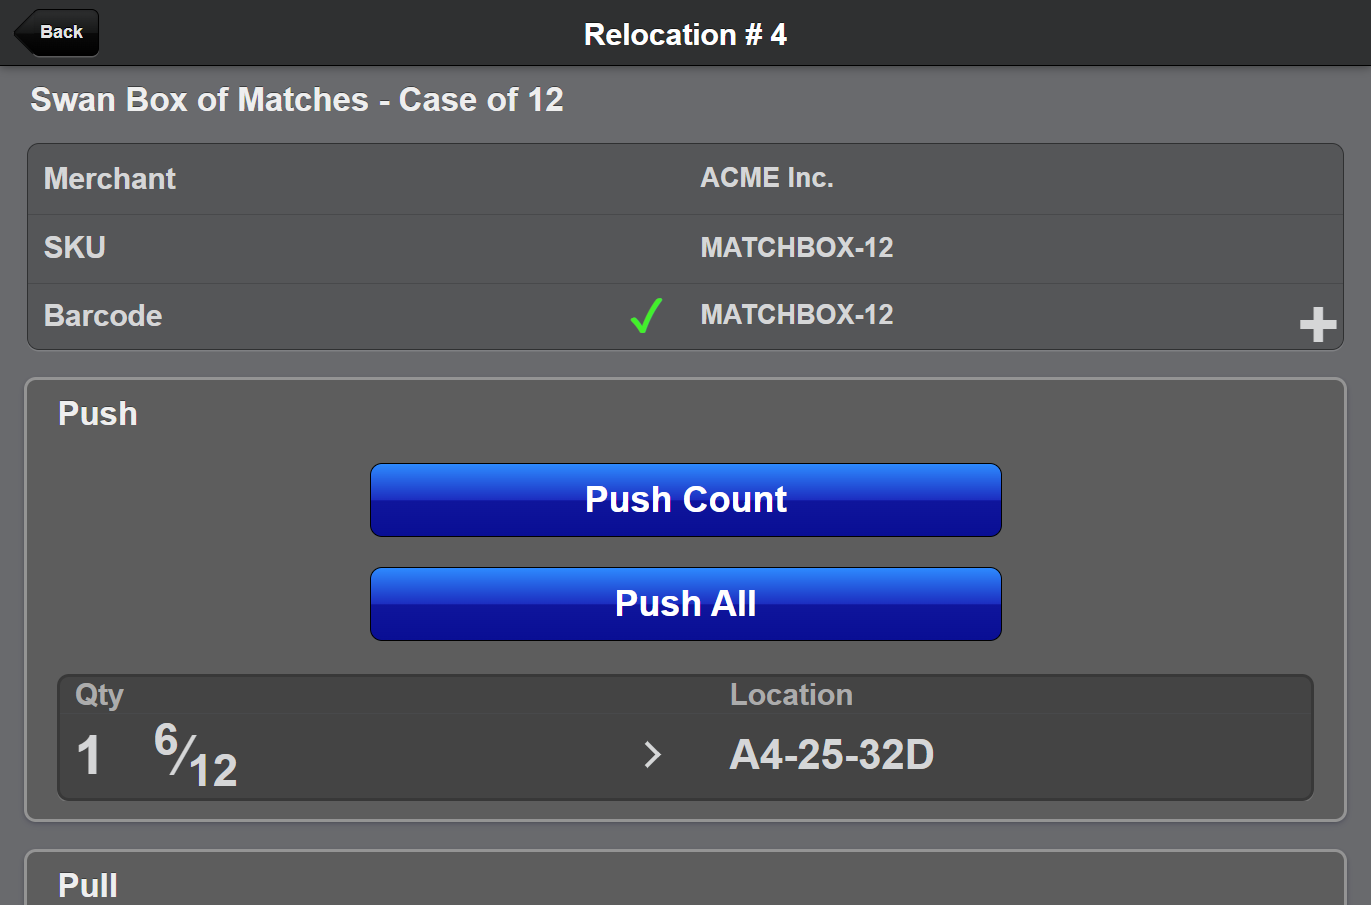
- Tap Push Count to specify an amount or tap Push All to push all inventory indicated to the selected Location.
- If the product has Lot/Expirations Tracking and is missing required information you will be given an opportunity to enter it now.
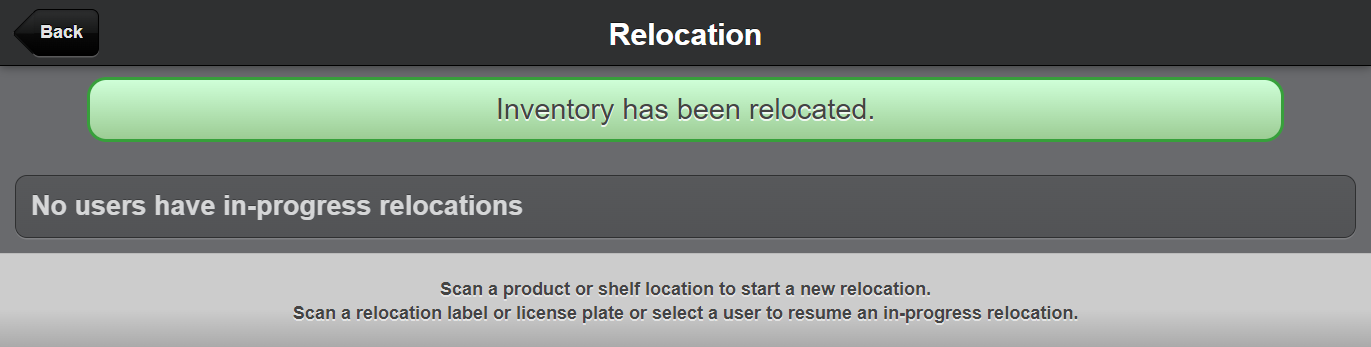
If there is no inventory remaining on the Relocation, it will be updated to Complete status and will no longer appear in the Relocation list. If there is inventory remaining you may continue to pull or push with the same Relocation until it is empty.
Resume a Relocation
In some cases you may not want to complete the entire Relocation process all at once. For example:
- You designate different users to do the pulling and pushing
- You need to put a Relocation on hold and complete it later
- You need to Trasnfer it from one warehouse to another
In these cases you will need to "resume" the Relocation. Any user with Relocation permissions can resume a Relocation started by another user in the same warehouse.
From the Scanner menu, tap the Relocation button.
- Navigate to an existing Relocation in one of three ways:
- Tap a User in the list and then tap a Relocation in the user's list. If there are any Active or Idle Relocations in your current warehouse, the users they belong to will be listed on the main Relocation page with a number indicating how many Active or Idle Relocations are currently assigned to each user. If you have any Active or Idle Relocations, your name will always be listed at the top for easy navigation.
- Scan a Relocation label barcode. These can be printed from the Relocation page in the Admin UI or from the Scanner UI by tapping Print Labels.

- Scan a License Plate that is assigned to a Relocation. These can be assigned from the Scanner UI by tapping Associate with License Plate and then scanning the License Plate barcode.
- Tap a User in the list and then tap a Relocation in the user's list. If there are any Active or Idle Relocations in your current warehouse, the users they belong to will be listed on the main Relocation page with a number indicating how many Active or Idle Relocations are currently assigned to each user. If you have any Active or Idle Relocations, your name will always be listed at the top for easy navigation.
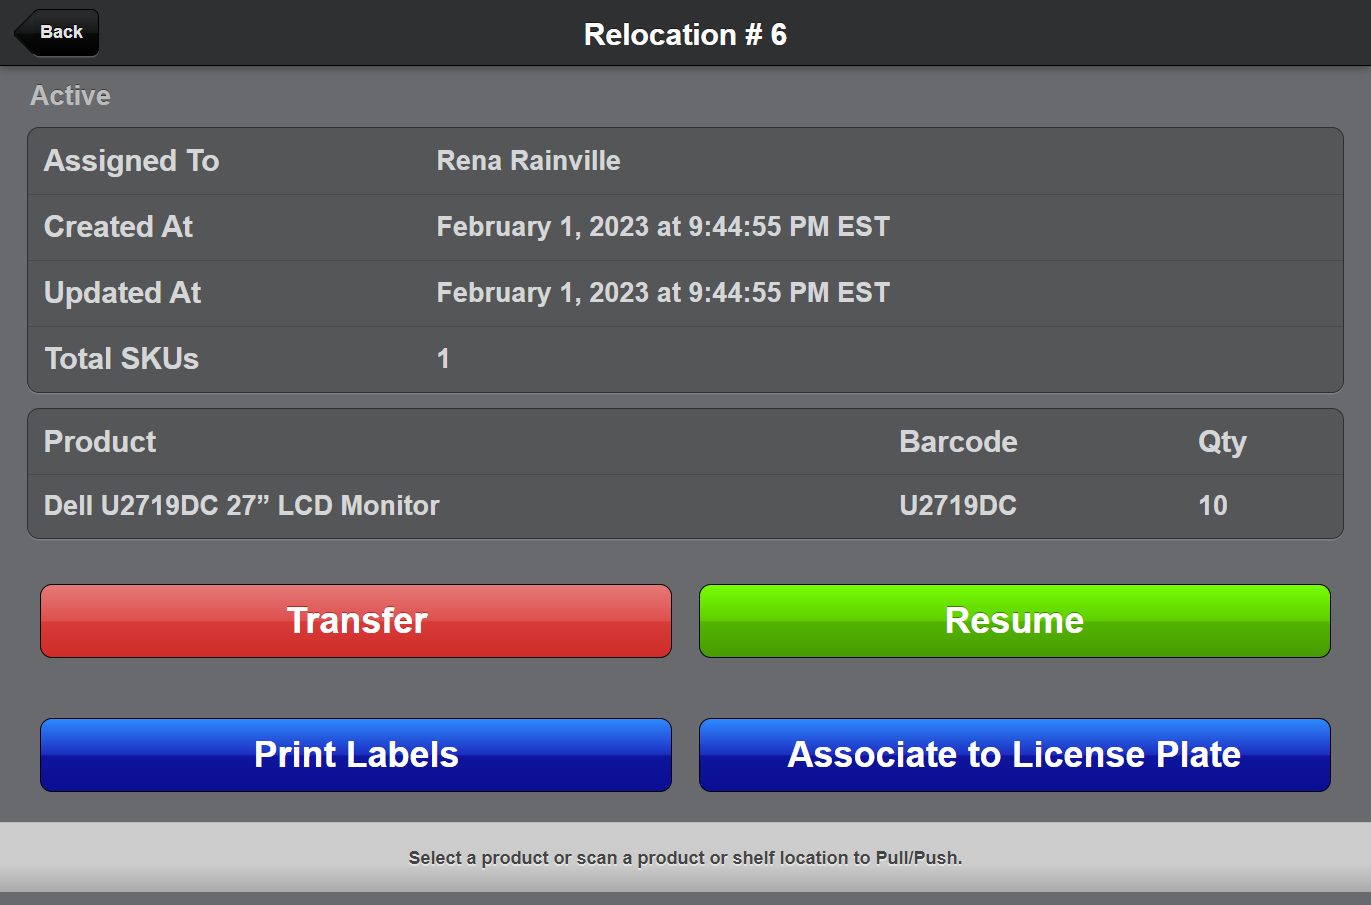
- If the Relocation is not already assigned to yourself, tap Resume to assign it to yourself.
You may now proceed to Pull or Push inventory for the given Relocation.
Idle Relocations
To help you avoid "losing" relocations that were never completed, ShipStream tracks the last time a Relocation was updated, yielding an "Idle Time". If the amount of idle time of a Relocation exceeds the configured "Idle Time Threshold" number of minutes (see System > Configuration > Warehouse > Operations > Relocation > Idle Time Threshold), the status will be changed from Active to Idle. Resuming a Relocation will bring it back to Active.
Voiding Relocations
Voiding a relocation effectively wipes away any remaining inventory on the Relocation so normally there should be no reason to do this. However, if you need to clean up old Relocations that were for some reason or another abandoned, and the physical inventory that they represent is no longer present you can click Void or use the Void mass action. This effectively results in a negative adjustment and changes the Relocation status to Void.
SKU Conversions
The Relocation feature may also be used to quickly convert inventory from one SKU into inventory of another SKU that is interchangeable. The quantity of the "each" units must be contained in the suffix of the SKU and all interchangeable products must share the same "base" SKU to use this feature. For example, "MATCHBOX-1" would be considered singles and "MATCHBOX-12" would be considered a twelve-pack which are inherently the same product, but in different quantities.
- Pull some inventory using the steps describe above.
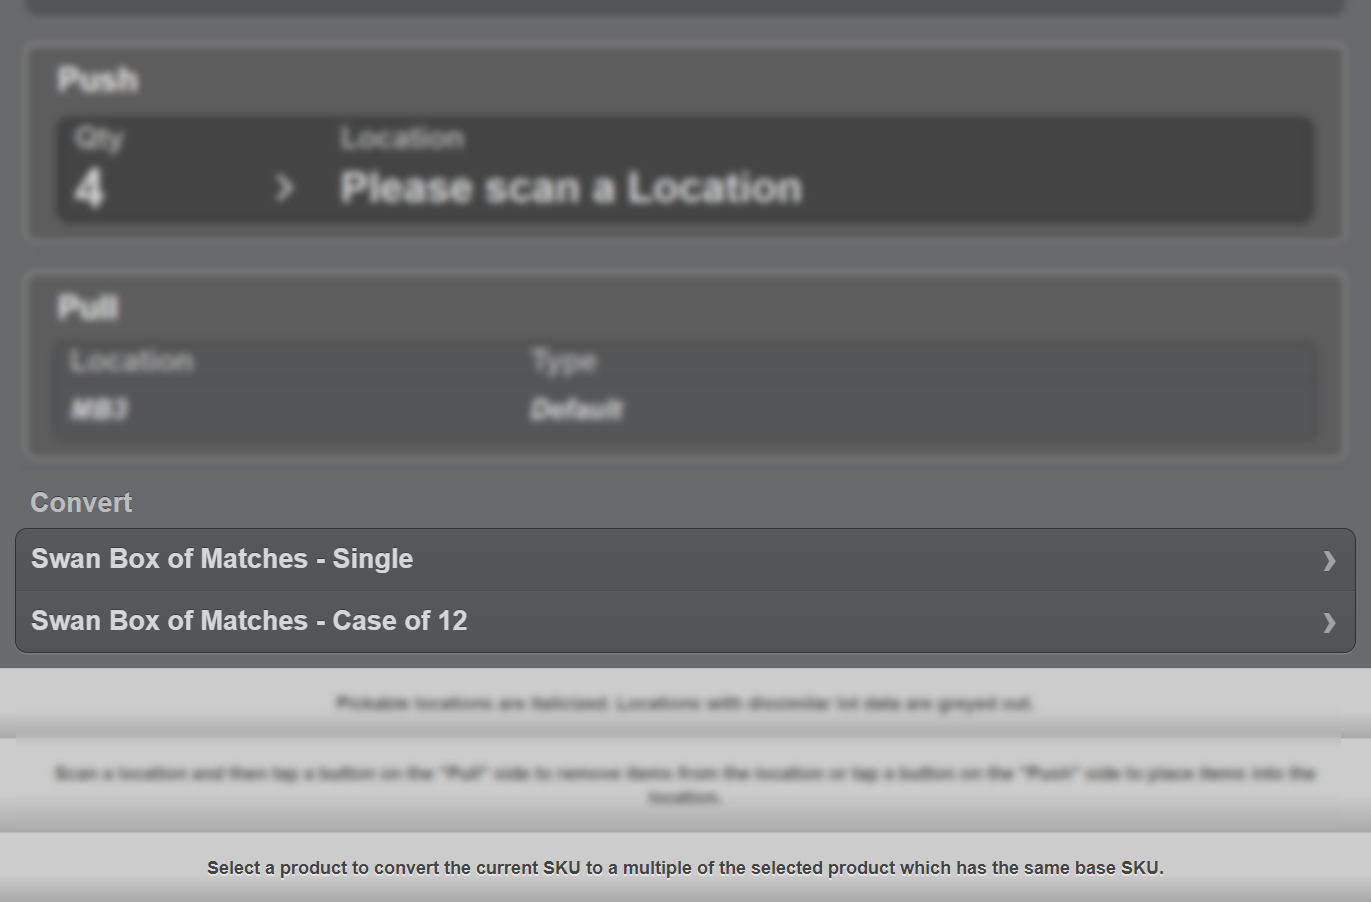
- Scan the product barcode or tap the product you wish to convert to load the Pull/Push page and scroll to the bottom.
- Tap the product you wish to convert To to load the Convert page.
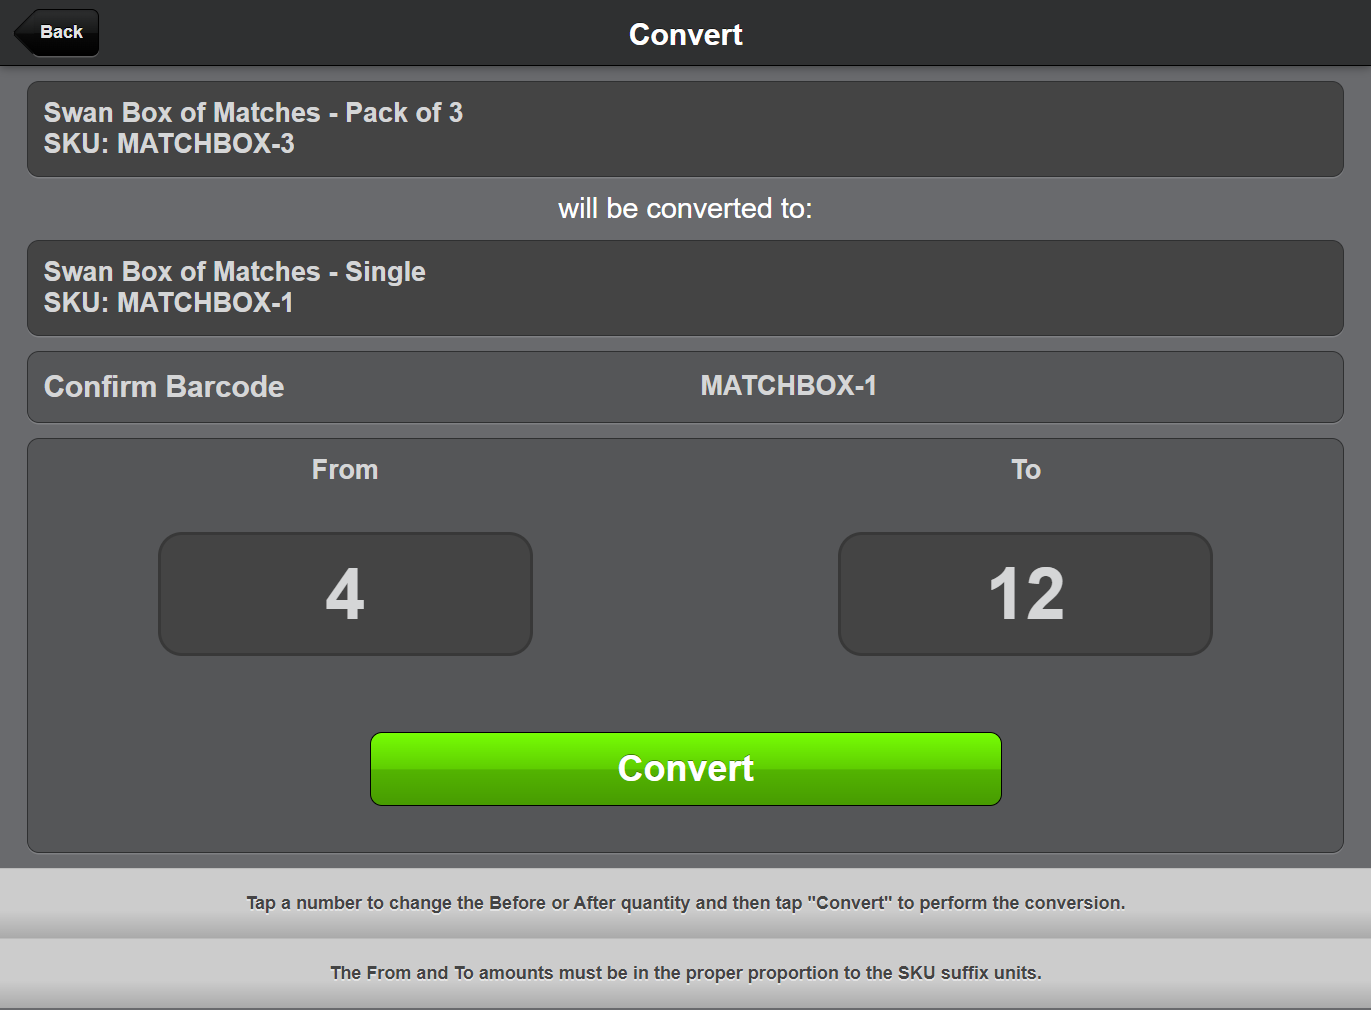
- Scan the barcode of the To product to confirm you are converting the correct product.
- The From and To amounts are pre-populated with the largest amount that can be converted but you can tap the numbers below either From or To to choose a different amount to be converted. In this example we are converting 4 units of MATCHBOX-3 into 12 units of MATCHBOX-1.
- Tap Convert to complete the SKU conversion.
- Follow the instructions above to Push the converted inventory to a shelf location so that it may become pickable.
Warehouse Transfers
If you have multiple warehouses and need to transfer inventory from one warehouse to another you can use the Relocation Transfer feature to accomplish this without making tedious stock adjustments.
In a nutshell, this feature allows you to pull any amount of inventory out of one or more locations in one warehouse, transfer the Relocation to another warehouse with one click, then push the same inventory into one or more locations at the new warehouse.
- Start a new Relocation by performing one or more pulls (see How to "Pull" Inventory section above) or navigate to an existing relocation (see Resume a Relocation section above).
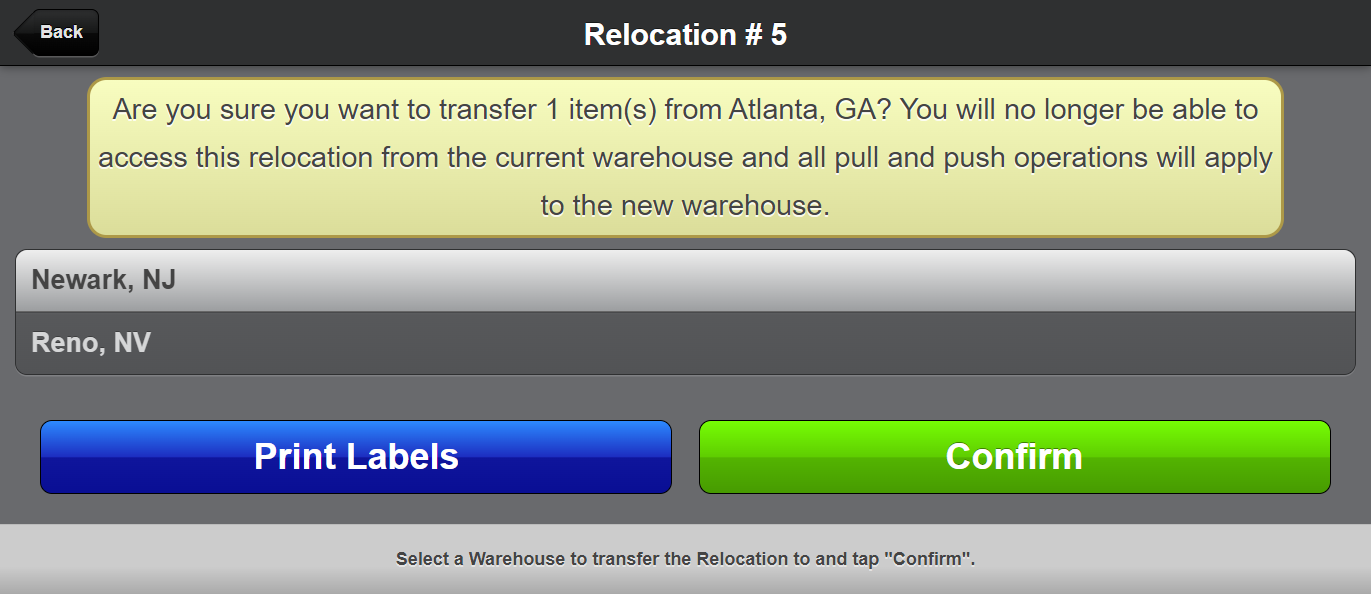
- Tap Transfer on the Relocation page.Before you complete the transfer, it is recommended but not strictly required to associate the Relocation to a License Plate or tap Print Labels to create a barcoded label that can remain physically with the inventory while it is being transferred. The receiving warehouse will then be able to scan the barcode to resume the Relocation when it is received.
- Tap a destination warehouse on the list and then tap Confirm. You have another opportunity to Print Labels on this page before the transfer takes place.
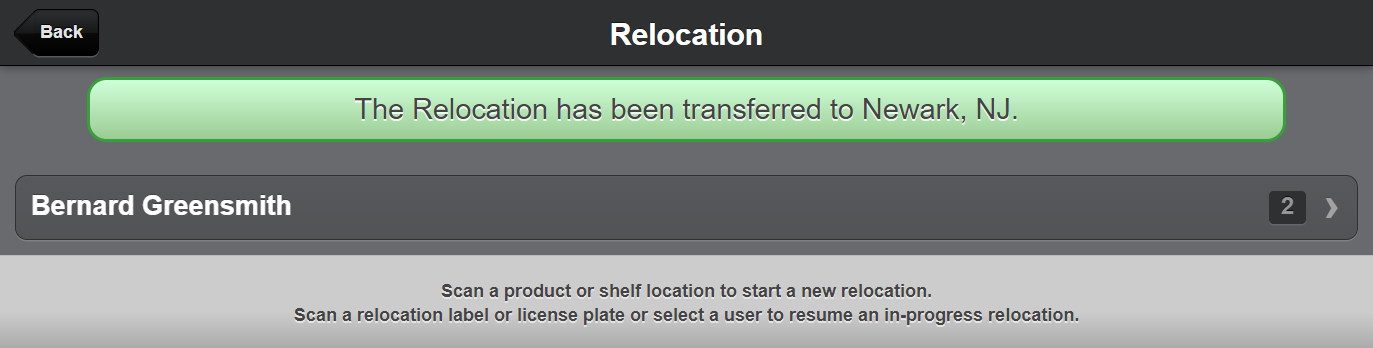
- That's it! The Relocation will no longer be accessible in the current warehouse and can now be resumed in the destination warehouse.
How did we do?
Time Tracking for Staff
Import Locations, Lots and Inventory