Shopify Public and Custom Apps
ShipStream's Shopify integration supports authentication both with and without OAuth. OAuth is an authentication workflow whereby the user can authorize an application by approving an app as an authenticated Shopify user and without sharing their login credentials versus directly copying and pasting an API key or access token.
Which should I choose?
Please see Types of apps for a more detailed description of the differences between the types of Shopify apps and the capabilities and requirements.
Public apps are best for 3PLs who want to offer an app to their customers on the Shopify App Store, but for merchants that have no need for a public Shopify app, it is recommended to use a Custom app. Public apps require the "Use OAuth" setting in ShipStream to be Yes and approval from Shopify and generally carry a significant burden for both initial setup and maintenance.
Custom apps do not require Shopify approval and should have "No" selected for "Use OAuth" unless you are installing it with a "Single-merchant install link".
Custom App Setup (Not using OAuth)
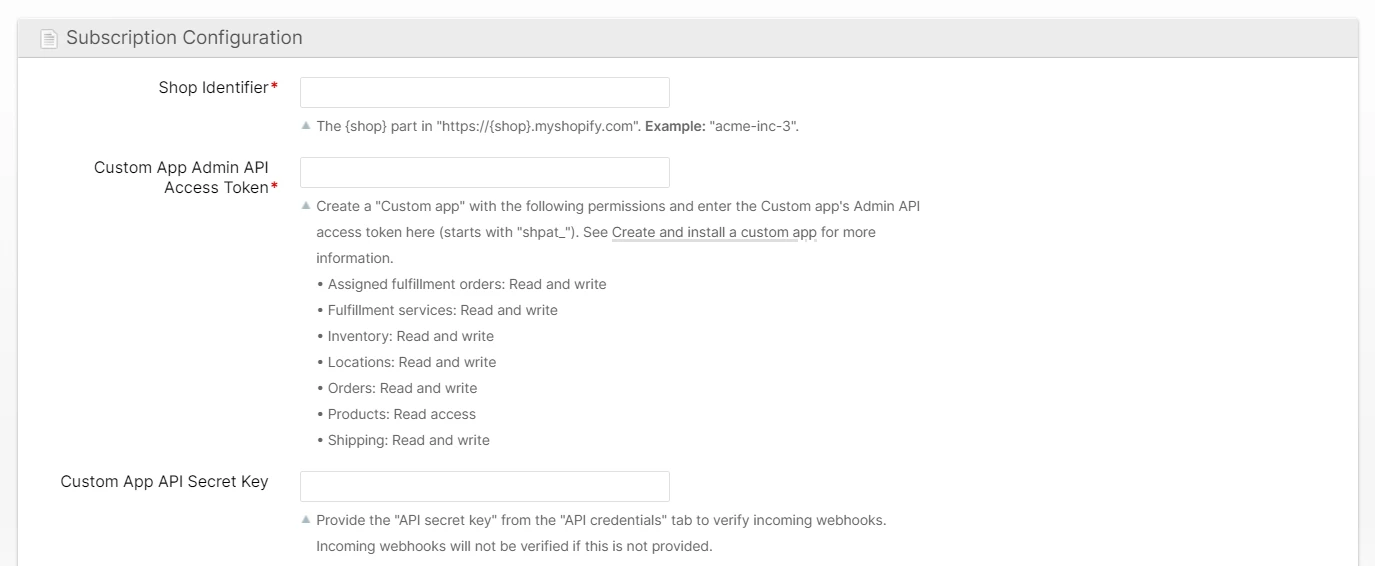
If you do not require a Public app, you can add a Subscription for the Shopify plugin in ShipStream and simply obtain an Admin API Access Token and paste this into the Subscription's Plugin Configuration section.
Obtaining a Custom App Access Token
To obtain a custom app access token you will be creating a "Custom app" and then installing the app in your store to generate an "Access token".
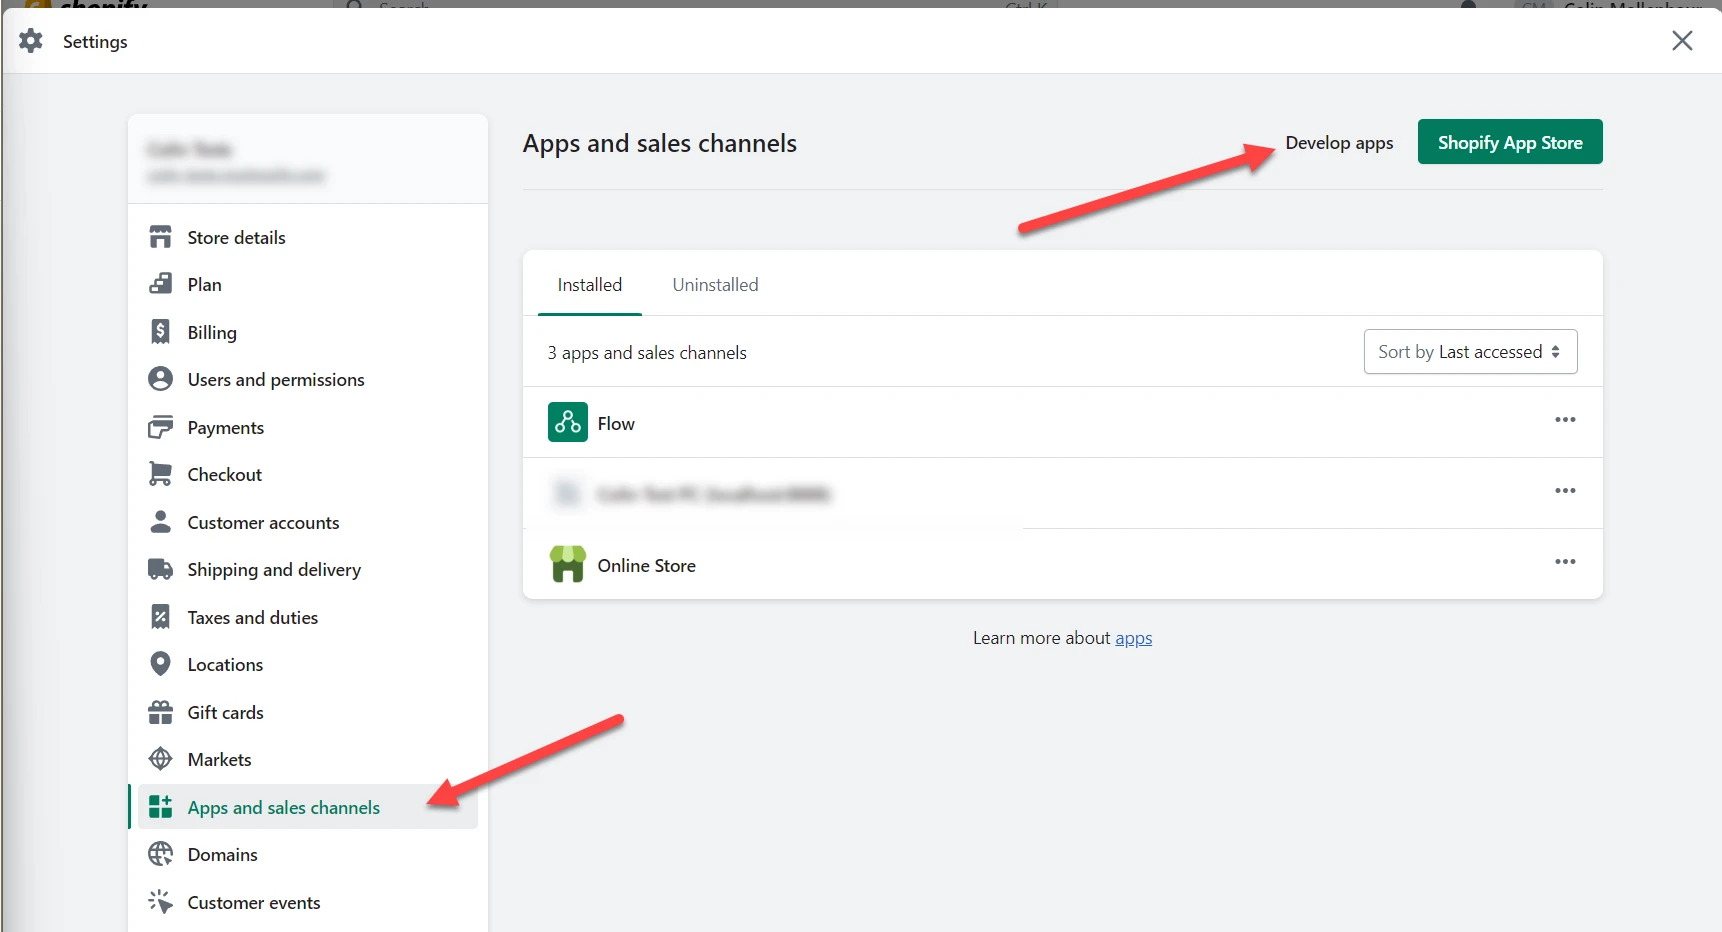
- Go to your Shopify store's admin panel and click Settings > Apps and sales channels and then Develop apps.
- Click Enable custom app development and read the terms carefully and accept to continue.
- Click Create an app to create your custom app for use with ShipStream and provide an App name (e.g. "ShipStream Custom") and choose the primary contact.
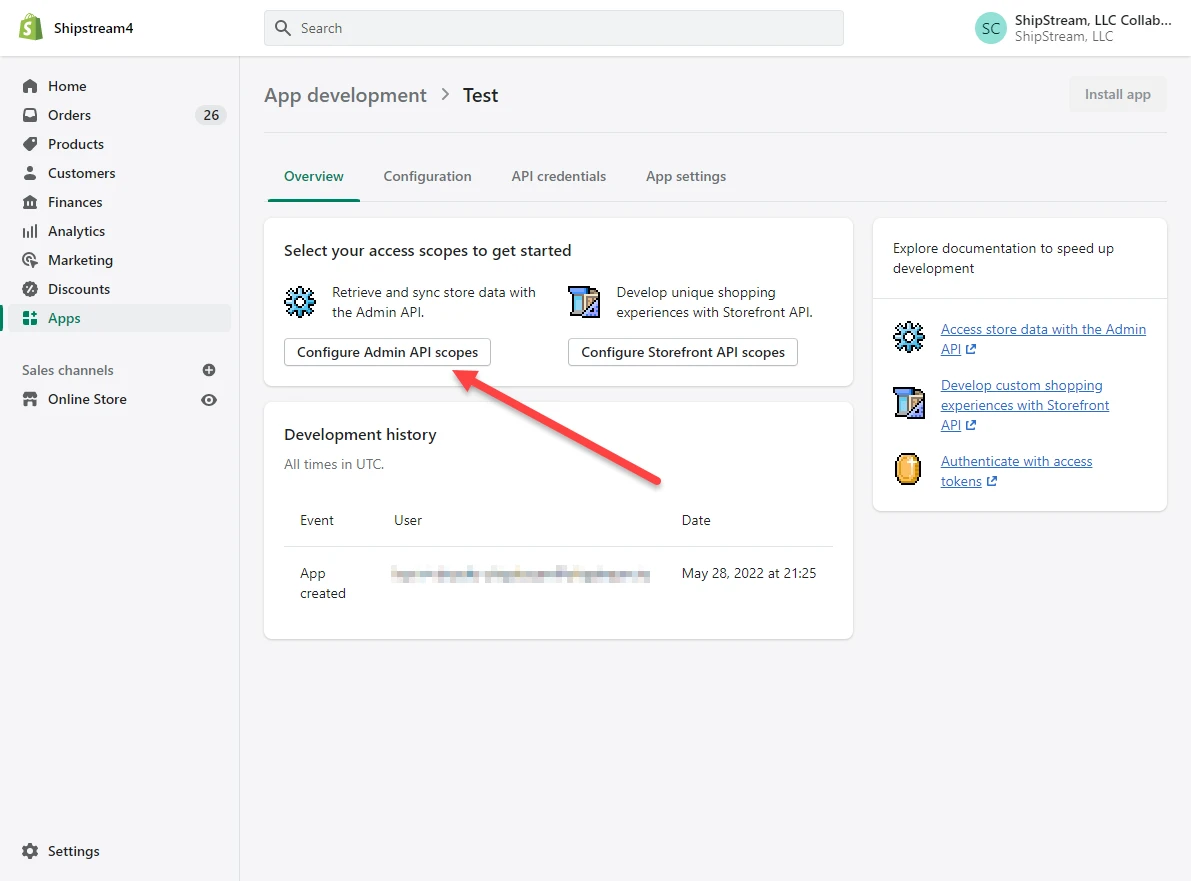
Set all of the appropriate permissions for the app by clicking "Configure Admin API scopes".
 The permissions required by the Shopify Plugin are:
- Assigned fulfillment orders: Read and write
- Fulfillment services: Read and write
- Inventory: Read and write
- Locations: Read and write
- Orders: Read and write
- Products: Read access
- Shipping: Read and write
The Storefront API access is not needed and can be left unconfigured.
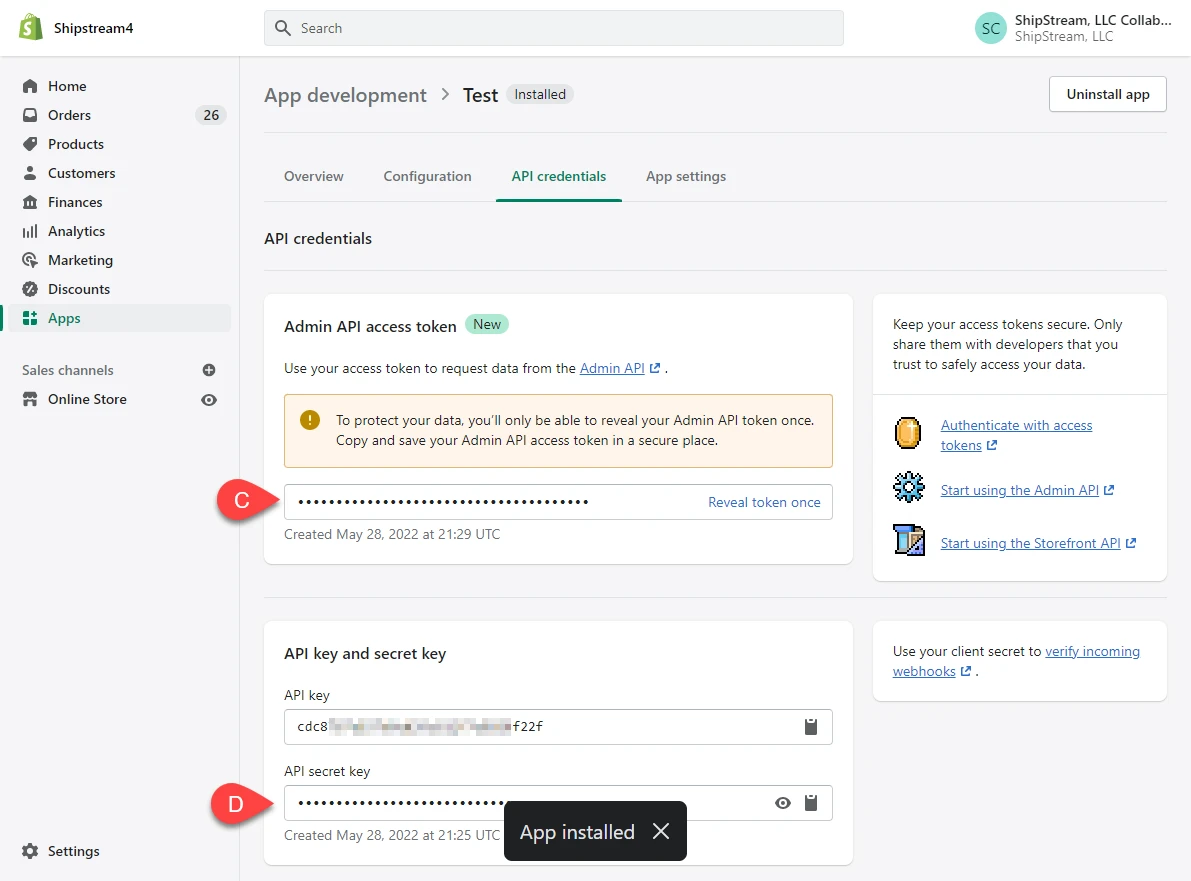
- After clicking Save, the API Key and API Secret key will be generated by Shopify but not the Access Token yet. Go to the API credentials tab and click Install app and confirm.
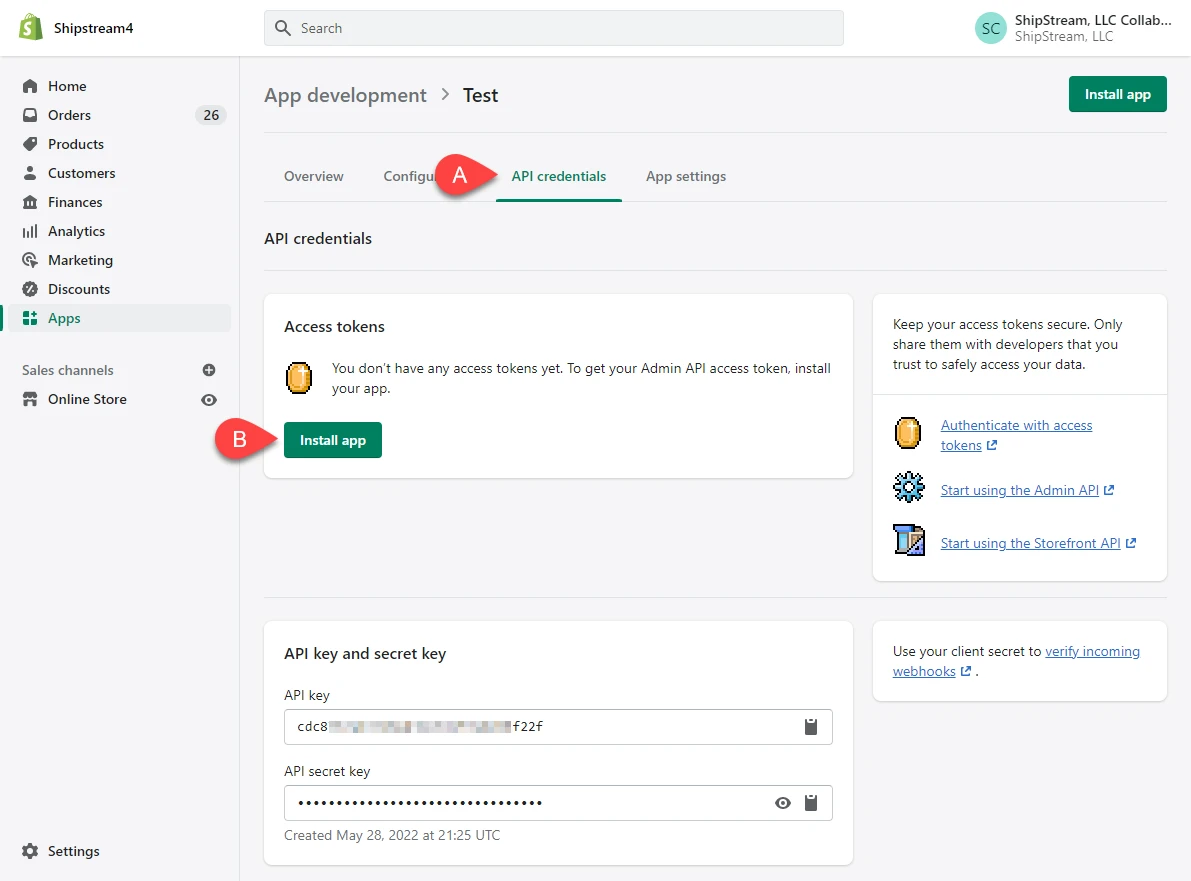
- After confirming, the Admin API access token will be generated. Click Reveal token once to reveal the token and copy it to your clipboard.
- Paste this access token (C) into the ShipStream "Custom App Access Token" field on the Subscription page in ShipStream and copy the API secret key (D) into the "Custom App Secret Key" field in ShipStream.
Public App Setup (Using OAuth)
To create a Public app you must first sign up as a Shopify Partner for your company and log in.
- In your Shopify Partners dashboard click Apps and then Create app.
- Click Create app manually and provide your App name.
- In the ShipStream configuration under System > Configuration > General > Integrations > Shopify Plugin, choose Use OAuth: Yes and copy and paste the Client ID and Client Secret from the Shopify Client credentials page and click Save Config.
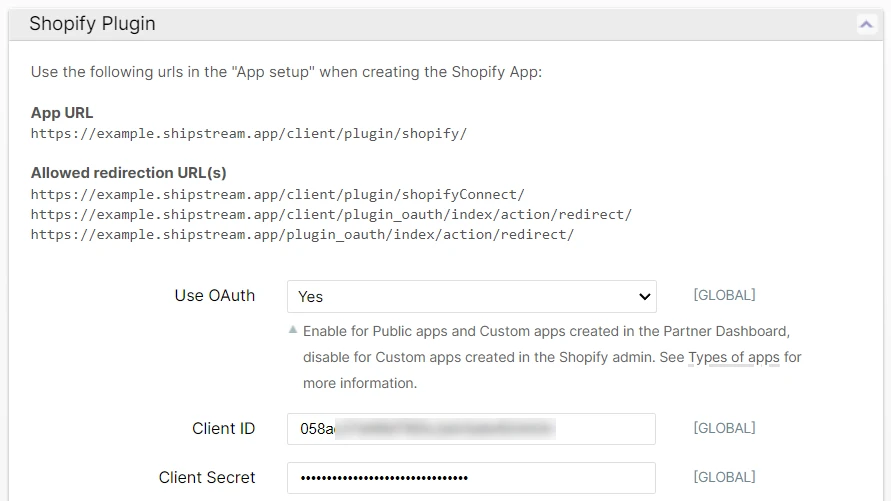
- In Shopify, while on the page for your new app in the Shopify Partners site, click App setup and scroll to URLs. Copy and paste the urls from the ShipStream configuration pictured above into the App URL and Allowed redirection URL(s) fields in the Shopify Partners site and click Save.
- On the Shoipify Partners App setup page, scroll down to Protected customer data access and click Request accessand submit the form to request access to protected customer data which is required for "Store management" reasons (to create shipping labels with the customer's name and address - and for international shipments the email and phone may be required).
Your Shopify app must be approved by Shopify before it can be used for more than one store so be sure to account for 1-2 weeks for the approval to be completed.
Once approved, your Shopify users will be able to connect their stores by visiting the app listing to install your app, or by clicking the Connect button on ShipStream's Edit Subscription page.