Getting Started
Interface Basics
Printers and Scales
Shipping
Order Processing
Order Allocation
Order Processing Loop
Packing Solutions
Backorders
Ready to Ship
"Unable to Process" Order status
Address Validation and Classification
Packaging Features
Orders
Custom Fields for Orders
Reference Numbers
Other Shipping Options
Packing Instructions
Shipping Accounts
External Shipping Methods
Third Party Billing
Manifest Couriers
Packing Slip Design
Service Levels and Target Ship Dates
Outbound SSCC Barcodes
International Shipping
Tracking Numbers for Offline Shipments
Serial Number Tracking
Custom Fields for Shipments
Receiving
Catalog
Bill of Materials/Work Orders
Bill of Materials
Bill of Materials - Quantity-types
Work Orders
Import Bill of Materials
Virtual Inventory
Regulations
Products
Product Attributes
Lots/Expirations Tracking
Product Velocity
Import Products
Operations
Warehouse
Picking Classes
Picking Batches
Bulk Fulfill Orders
Put-Aways
Manifests (Loading)
License Plates
Time Tracking for Administrators
Time Tracking for Staff
Relocations
Import Locations, Lots and Inventory
Assets
Batching Presets
Rating
Rate Shopping
Rating Maps
Rate Groups and Plans
Fee Schedules and Adjustments
Virtual Shipping Methods
System
Configuration
Merchants and Brands
Warehouses
User Management
User Roles
User Groups
Login via Badge
Protected Customer Data
Enumerations
Technical Contact
Integrations
Shopify
Integrations Overview
Amazon Merchant Fulfillment
Amazon Selling Partner
CartRover
EasyPost
eHub
External Shipping Method API
Freight Club
Magento 1 / OpenMage
Merchant API Users and Roles
SPS Commerce
ShipStream Plugin Fostering Program
Webhooks
Global Integrations
Magento 2 / Adobe Commerce
WooCommerce
UPS
Scripting
Scripting Basics
Before Create Order Scripts
Before Create Order scripts Cookbook
Preprocess Packing Solution Scripts
Ready to Ship Time Scripts
Picking Class Shipment Matching Scripts
FAQ
How-To: FedEx Production Key Certification
How-To: Brand-Specific Shipping Account
Pattern and Replacement RegEx
ShipStream's Subprocessors
ISO Alpha-2 Country Codes
Printer Troubleshooting
ShipStream Flow
Release Notes
ShipStream Releases
Version 2026.1
Version 2026.0
Version 2025.7
Version 2025.6
Version 2025.5
Version 2025.4
Version 2025.3
Version 2025.2
Version 2025.1
Applicable Quantity Migration Guide
Version 2025.0
Revamped Delivery Processing
Version 2024.6
Version 2024.5
Version 2024.4
Version 2024.3
Version 2024.2
Version 2024.1
Version 2024.0
Version 2023.2
Version 2023.1
Version 2023.0
Package Tracking API Migration Guide (2023.0)
Version 2022.2
Version 2022.1
Version 2022.0
Version 2021.6
Version 2021.5
Version 2021.4
Version 2021.3
Version 2021.2
Version 2021.1
Version 2021.0
Version 2020.2
Version 2020.1
Version 2020.0
Version 2019.9
Version 2019.8.1
Version 2019.8
Version 2019.7
Version 2019.6
Version 2019.5
Device Hub Client Updates
Table of Contents
- All Categories
- Interface Basics
- Grid View
Grid View
This article will help you make use of the Grid View's tools and features.
The Grid View allows for some key features that will make understanding your data much easier:
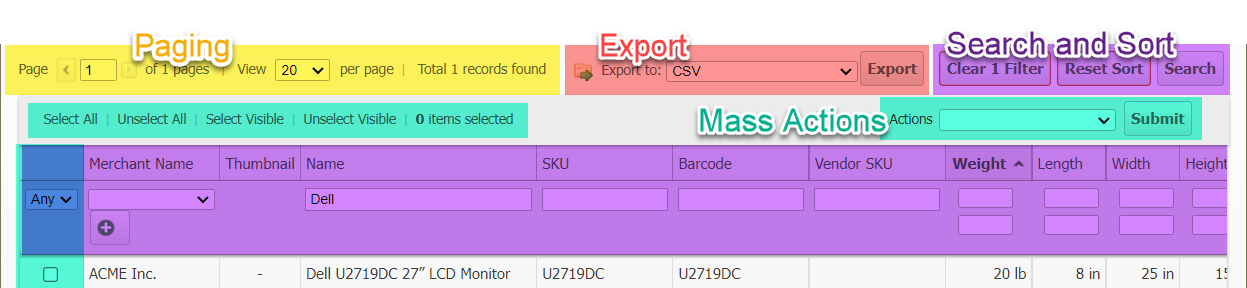
Basic Filters
Below almost all column headers are fields where the user can set a filter to view only specified records. This may be a drop-down menu of pre-defined criteria, a text input box, or a date selector. When a filter has been entered, the user must hit enter or click "Search" before it is applied to the Grid View.
Text Columns
Text columns are typically case-insensitive and can be filtered with a simple text match. See Advanced Grid Filtering for a guide to using the many advanced search capabilities that text fields support.
query*). To search anywhere in a text field use a wildcard before and after your query (e.g. *query*).Options Columns
Columns which use a select box for filtering also support selecting multiple options by clicking the + button below the field. Hold "Ctrl" while selecting options to select multiple options at once or use "Shift" to select a range of options.
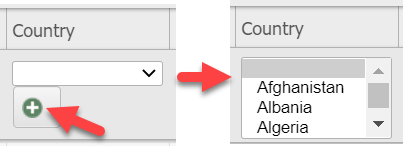
Click "Reset" to clear all search filters and return the grid to the default state.
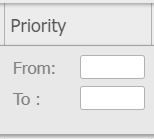
Date/Time Columns
Timestamp columns can be filtered with a From and To date, but you can also add a time component to your filter by clicking on the "From" and "To" labels:
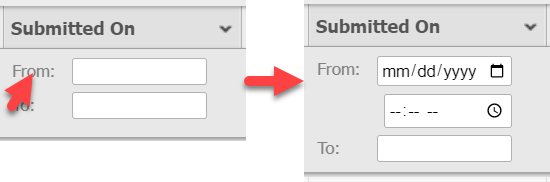
If a time component is not used the filter condition will be interpreted as:
- From: "greater than or equal to the From date at 00:00:00"
- To: "less than or equal to the To date at 23:59:59"
Numeric Columns
Numeric columns can be filtered with a range which is inclusive for both the From and To values.
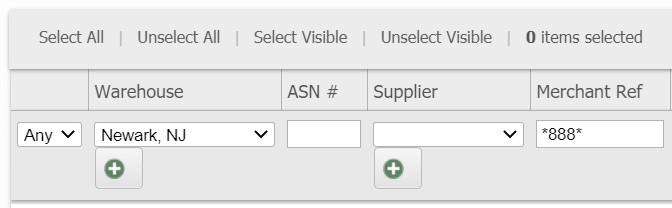
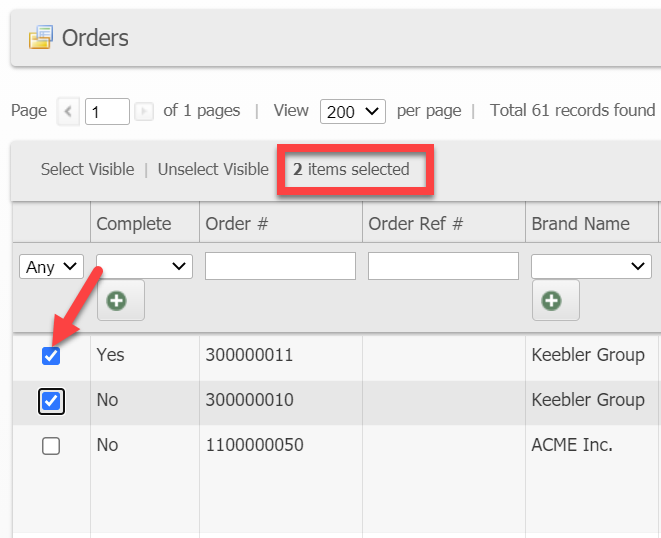
Mass Actions
You can check a box on a mass-action enabled grid and then change the column filter to Any, Yes, or No where "Yes" means the checkbox is checked and "No" means it is not checked.
This allows you to, for example, check all rows for a large search excluding only certain rows:
- Search for a given criteria
- Check the boxes of the records you want to exclude
- Choose "No" in the checkbox column and update your search
- Click Select All - the items that were checked in step 2 will not be included in the mass action
Exporting Data
Most grids allow for the data to be exported to CSV or Excel XML. To download an export file, click the dropdown next to the export button, choose a data set and file type, and click Export.

Mass Actions
Mass actions allow you to affect any number of selected items in a Grid View.
- To use this feature, select the items using the check boxes on the left-most column in a Grid View or use Select All or Select Visible to choose one or more items to which your action will apply.
- Then click the menu next to “Actions” on the right side of the Grid View to see the action that can be applied and choose the appropriate action. Some actions may have additional fields that appear when chosen.
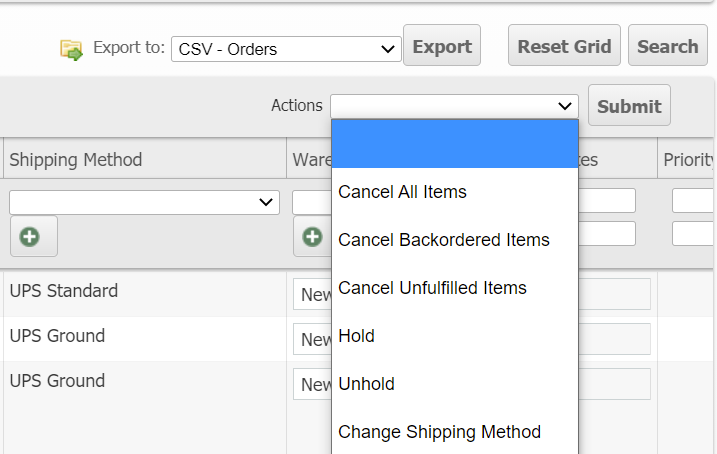
- After selecting an Action click Submit.
How did we do?
Advanced Grid Filtering