Background Images
Users may wish to use an image as a reference or guide while designing the layout. The Background Image can be uploaded from the hard drive and positioned and sized as needed. It can not be selected by clicking the image in the layout, and must be selected from the Background Images menu.
This article explains how to:
- Add a Background Image
- Select a Background Image
- Resize the Background Image
- Auto-Scale the Background Image with the Scale Tool
- Show/Hide one or all Background Images
- Delete Background Images
- Adjust Background Image Layering
Add a Background Image
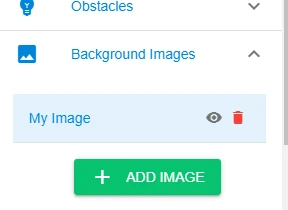
- Open the Background Images item from the left menu.
- Click Add Image.
- In the dialog window, enter a Name for the image to be displayed in the menu.
- Click the + sign in the "Upload Image" container.
- Choose an image from your computer and click Open
- The image thumbnail will appear in the container, and you can click the Upload button (up arrow in the cloud)
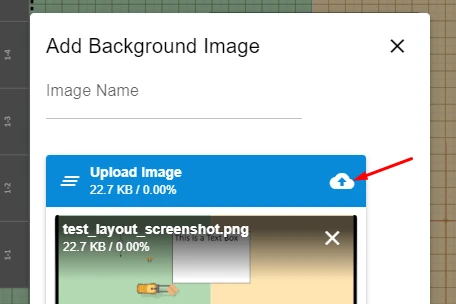
- Once the image is finished uploading, click Save
Selecting the Background Image
Background images cannot be selected using the conventional point-and-click method. Instead, you must click the name of the Background Image from the left side menu. This is to prevent users from accidentally dragging the image unintentionally.
Resizing and Rotating the Background Image
Images can be resized or rotated manually by first selecting an image from the menu then dragging the control points on the corners. The images can not be distorted and will always remain at the same aspect ratio.
Auto-Scale the Background Image
- Select the image and click Scale Tool in the right side menu.
- Enter the known distance between two points on the image in the Scale Tool Distance input.
- Click Scale Tool. This will allow for two points to be selected. The first marker is green, and the last marker is red.
- After clicking the second point to set the red marker, the image will automatically scale to a size that accommodates the chosen distance. From here, the user may wish to use the control points to further fine-tune the scale.
Auto-Rotate the Background Image
- Select the image and click Rotation Tool in the right side menu.
- Choose a desired orientation (Vertical or Horizontal) that you want to rotate two specified points on an image.
- Click two points on the image that you wish to make Vertical or Horizontal. This will show a triangular rotation indicator. The indicator shows a red solid line which is the final rotation of your two points.
Reset Background Image Rotation
To reset the image back to its original rotation, open the Rotation Tool and click the circular arrow in the lower left of the dialog box.

Show / Hide the Background Images
Users can show or hide individual Background Images by clicking the "eye" icon in the Background Images section of the left side menu. Additionally, all Background Images can be toggled under Settings.
Delete Background Images
Users can delete individual Background Images by clicking the "trash can" icon in the Background Images section of the left side menu or hitting Delete with the image selected.
Adjust Background Image Layering
Background Images can be moved on top or below each other by first Clicking the image in the left side menu to select it, then Drag it above or below another layer. Release the mouse and the layer is now set to the desired position. To see the layer change, deselect the image by clicking somewhere other than the image, or hitting the Escape key.