Operations
Put-Aways
A Put-Away represents inventory that needs to be put away or stored in your warehouse. Put-Aways are not created directly but rather originate from one of the following actions:
- Processing an ASN, RMA or Other Delivery
- Canceling an Order or reverting a Shipment that has already been picked
- Assembling items from a Work Order
You can find a grid listing all Put-Aways by navigating to Operations > Put-Aways.
Put-Aways will have one or more Associations. They may be associated to multiple entities of the same type (e.g. an ASN), but will never contain a mixture of types.
Statuses
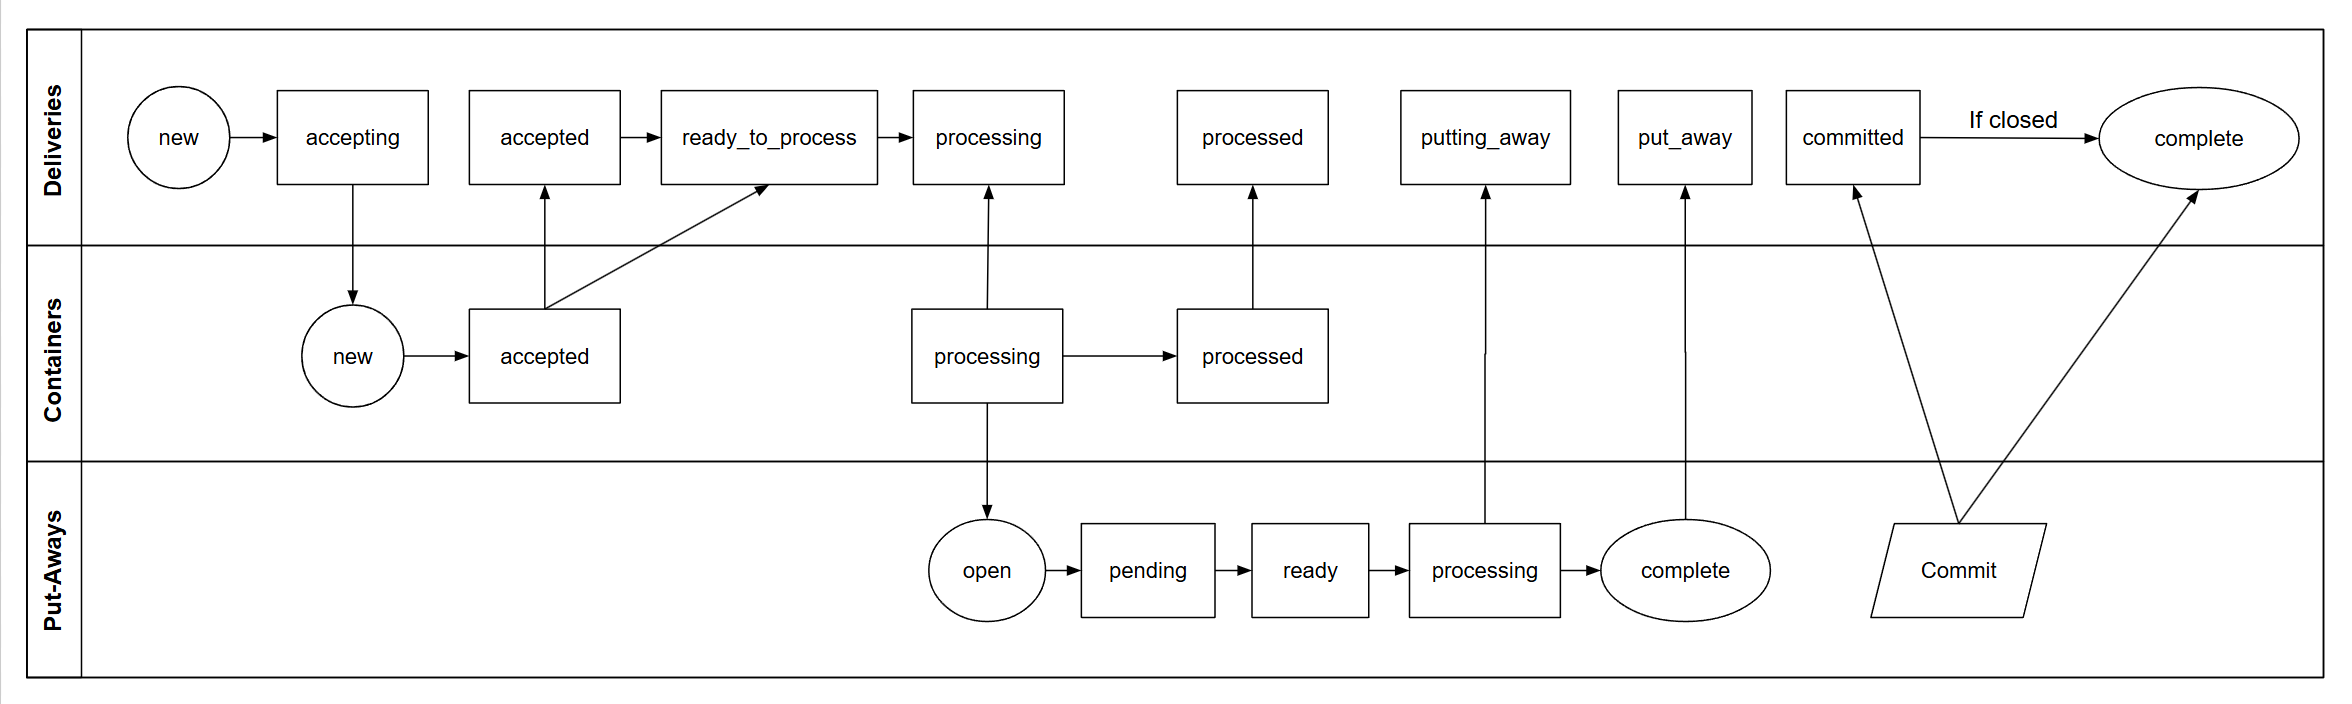
The statuses for a Put-Away are pretty linear and are as follows:
- Open - Items are still being added to the put-away from the associated entity
- Pending - One or more items are awaiting an approval action (e.g. an ASN shortage exception)
- Ready - No more items will be added, ready to begin the put-away process
- Processing - Processing is currently underway and there are still items that have not yet been put-away
- Complete - All items have been put-away
- Void - The put-away was voided (all unprocessed items have "disappeared")
A Put-Away that is Pending or Ready can be re-opened so that more items can be added by clicking Reopen on the Put-Away page.
Put-Aways directly impact the status of the ASNs, RMAs and Other Deliveries to which they are associated as depicted in the following diagram:
Admin UI
Navigate to the Put-Away page by:
scanning a barcode associated with the Put-Away
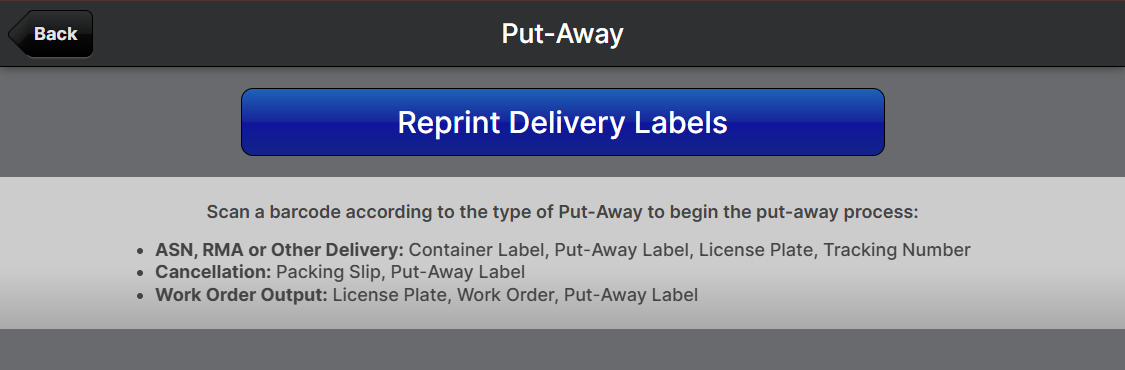
The types of labels that can be scanned include Container Labels, Put-Away Labels, License Plates, Packing Slips, and Tracking Numbers.- navigating to Operations > Put-Aways and using the grid to locate
- navigate to the delivery page (Receiving > ASN, RMA or Other Delivery) and then to the Put-Aways tab on the page of the delivery that you want to put-away, then click the header link titled Put-Away # X.
- If the Put-Away is not yet closed, click Close to advance it to Ready status. If there are unapproved Overage exceptions, these will need to be approved or rejected before the Put-Away can be closed.
- Click the Put-Away button on your chosen item row.
- Enter the Location and Quantity to put-away and click Submit. If the product has lot tracking enabled, you will also need to select the correct lot to be put-away.
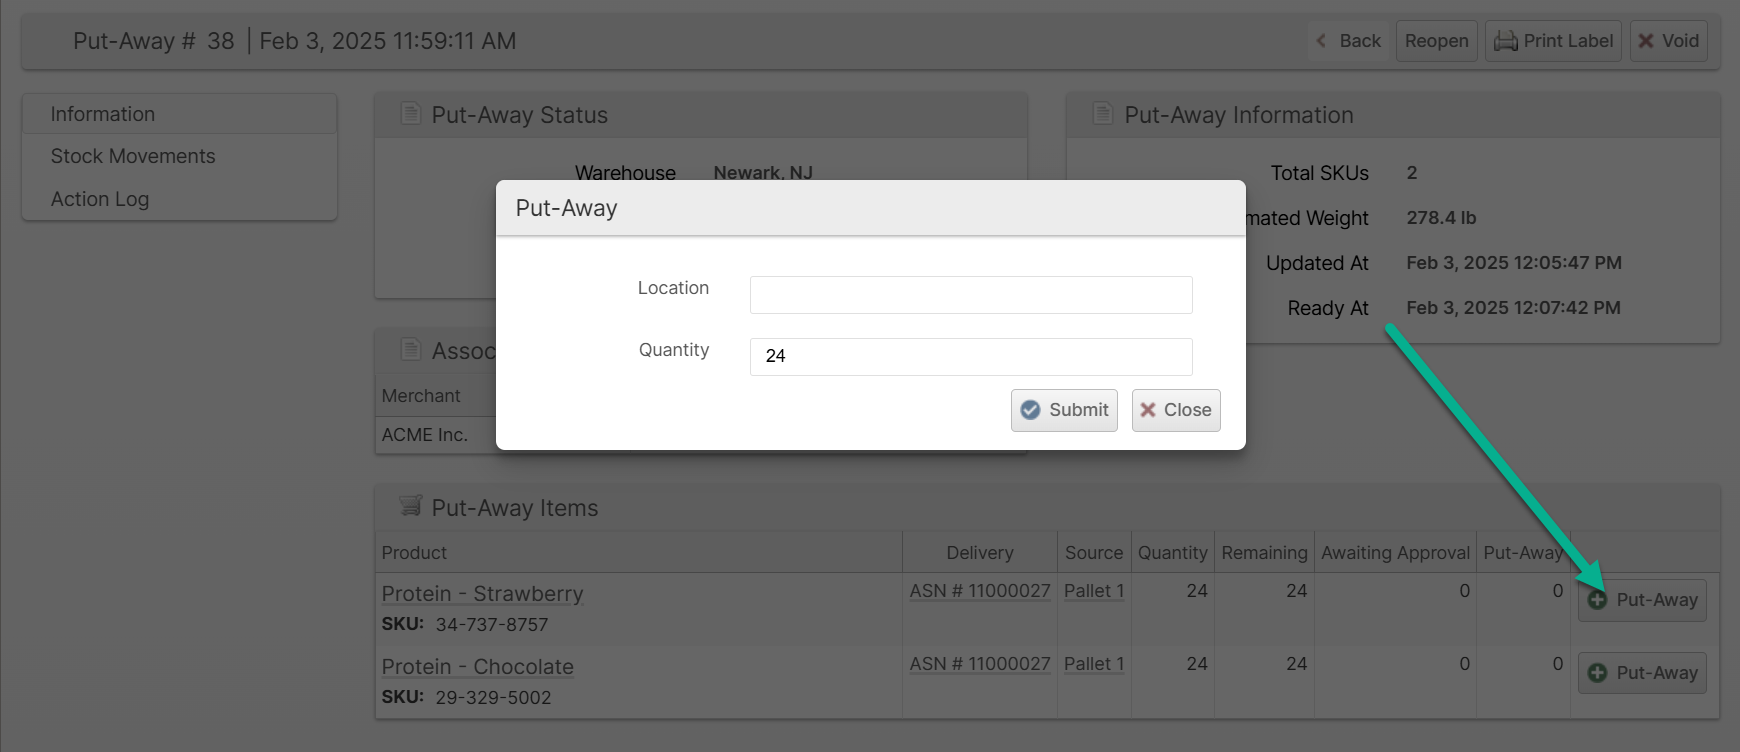
- Repeat until all items are processed.
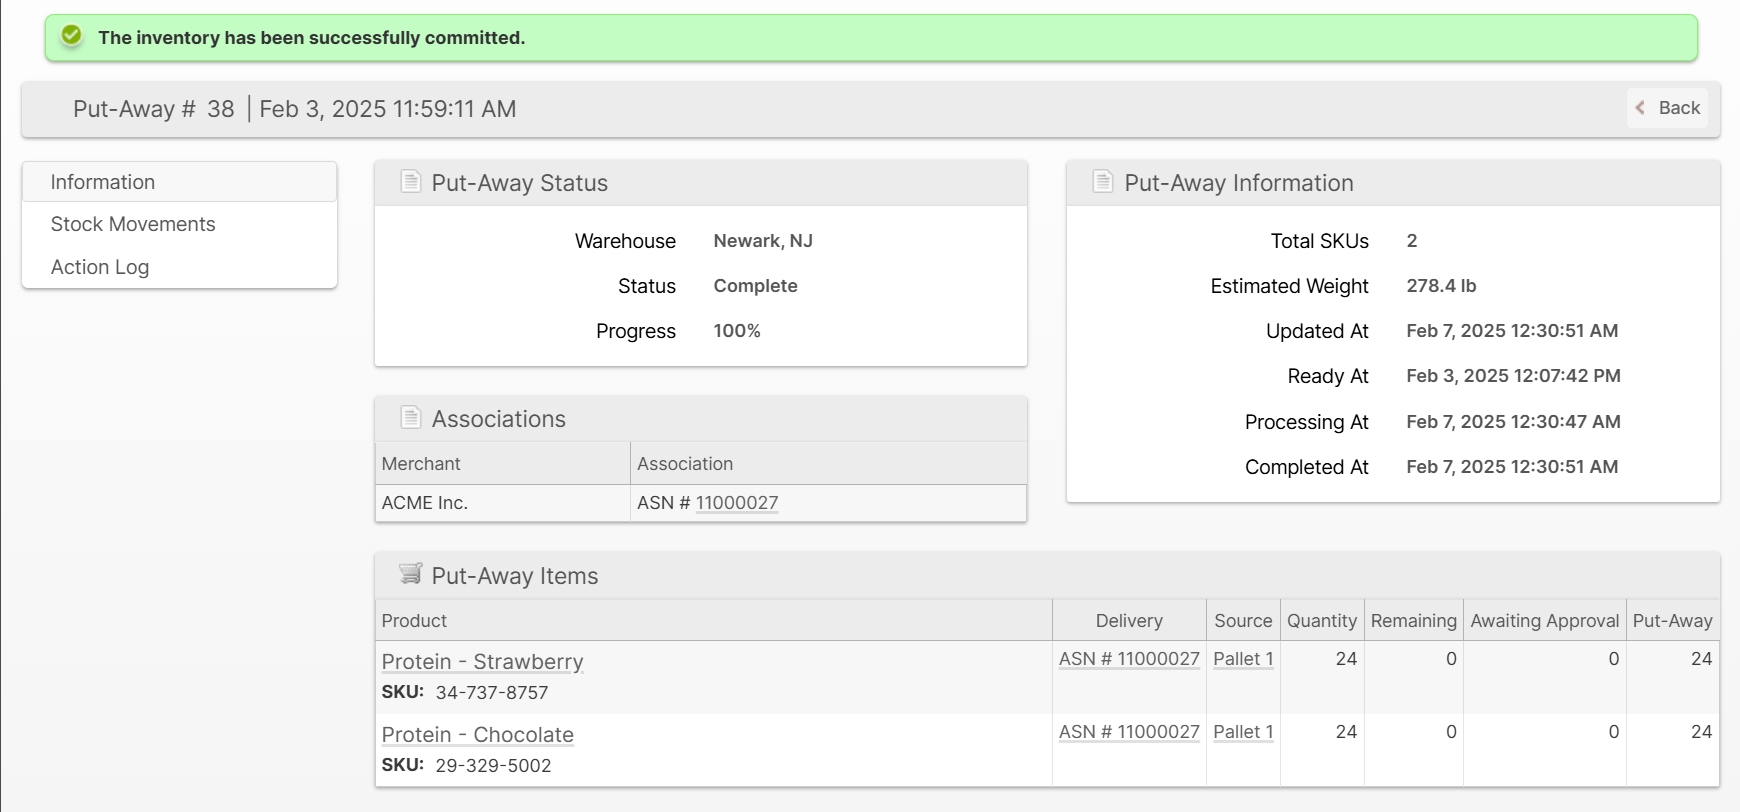
- If the Put-Away is associated with an ASN, RMA or Other Delivery and Auto-Commit is not enabled, click Commit to commit the items to the available inventory or backordered orders.
Scanner UI
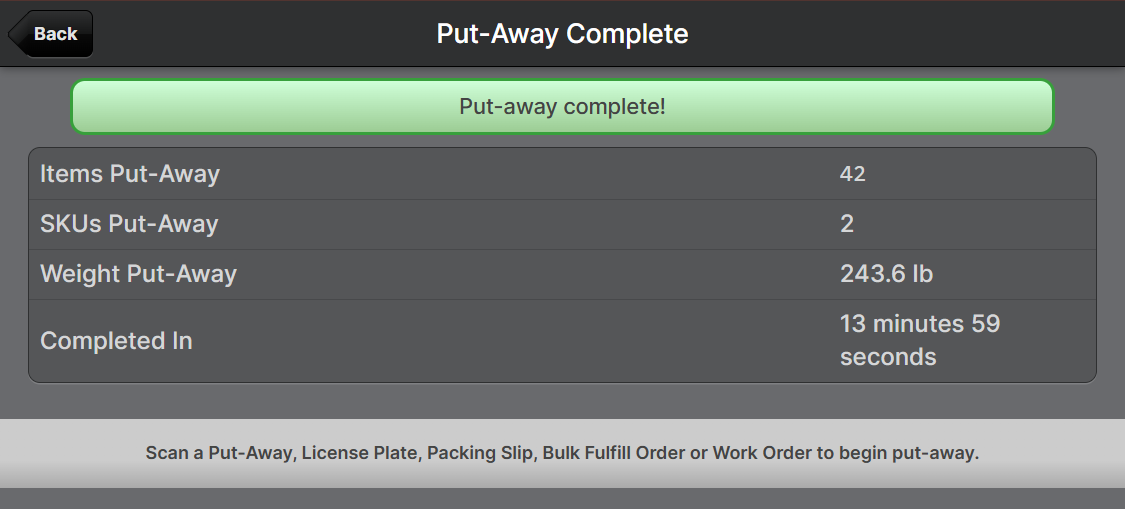
- From the Scanner main page, tap Put-Away.
- Scan a barcode according to its type.
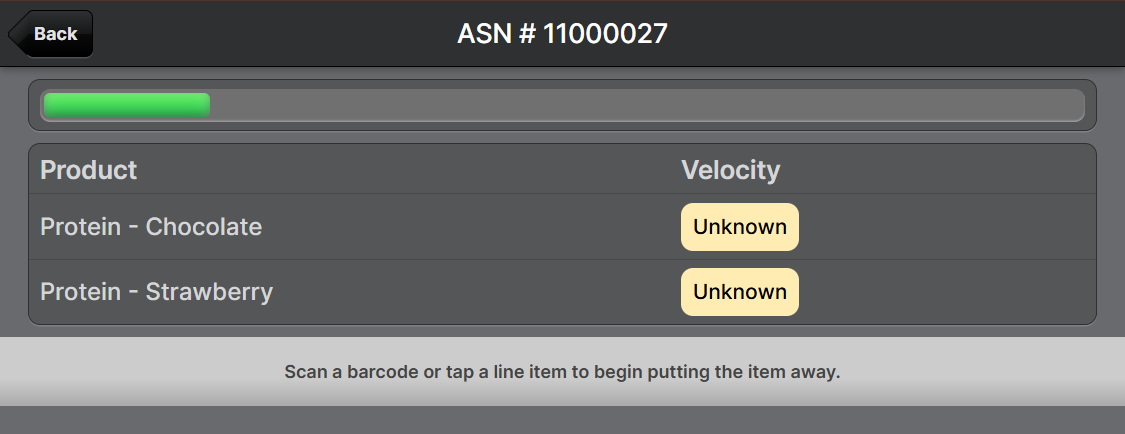
- Tap Start Put-Away to begin processing.

- Scan a product barcode or tap a row if the product does not have a barcode.
Scan a location barcode. You may scan an assigned location or a new location or one that is not in use by another product.
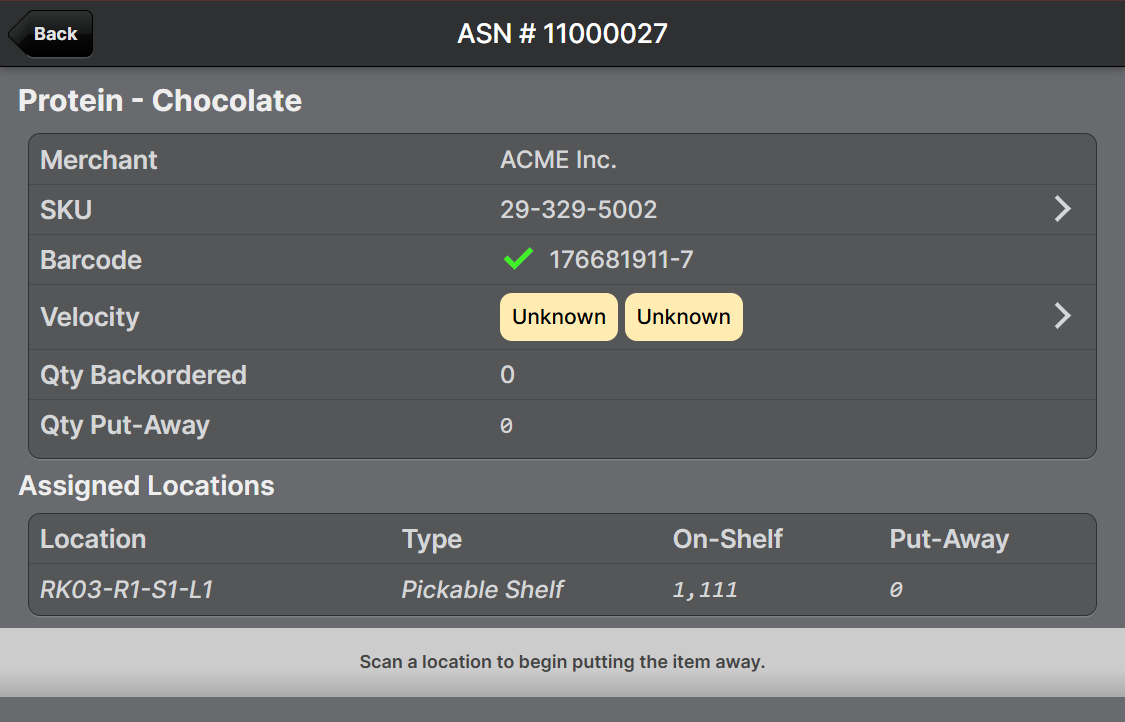 Tap the Velocity row to view more information about the recent velocity of the product, so you are better informed about the demand for this particular product. See Product Velocity for more information. Then tap Back to return to the previous screen.
- Use the counter to enter the amount which is to be put in the current location.
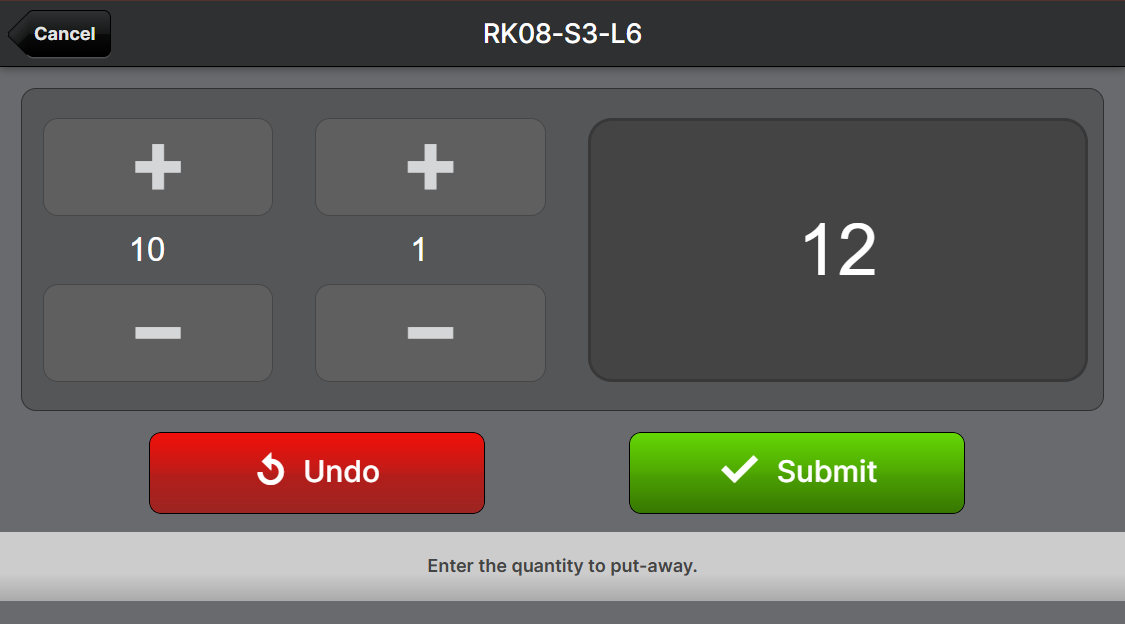
- Repeat steps 4 through 6 until all items have been processed.