UPS

UPS is one of the world's largest shipping couriers and is well supported by the ShipStream WMS. With the UPS integration, you can:
- Generate shipping labels for UPS domestic and international parcel services
- Retrieve customs documents or submit paperless invoices for international shipments
- View up-to-date tracking information and generate webhooks for tracking events
- Validate and classify destination addresses
How to Set Up UPS
Getting started with UPS is easy, the steps from a high level are:
- Authorize the integration.
- Add one or more Shipping Accounts.
- Enable and configure the UPS carrier under Shipping Methods.
Step 1 - Authorize the integration
There are three methods of providing authorization for ShipStream to access a UPS account:
- Authorization Code
- Client Credentials
- Legacy Access Keys
The Authorization Code method allows a UPS user to authenticate securely on the UPS website without sharing any credentials to their account. This is the preferred method since it is both easy and more secure.
The Client Credentials method requires the account holder to create an "app" via https://developer.ups.com/ and copy the Client ID and Client Secret to the ShipStream shipping account configuration page or share these credentials with a user who has access to do so.
The Legacy Access Keys method is the method used before 2023 in which the MyUPS username and password of the account holder were copied into the ShipStream shipping account page. This method will no longer be supported beginning June 3, 2024 so it is expected that any accounts using this method on that date will begin to throw errors and must be updated to one of the above methods (preferably well before the EOL date).
If you are using the Authorization Code method (recommended), proceed to step 1-A. Otherwise, proceed to step 1-B for Client Credentials or step 1-C for the Legacy Access Keys method.
Step 1-A - Authorization Code
You will create either a Global Integration or Merchant Integration subscription for UPS and click the Authorize button to complete authorization via the UPS website. Choose a Global Integration if this is your primary account or you are a 3PL and you will be using one UPS.com ID for multiple merchants. Otherwise, choose Merchant Integration to create an authorization that can only be used by a specific merchant.
Navigate to either System > Integrations > Global Integrations or System > Integrations > Merchant Integrations depending on your needs.
- For Global Integrations click UPS.
- For Merchant Integrations, click Add New Subscription, select the merchant that the account shall belong to, and then click UPS.
- Click Save Subscription.
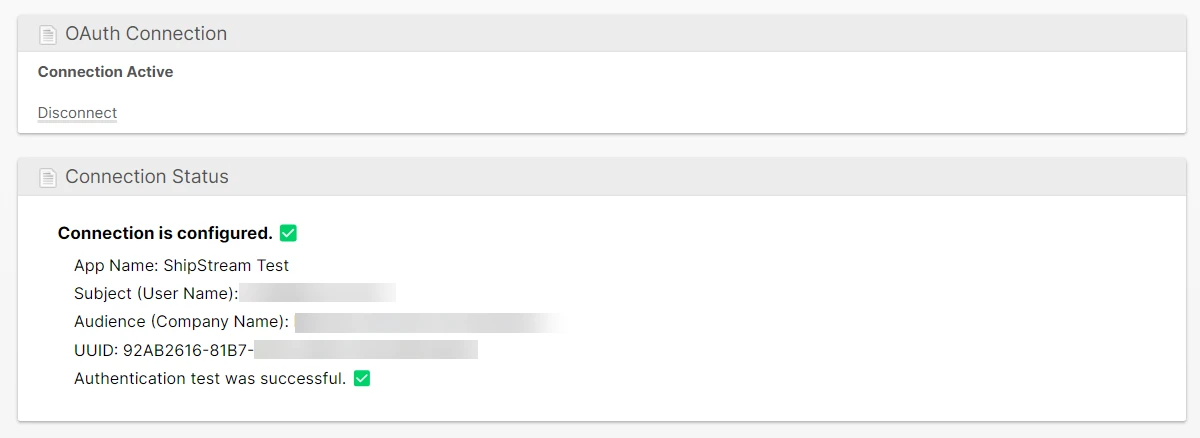
- Click Authorize and complete the sign-in on the UPS.com pages that follow. You will be redirected back to ShipStream upon completion and the Connection Diagnostics will show the account which successfully authenticated.
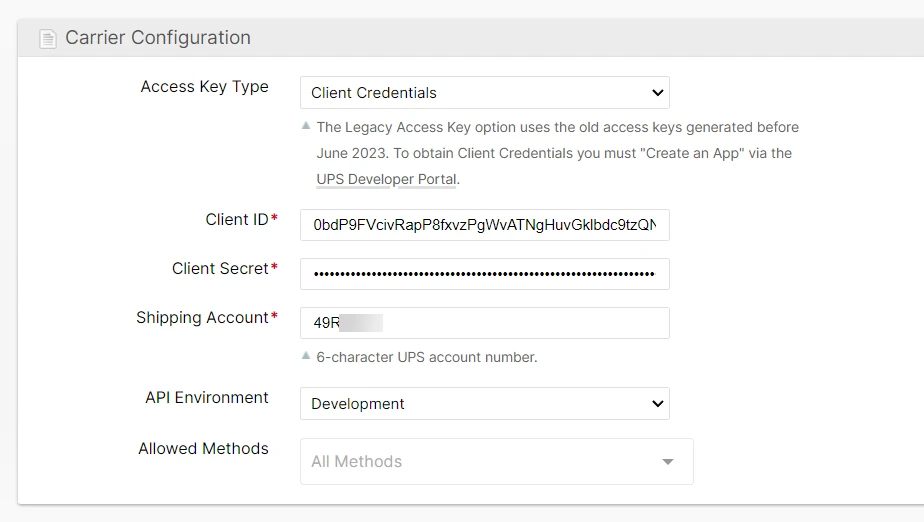
Step 1-B - Client Credentials
To use this method, the UPS.com account holder must create a UPS "App".
- Navigate to developer.ups.com and log in with the account that contains the UPS shipper accounts to be used.
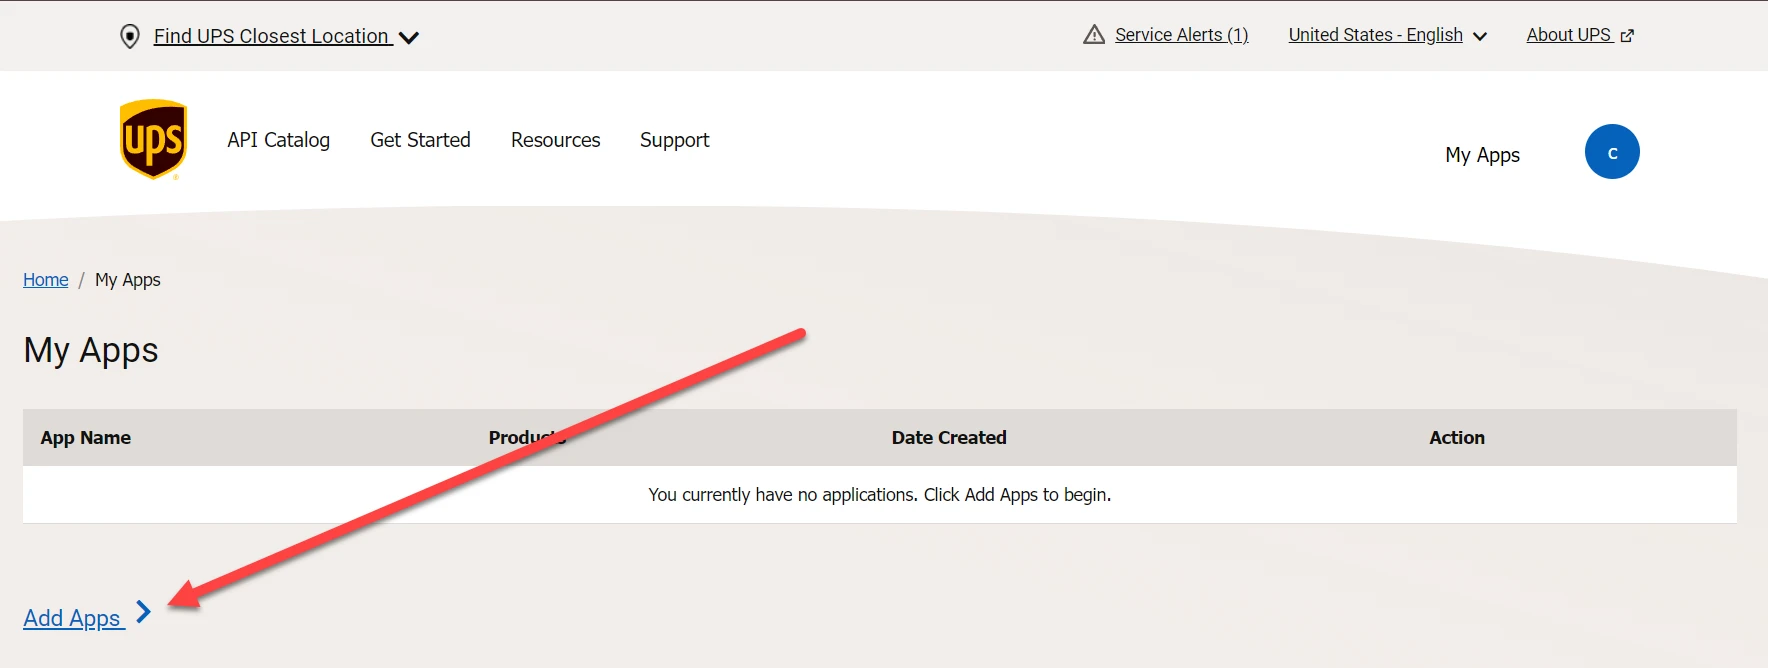
- Click My Apps in the top right corner.

- Click Add Apps in the bottom left corner.
Continue the wizard to complete creating the app, choosing:
- I need API credentials because: I want to integrate UPS technology into my business.
- App Name:
- Callback URL:
- Products Included In This App:
- Shipping
- Address Validation
- Authorization
- Tracking
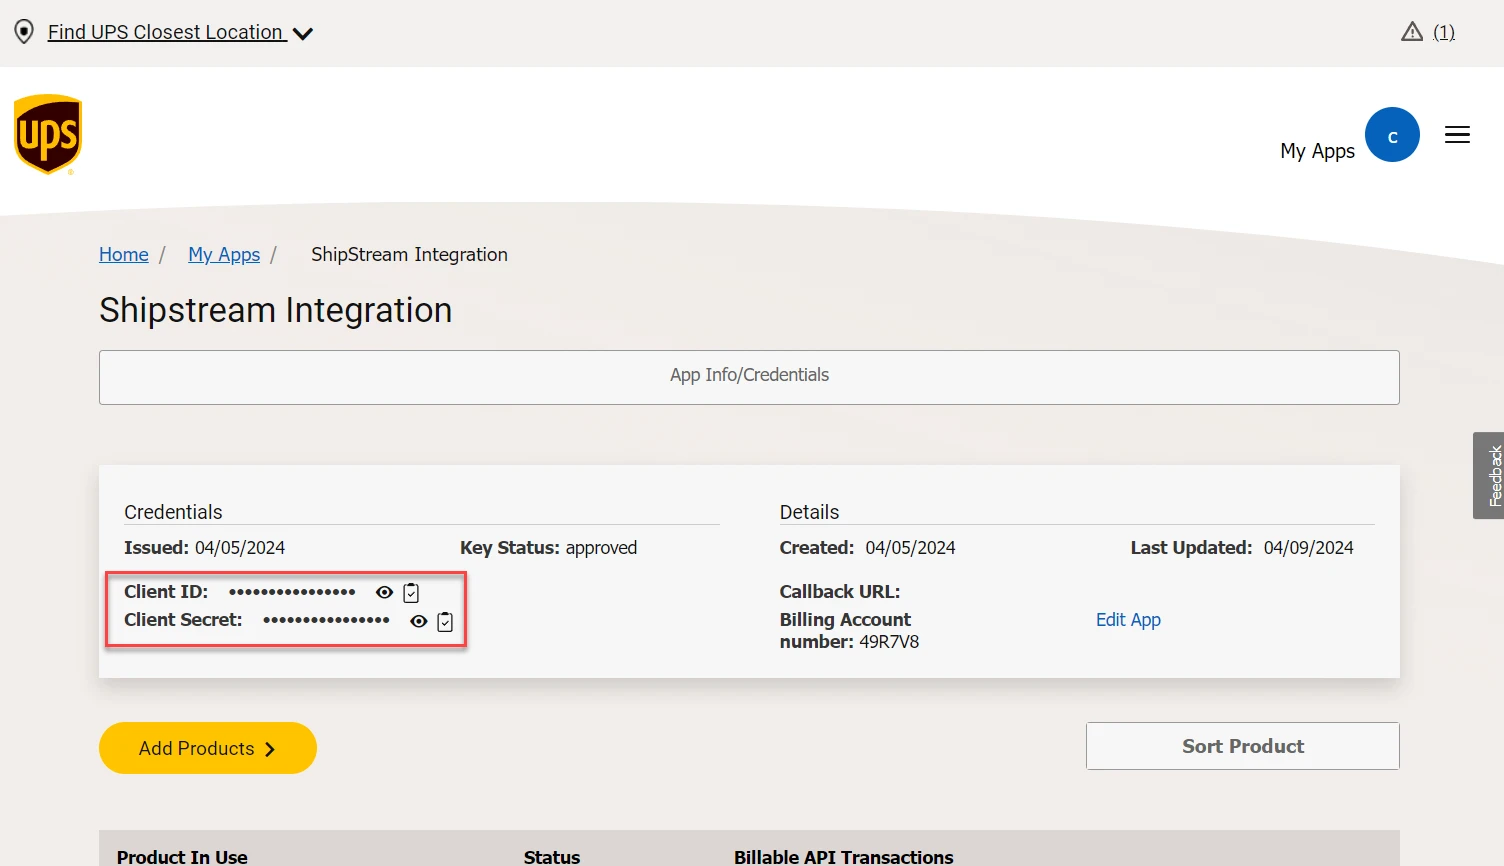
- Upon completion, note the Client ID and Client Secret which you will need for Step 2.
Step 2 - Create a Shipping Account
Add a Shipping Account in ShipStream for each UPS shipper account you wish to use, selecting the appropriate value for Access Key Type based on which route you took for Step 1.
You can change the Access Key Type of an existing account at any time. So, for example, if you are migratingfrom a Legacy Access Key type account to an Authorization Code account, navigate to the existing Shipping Account page to edit it instead of creating a new one.- If you followed Step 1-A, you will choose Authorization Code and then select the integration instance that corresponds to the authorization completed.
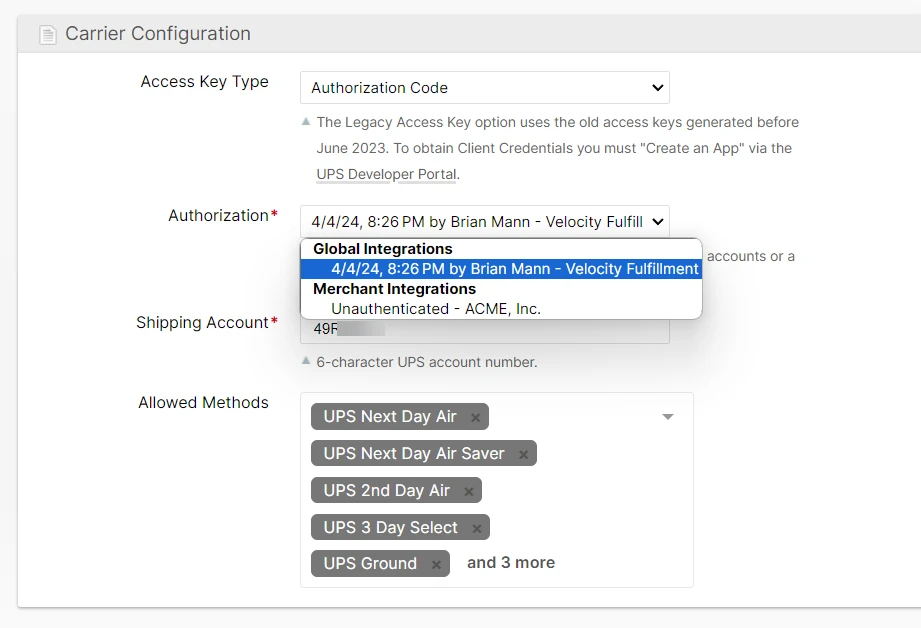
- If you followed Step 1-B, you will choose Client Credentials and copy and paste the Client ID and Client Secret to complete the authorization.
- If you followed Step 1-A, you will choose Authorization Code and then select the integration instance that corresponds to the authorization completed.
- Check the other account configuration options and adjust as needed.
- Click Save Shipping Account.
Step 3 - Enable and configure UPS {#step_1_e_hub_api_key}
- Navigate to System > Configuration > Shipping > Shipping Methods > UPS and change Enabled to Yes.
- Check the other UPS configuration options and adjust as needed.
- Click Save Config.
You are now ready to create shipping labels with your UPS account!
Intelligent Trailer Logistics
UPS® Intelligent Trailer Logistics allows shippers to upload data about packages being loaded onto a UPS trailer and notify UPS that the trailer load is complete and ready to enter the UPS network. This allows your end customers to see that their package has entered the network as soon as the manifest is sealed rather than the tracking number showing no information until it arrives and is sorted at the UPS hub, which can take hours or days over the weekend. This allows you to eliminate customer's questions and concerns about packages that have already shipped but don't appear to have just because the tracking number hasn't updated yet.
ShipStream is capable of uploading this data into the UPS Customer Visibility Interface System (CVIS) 100% automatically; the only additional step for your operations is to record the trailer number when sealing the manifest!

Configuration for this feature is located at System > Configuration > Shipping Methods > UPS Intelligent Trailer Logistics.
File Delivery Methods
You may configure Email Delivery of the CVIS file, Automatic Upload, or both. Email delivery is not required but is useful if you want to test, troubleshoot or receive confirmation each time the file is generated. Automatic Upload is what enables completely automated transmission to the CVIS Hub via SFTP as depicted in the diagram above.
CVIS Fields
All the CVIS fields except for CVIS Sort Date Cutoff (described below) will be supplied to you by your UPS representative. Some fields may need to be set at the warehouse configuration scope if they are different for each warehouse.
CVIS Sort Date Cutoff
The CVIS Sort Date Cutoff field specifies a cutoff date which is a time of day in the warehouse's local timezone after which the Sort Date value in the generated file will be advanced to the following day. We recommend you set this to the latest time that you would expect a pickup to occur so that any manifests sealed after this time will be expected to be picked up the following day rather than on the same day.